


2 Crafts 2 Furious
2 fast crafts that are practically Hobbs and Shaw (Hobbies and Shaw-ngri La... I know this was a stretch, stay with me).

Good Crafternoon to you,
I usually send these in the mornings but got sidetracked making hummus bowls today.
This Craft Cult is going to be a little different. I am going to show you two mini crafts. Now, these crafts can exist on their own, but both of them are great to zhush up other crafts. The first is a no-hassle tassel and then we are doing a paper rose that is much easier than it looks. Both are super easy and highly decorative.

Just a quick note on who I am becoming.
Let’s jump in. Whether you are a zoom burlesque dancer or planning for the 2020 graduation season, you might need to learn to make tassels at home. Start by getting some embroidery floss or similarly thick string (you might have some leftover from our embroidery project, that’s where I got mine.) You will also need a piece of cardboard and that’s it.
Cut the piece of cardboard to the length you want your tassel to be. I decided to make pretty small ones to use for jewelry, but if you want to use yours for decore (maybe for curtain pulls or on pillows) you might want to make the cardboard larger (and even the string thicker).
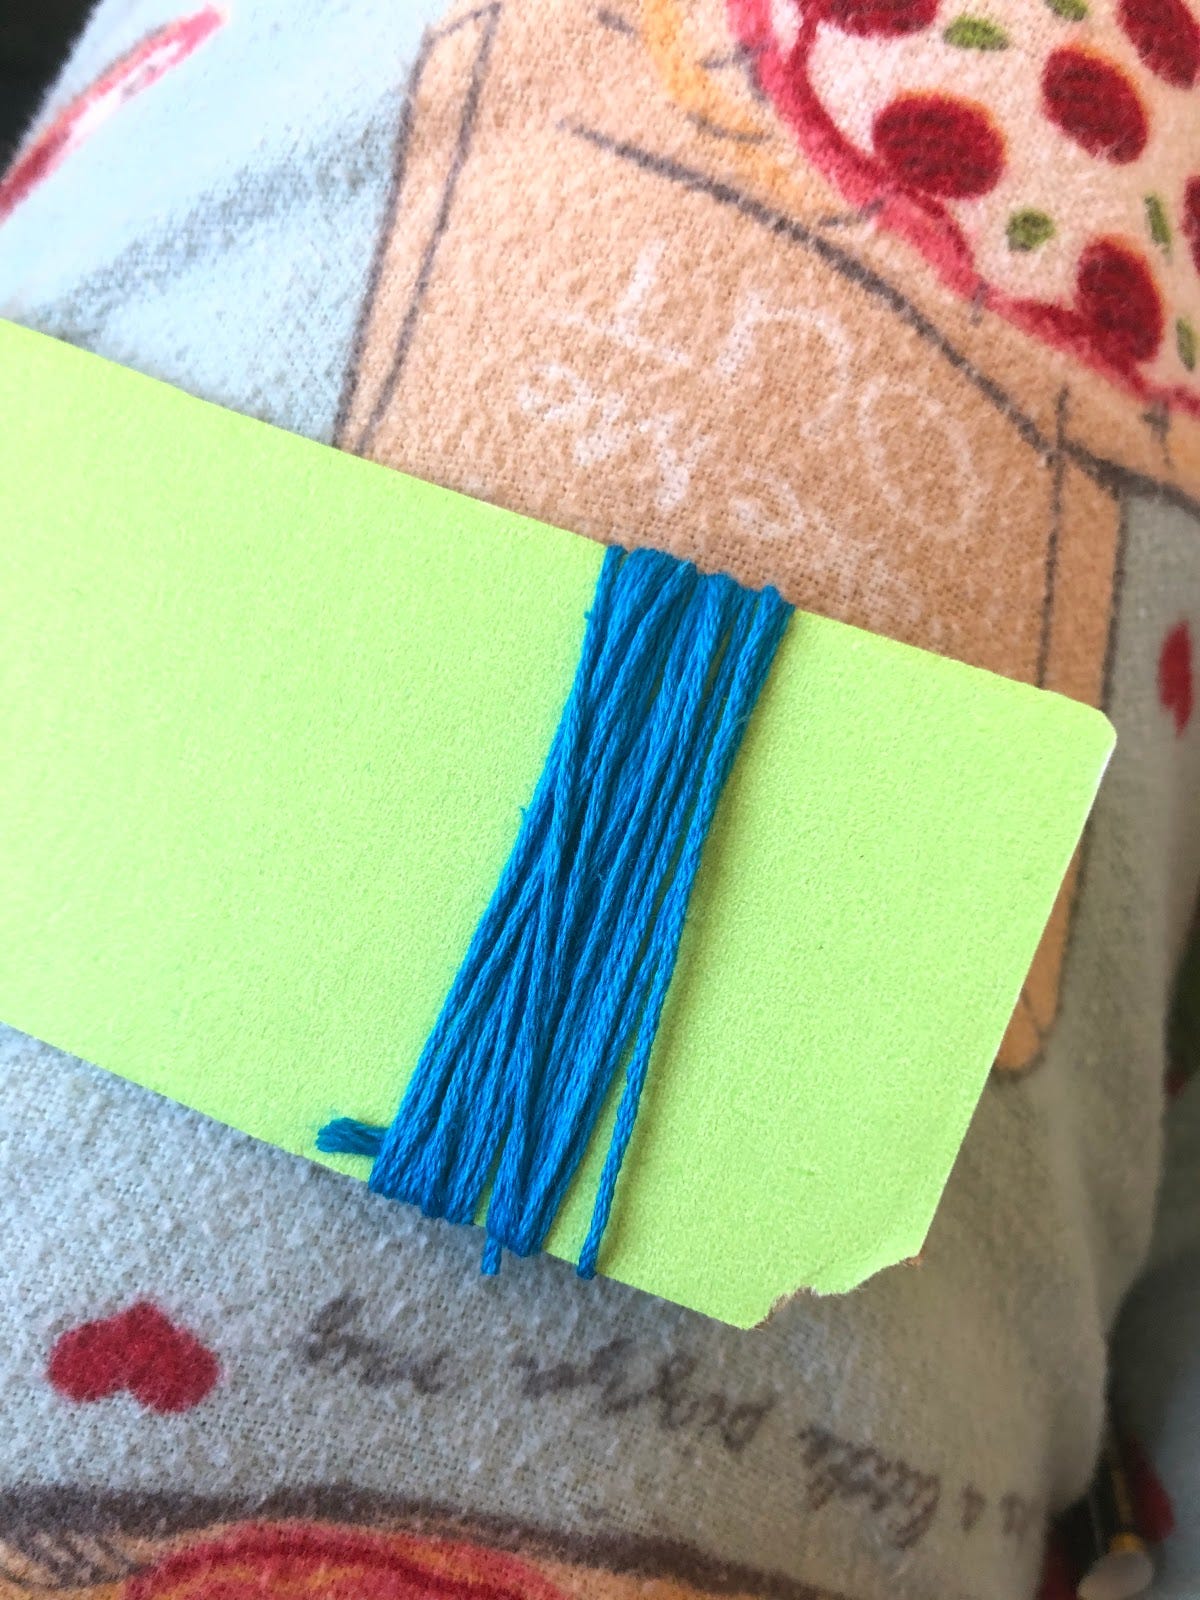
Wrap your string around the cardboard several times. The more times you wrap the string around, the thicker your tassel will be. Don’t feel the need to wrap it too tight, especially if yours is on the thicker side, a tight wrap will make the next step harder.
Take a piece of string and thread it between all your strings and the cardboard. Tie the new piece of string around all the strings with a simple double knot. You can then slip the cardboard out. If you did the first step tightly, it will be harder to do these two steps. If you can’t slip the cardboard out, you can cut the loops at the bottom, but I think the next step is a little easier if the loops are intact at the bottom of the tassel.
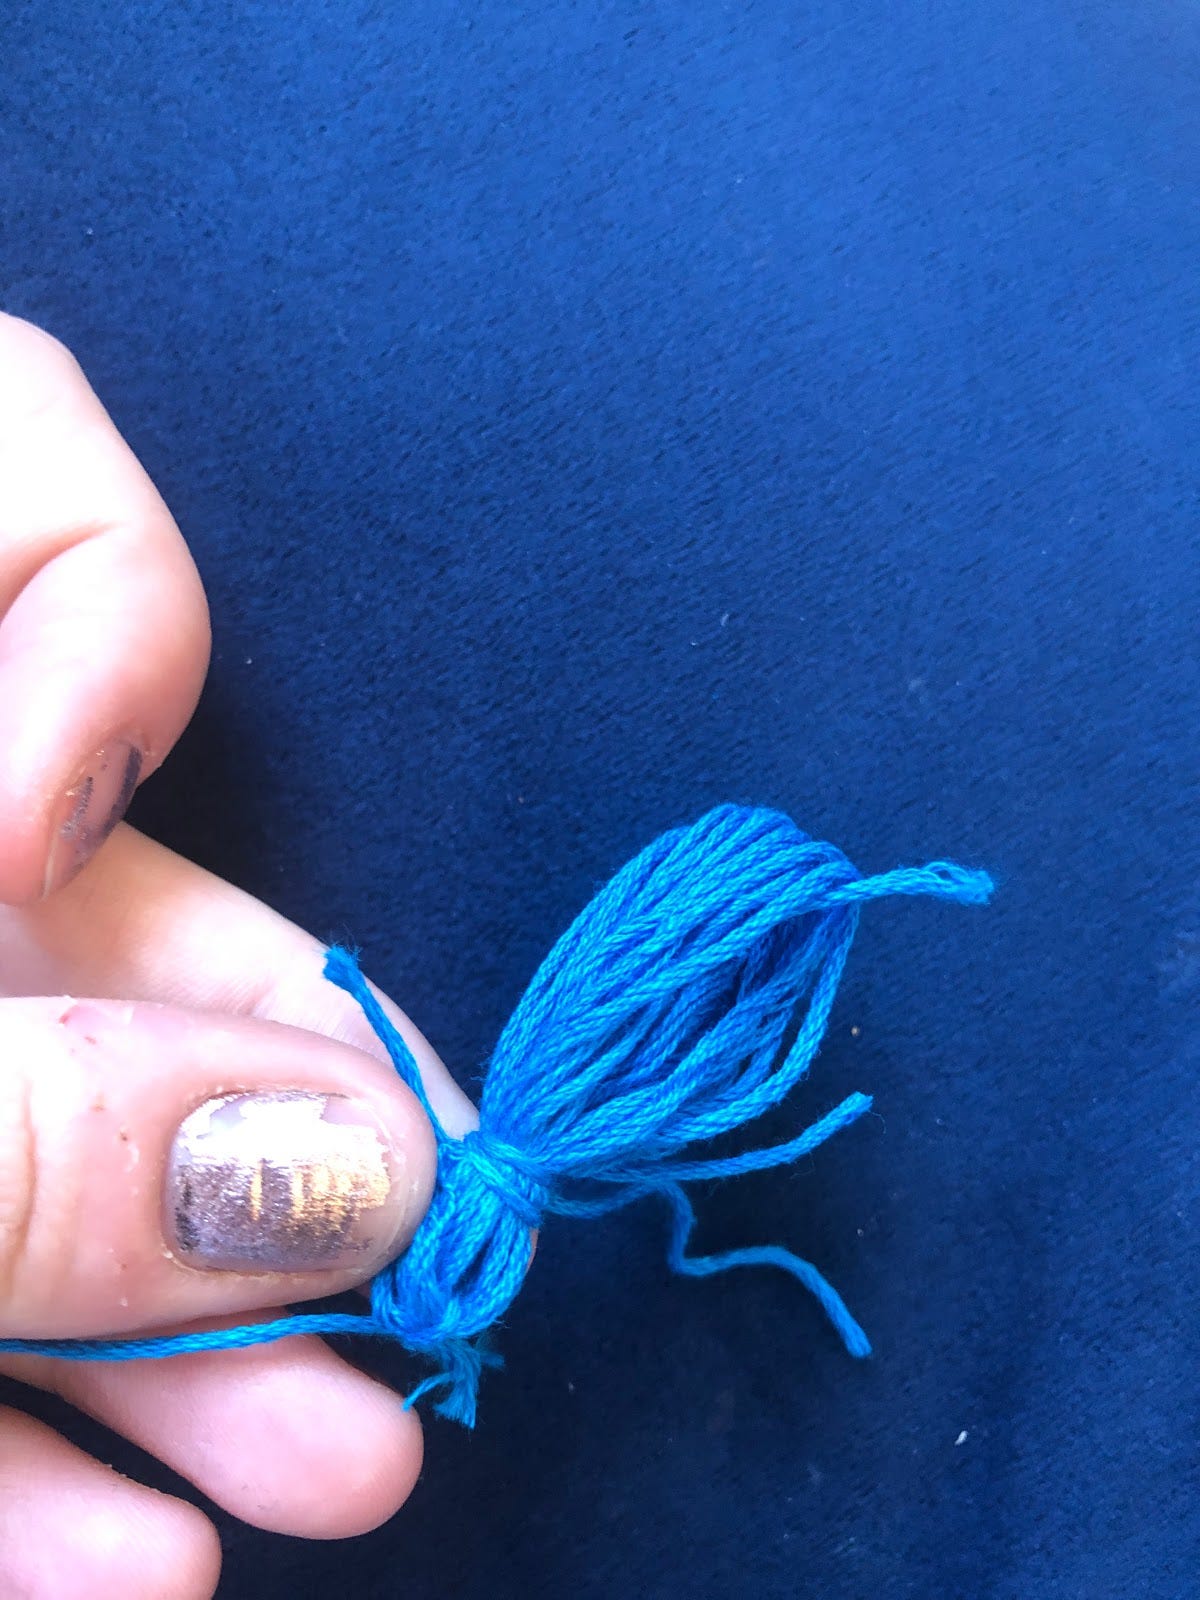
Take a new piece of string and wrap it around the all strings. You should pull your string tight during this step. I suggest doing it about a ¼-⅓ of the way down from the knot at the top of the tassel. Hold one end of the string in your fingers and wrap the other around. I wrapped the string around the tassel about 4 times, but you can do it as many times as you want. Wrapping it once makes it a tassel, wrapping it more will change the aesthetics of the tassel. When you wrapped it around a few times, you can tie a tight knot with the two ends of the string.
You can now cut the loops at the end at their longest point. You can always trim the tassel when you are done if the strings aren’t quite the same length.
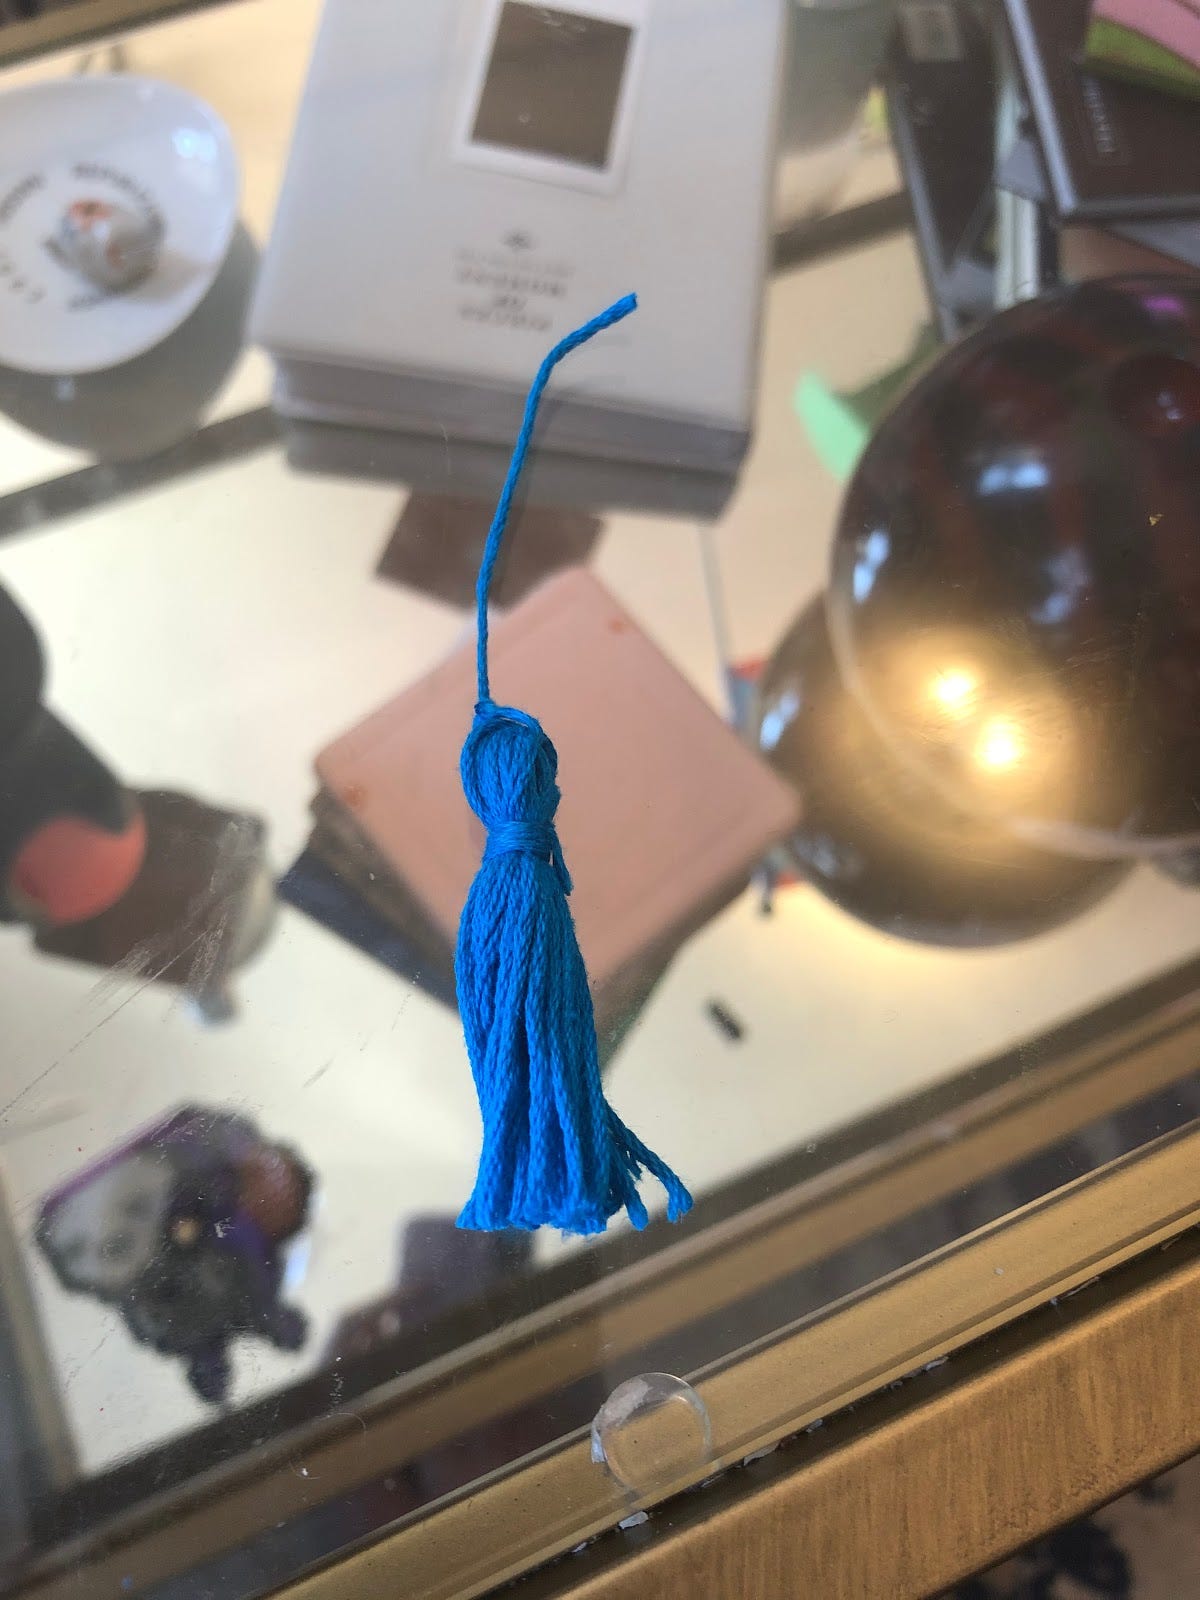
Feel free to trim the string at the top as well, but sometimes it helps to keep it long to help attach it to your final project if you chose to incorporate these into something bigger. I decided to make a couple and use them for earrings. I followed the steps in my shrinky dinks newsletter to make some parrots and then attached the tassels to them.

Peep the vintage postcard I photographed the parrots on. By this point, I think you can see the types of things I have around my house (This postcard was sent from an Anaheim post office to the writer’s parents in Mill Valley, CA exclusively to tell them how cool the Enchanted Tiki Room was in November of 1970. Please support the post office. It’s important right now.)
I think it’s time for our next craft. I mentioned to my mother that I was thinking of doing paper flowers, she reminded me that we made them all the time when I was a kid, a fact I had fully forgotten about. Some people are really against fake flowers (Erin in New Jersey), but I don’t mind them, especially if they are paper and not cloth. If you hate them, maybe skip this one and make some more tassels.
There are a lot of ways to make paper flowers, but my favorite is probably paper roses (for obvious reasons).

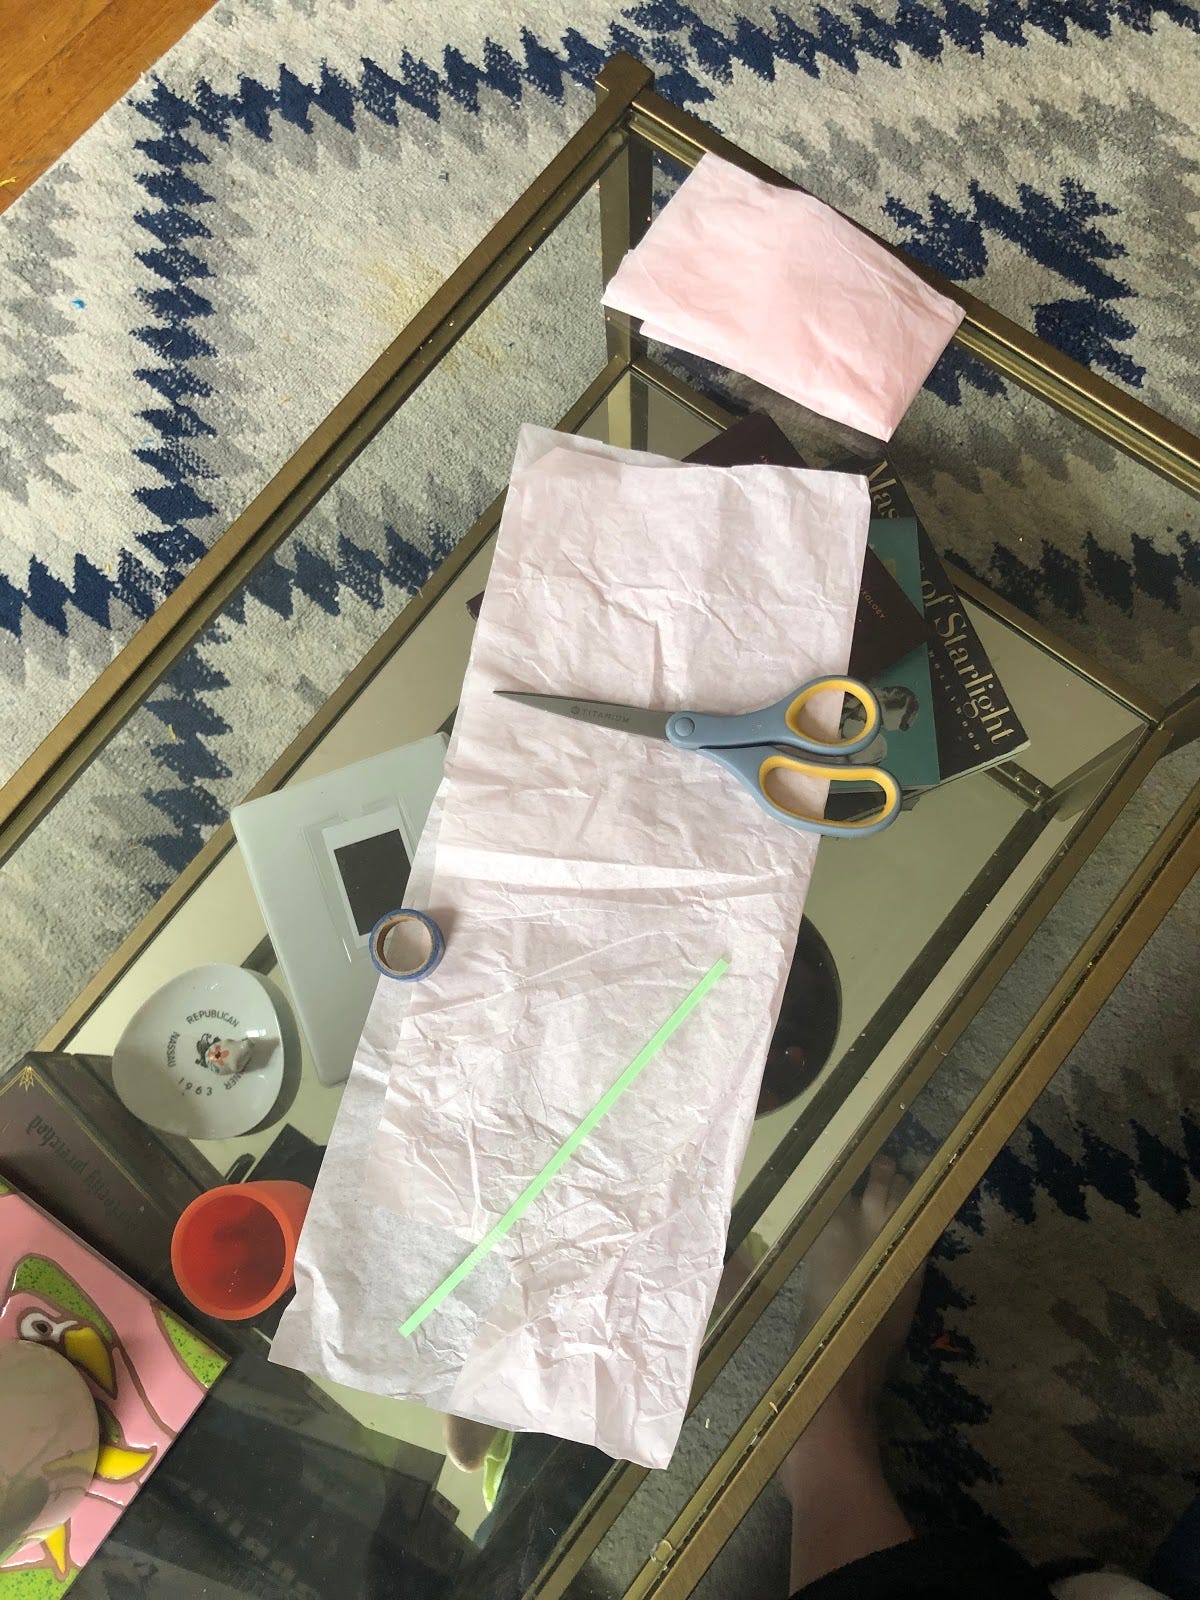
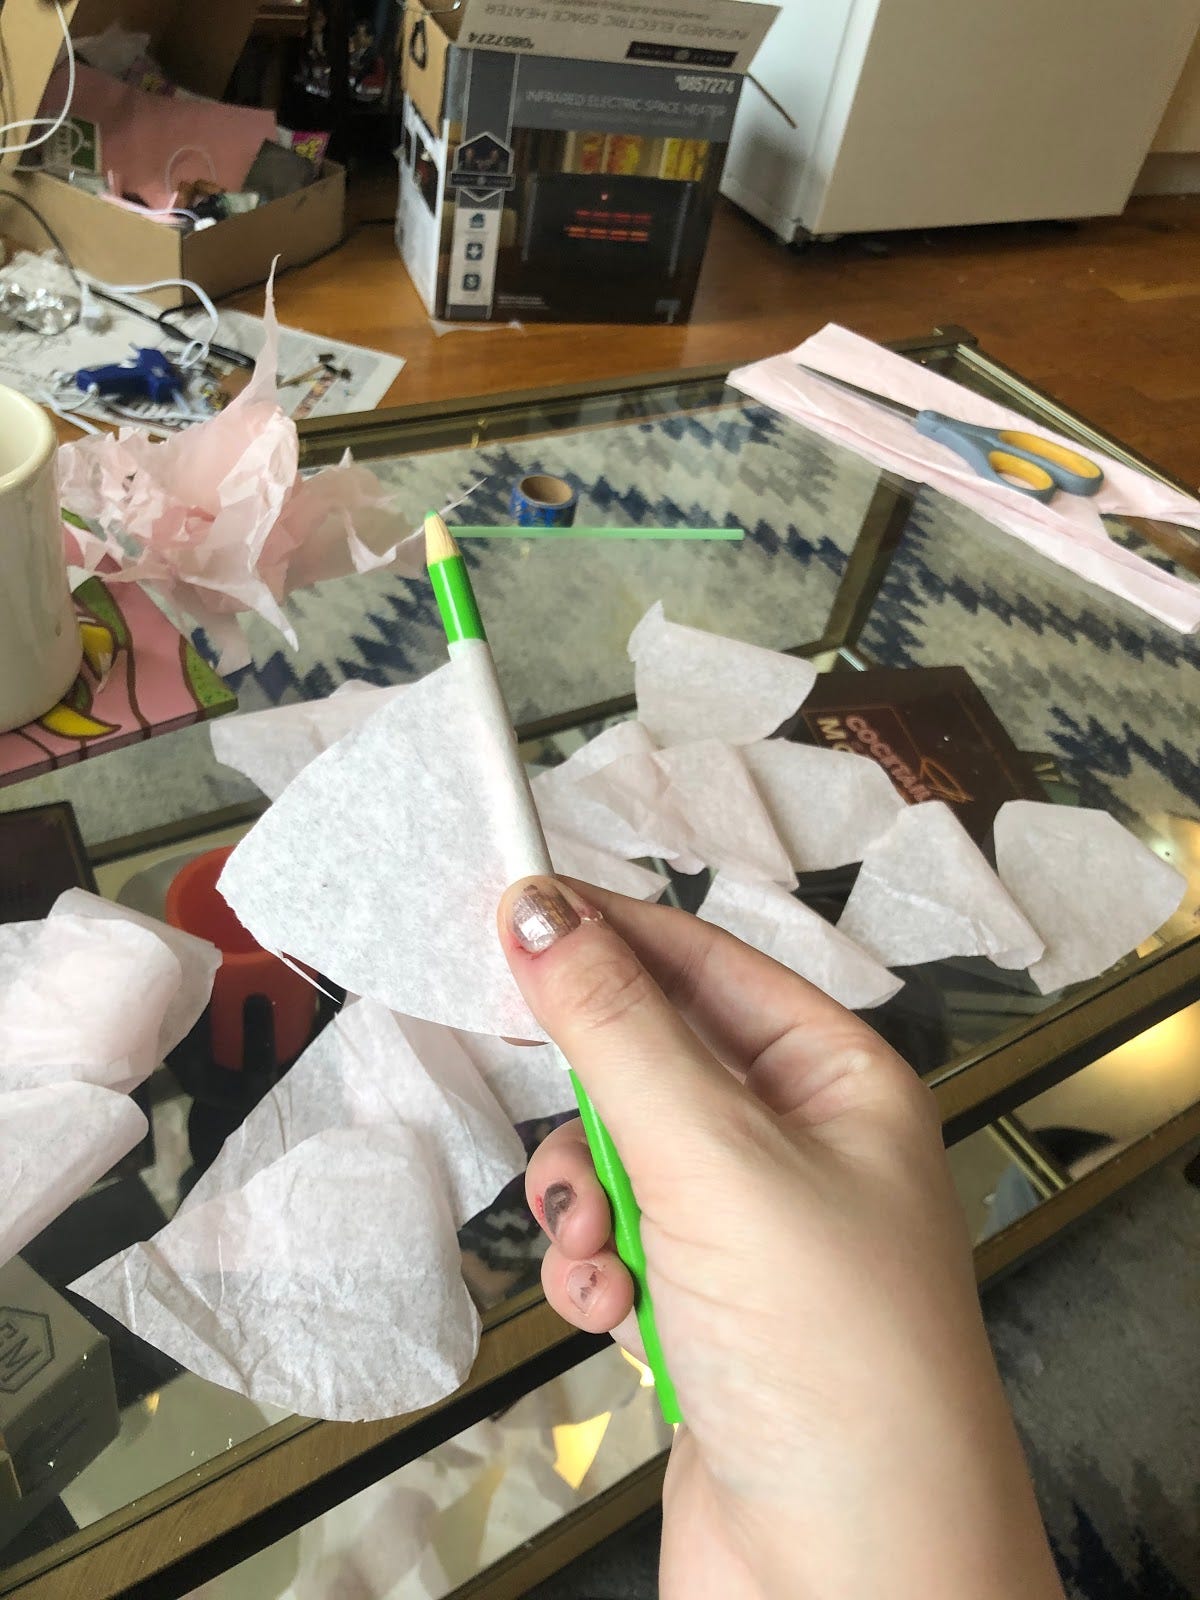
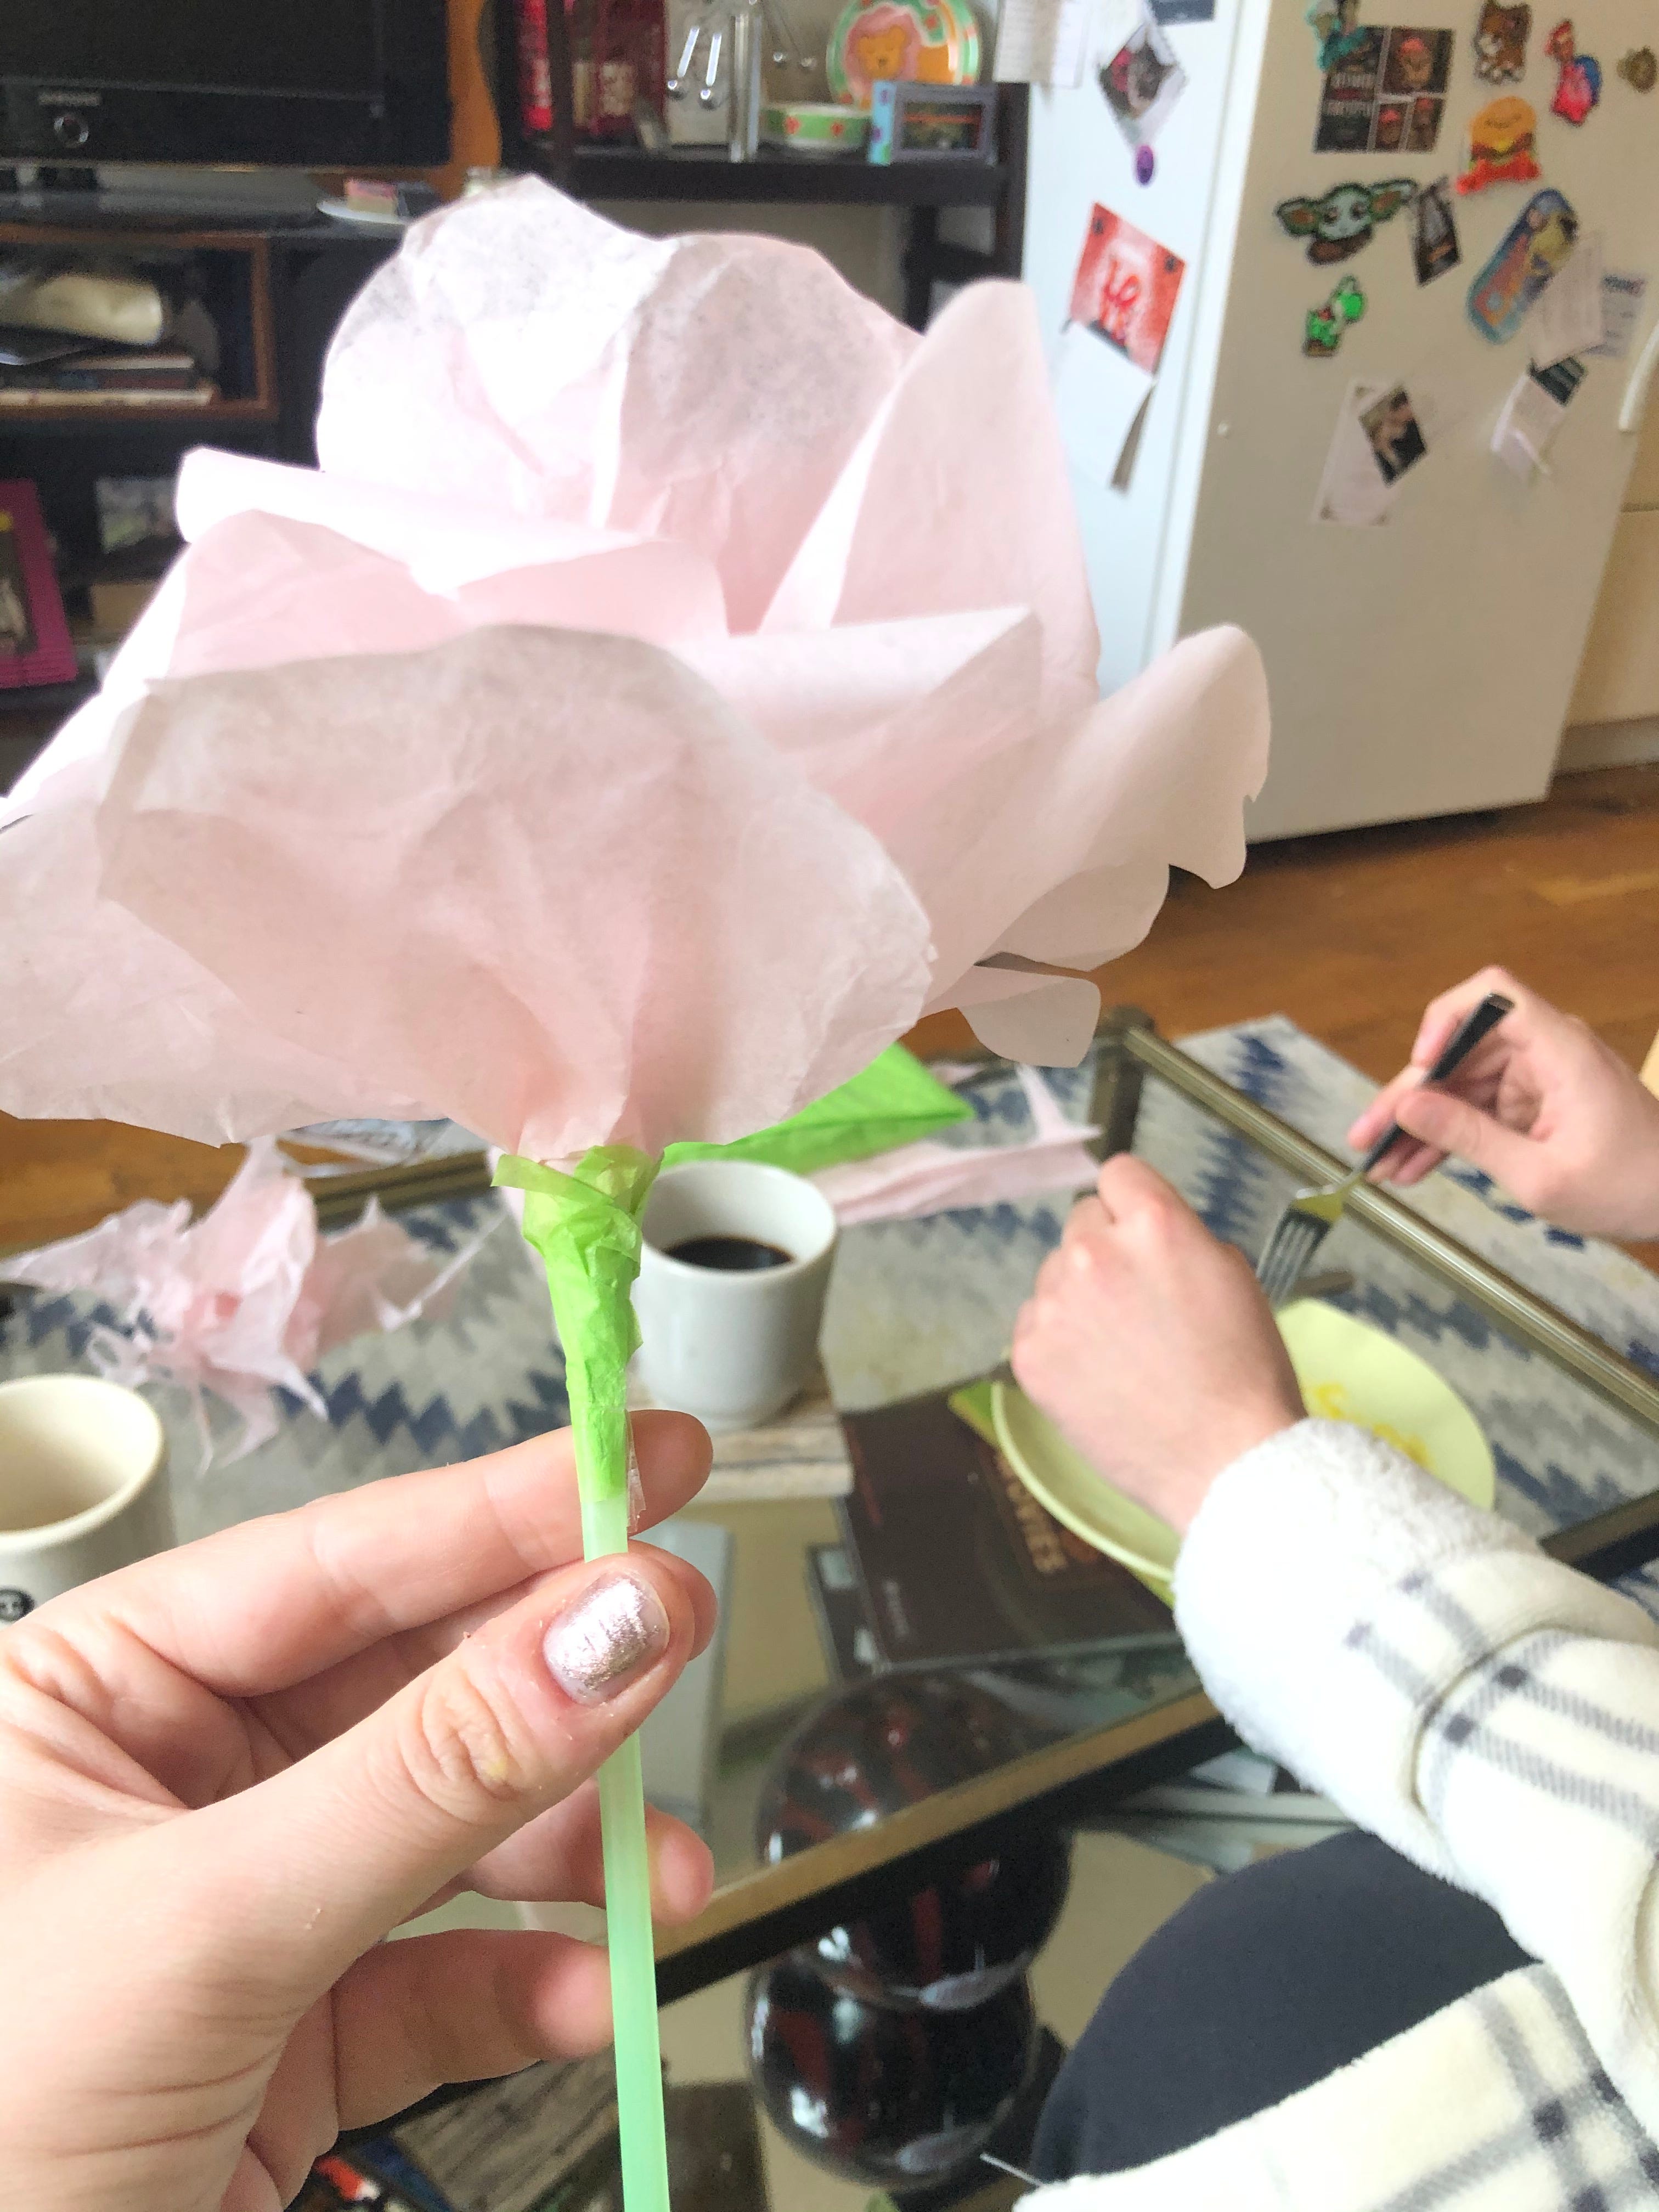
To start, get some crepe paper. My boyfriend got me a bracelet for my birthday and this is the paper it came in, that’s why it’s a little crumpled. I am also using some scraps from my pinata project later in this craft. This is to say, recycle if you can. You can do this craft with any paper. Thinner papers work better; newspaper, tissue paper, book paper, etc. To make the stem, I used a straw, but you can use anything cylindrical and hard; wooden dowel/skewer, a pencil (which is fun because you can write with it afterward.) You will also need tape (I ended up using scotch for this though I photographed the wrong tape below) and scissors.
Cut out 5 teardrop-shaped petals and 15ish larger, more heart-shaped petals. I used 15, but you can use less, it’s all about how full you want your flower to be. Make sure each petal comes to a point. Having a thin point on them will make them easier to attach later.

This step can feel tedious. If you fold the paper, you can cut several at a time. When you have them all cut out, it’s time to curl them. Honestly, you could skip this step, but it makes your petals look a lot more realistic. Curl the petals by taking a pen or colored pencil and wrapping the top end of the petal around it. Gently hold down the paper. Do this for each petal.
The next step is to attach the petals to your stem. Start with your small petals. You should attach to the tape to the thinnest part of the petal. Arrange a couple of petals how you want them to look and then use a piece of tape to affix them to the straw in that position. I found I could tape about three petals at a time. If you can tape more at once that’s great. If you are having issues, you can tape each petal separately but it can make the flower look a little less delicate.
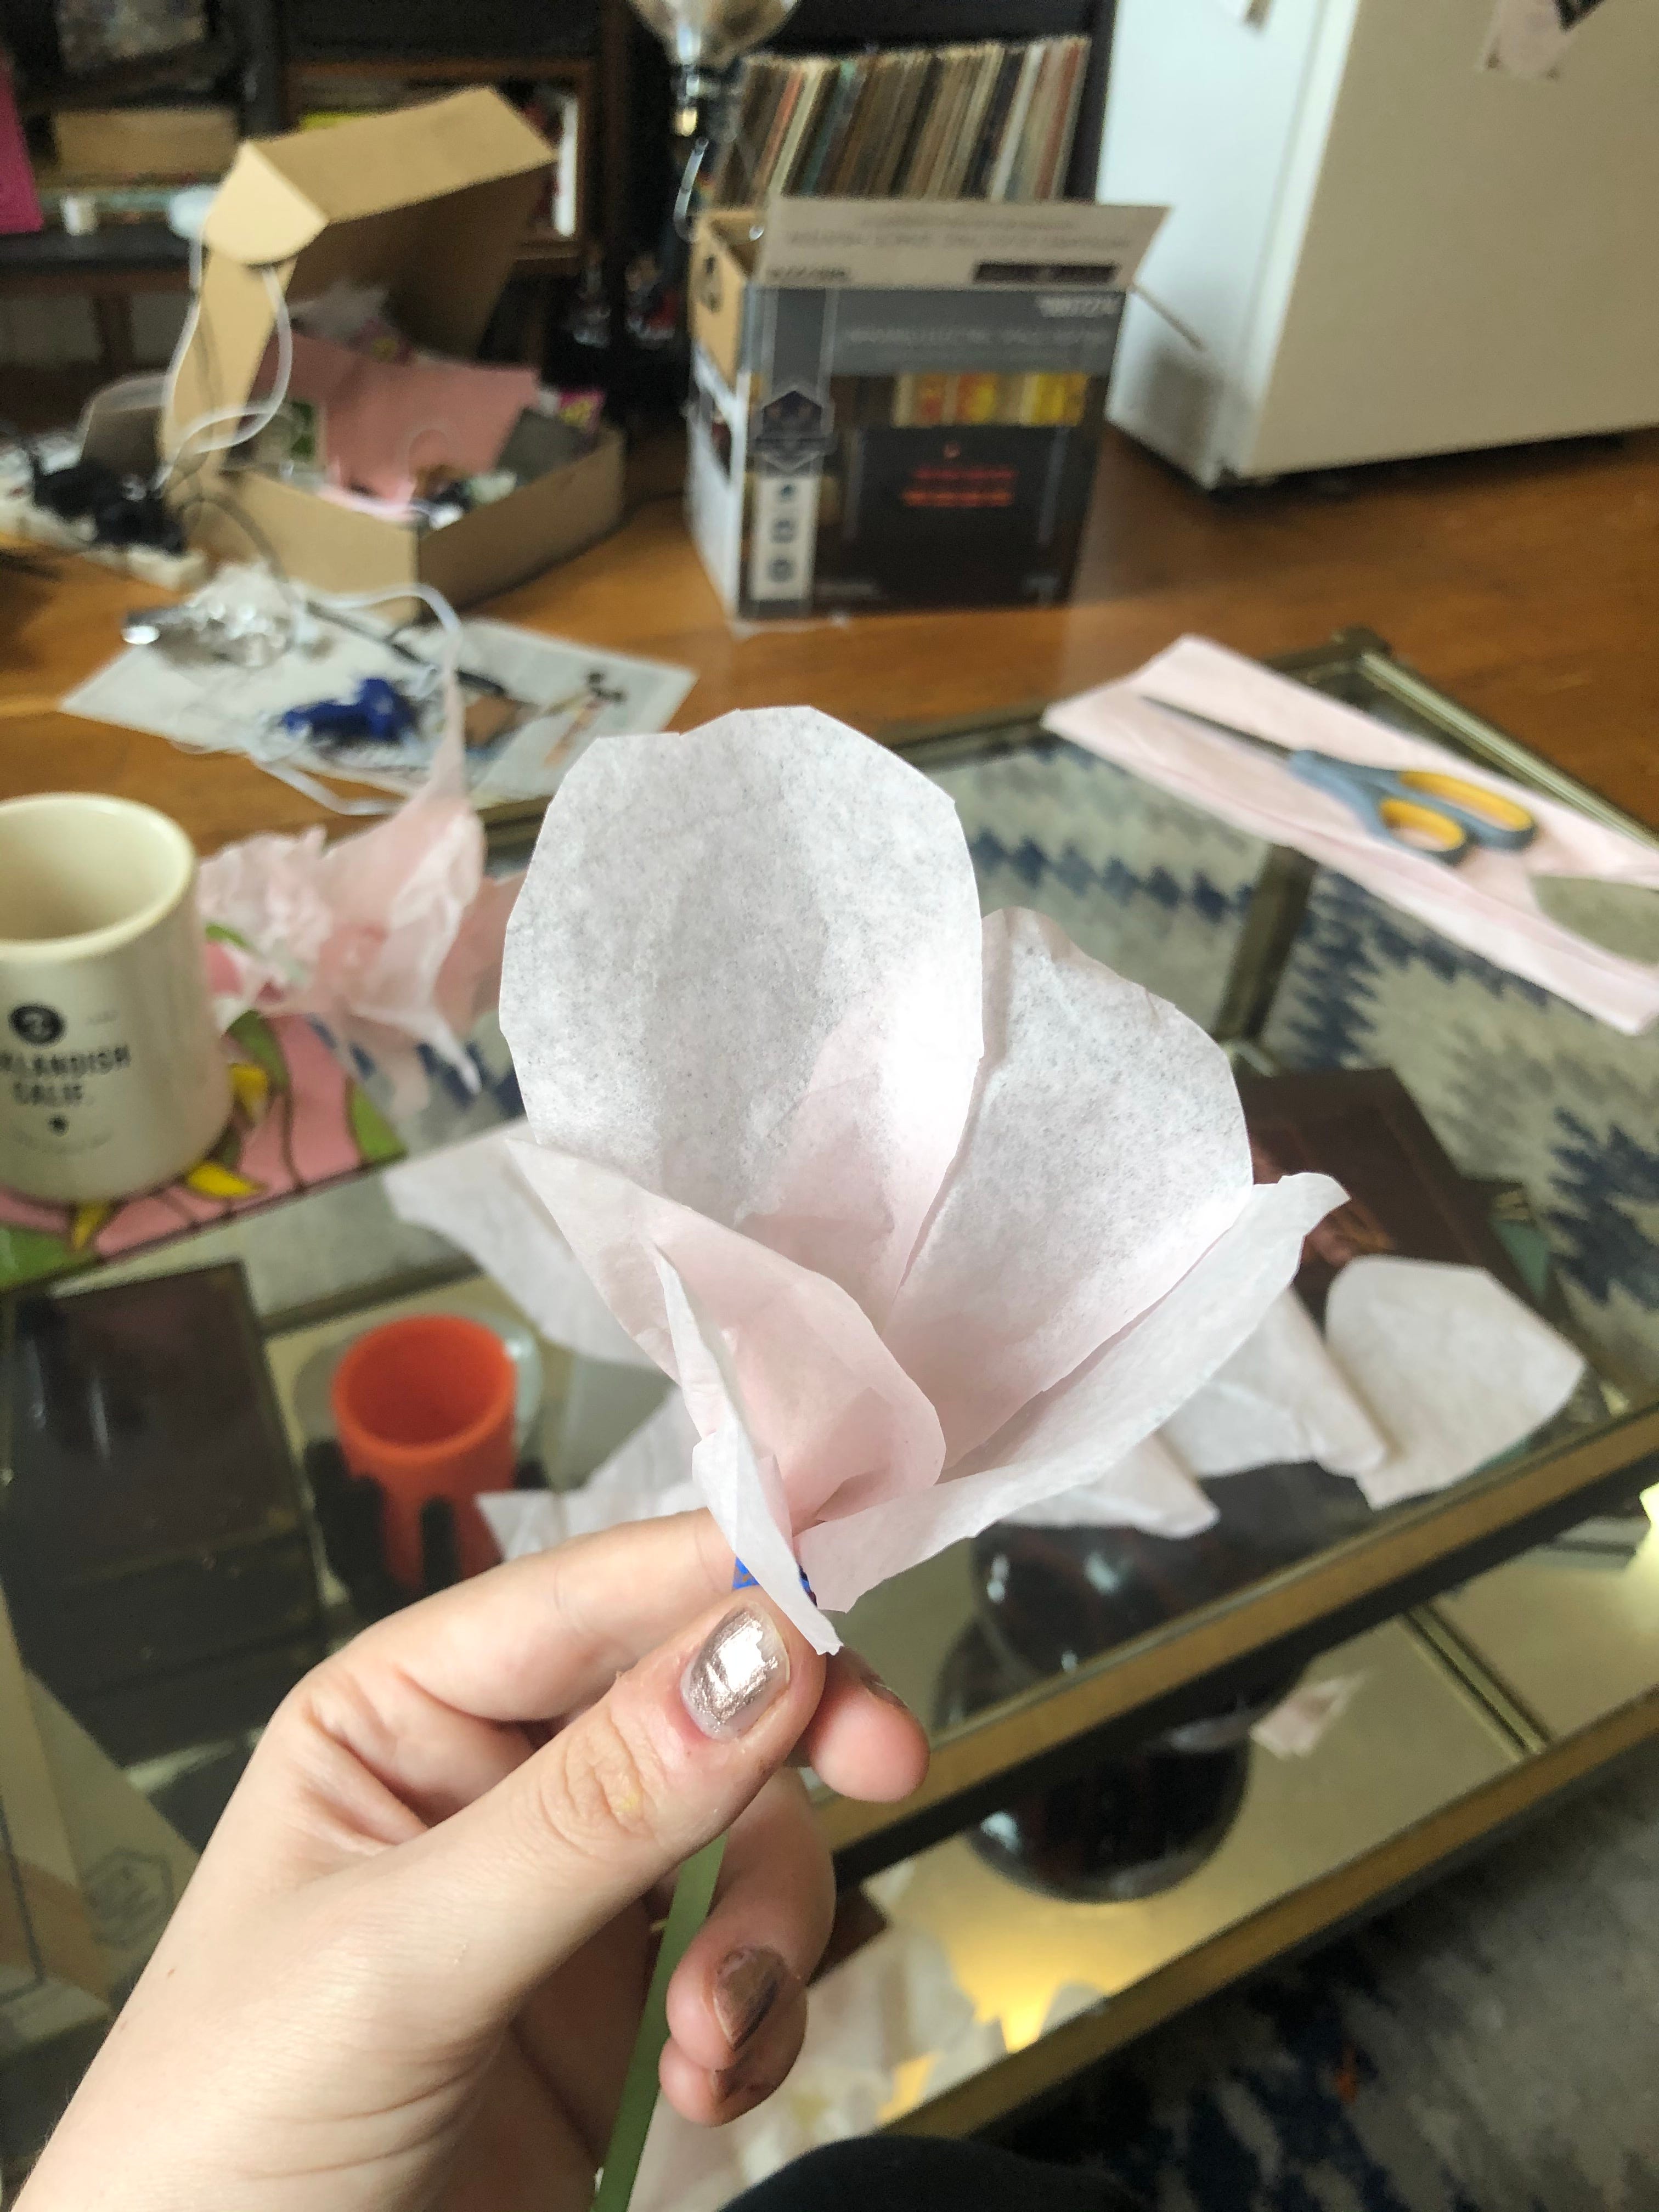
You can see in these pictures, I used blue washi tape at first. I wouldn’t recommend it. It didn’t stick to the straw right and it was very visible. I had to switch to scotch tape after the first row of petals but didn’t go back and take it off. Sorry for any confusion this might have caused, ignore my blue underside.
Once your small petals are taped on. Add the larger petals the same way you added the small ones. Your petals should overlap. It is going to give your flowers more volume. Try not to go too far down your stem. Your petals should all be able to fit near the top.
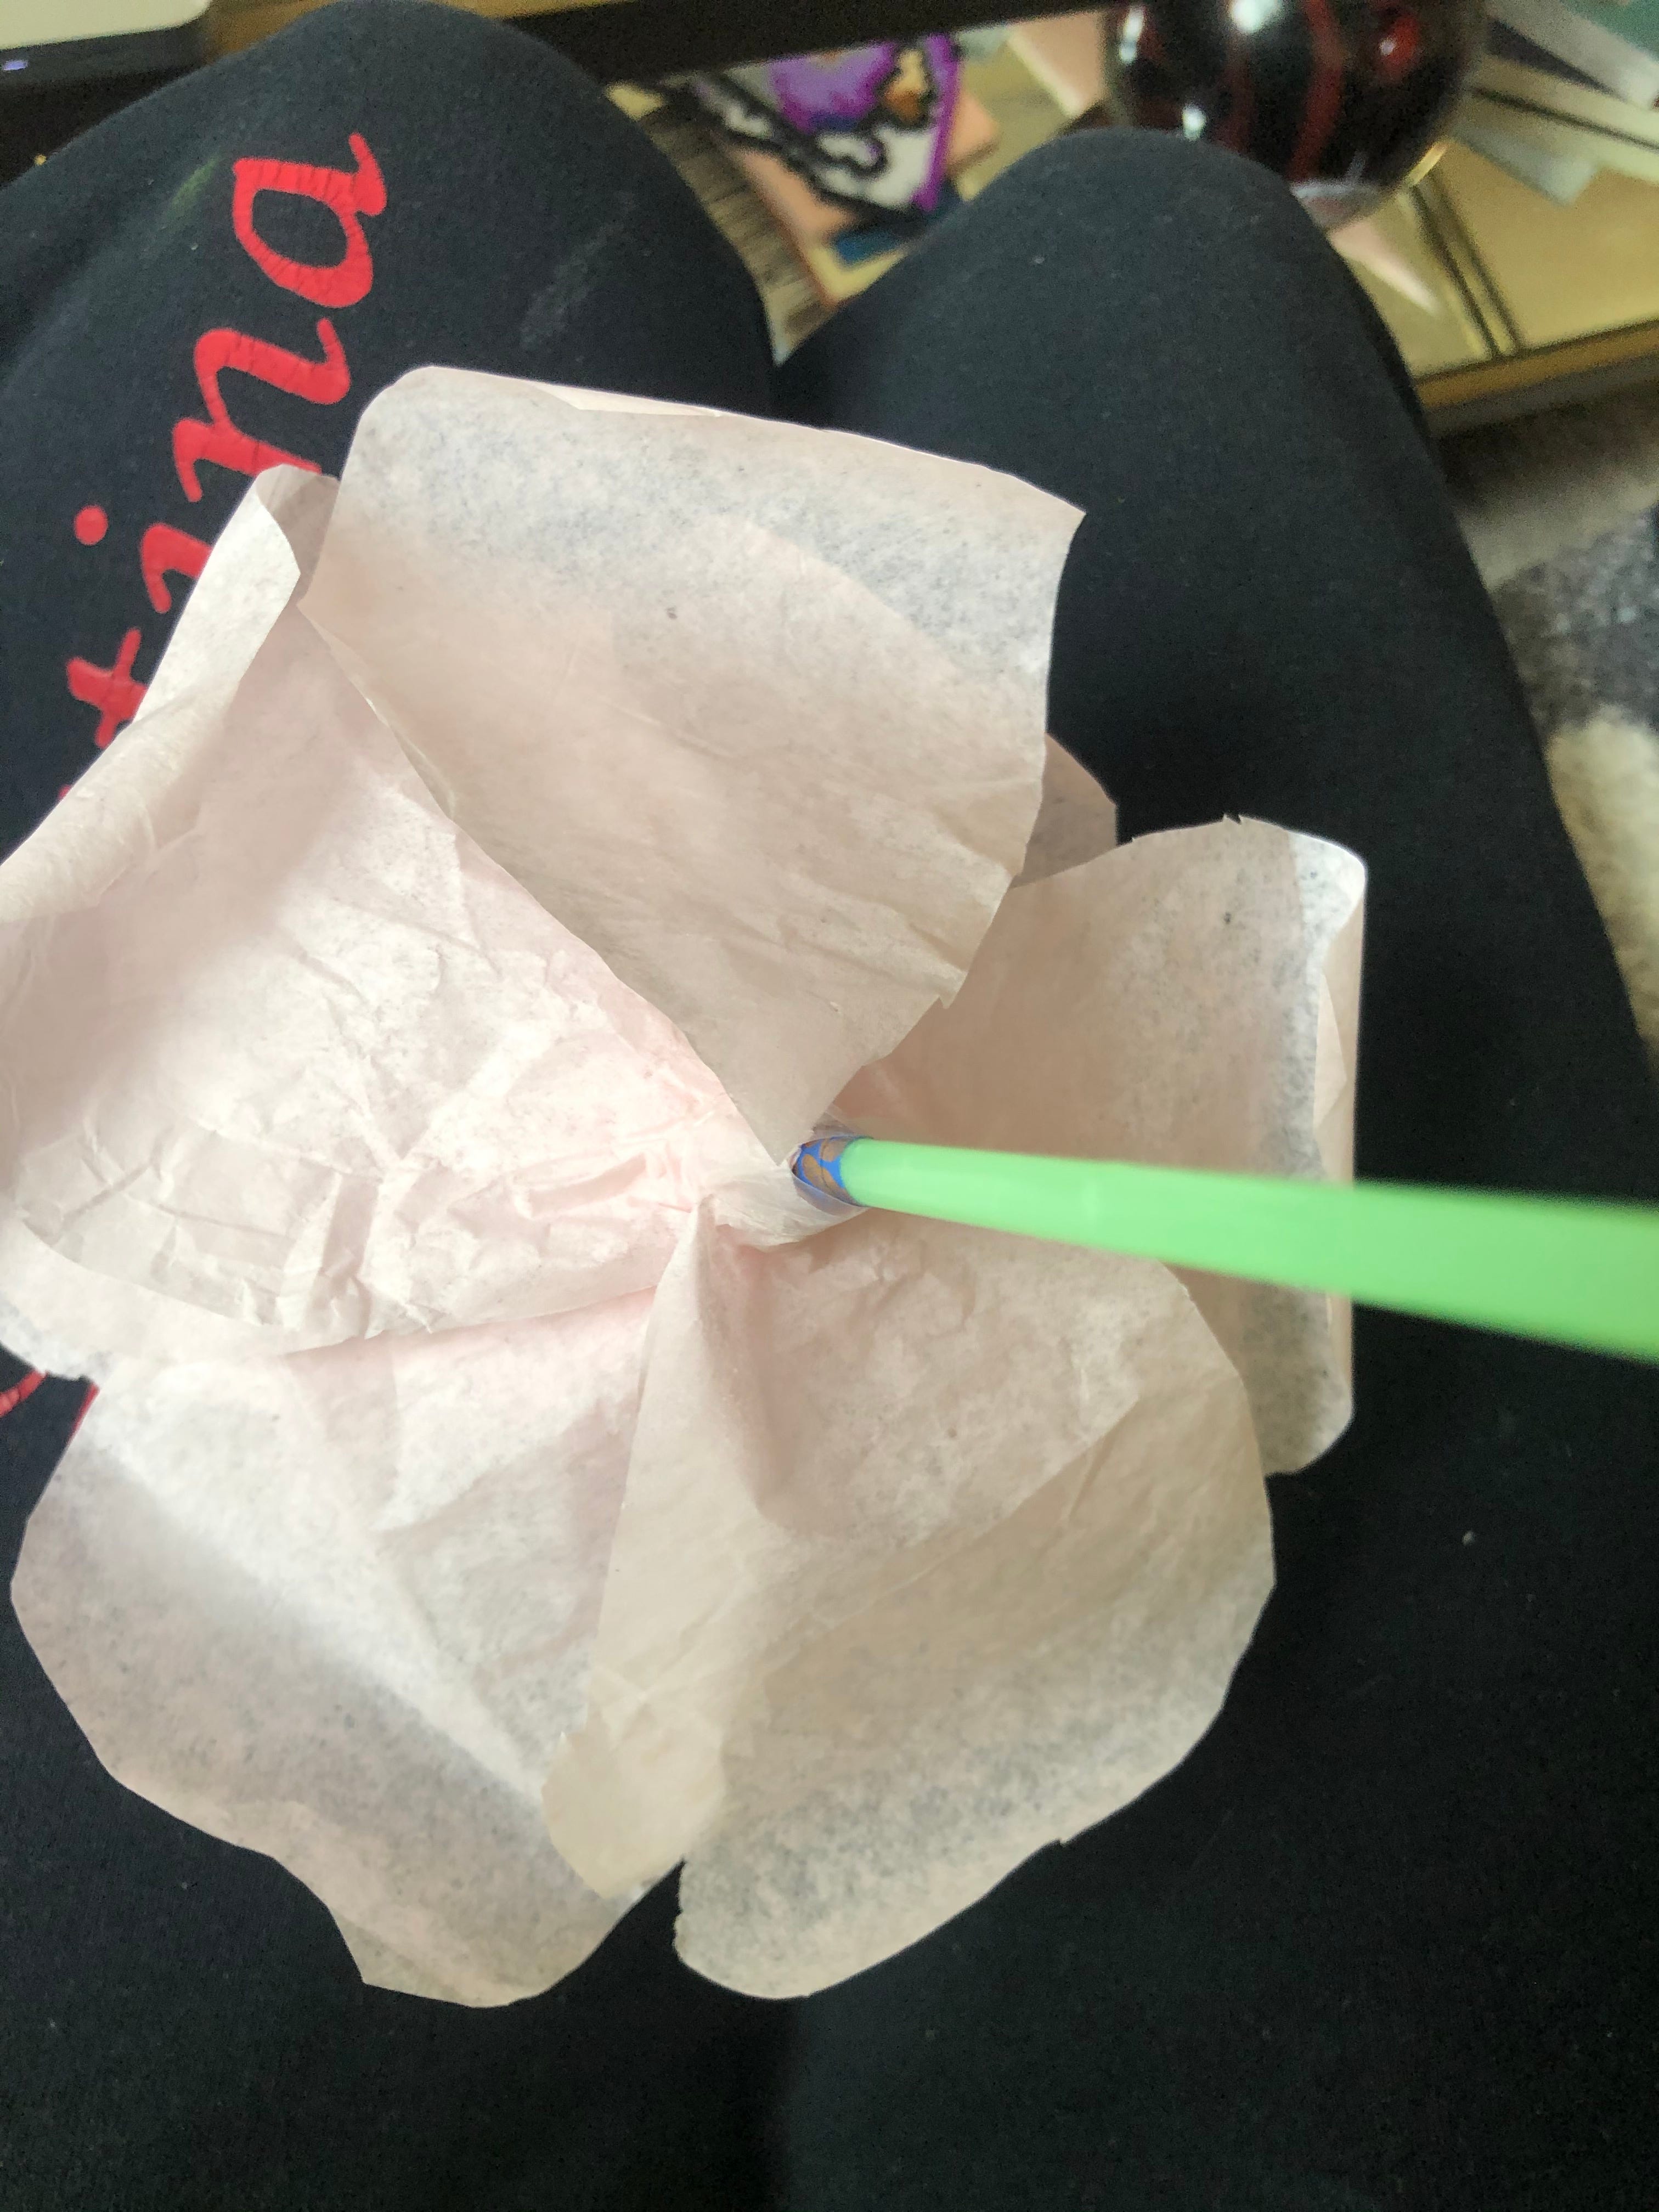
As you go, it might become easier to add your petals if the flower is upside down. You can rest it on your knees or a table, but be careful not to put too much weight on the flower as it will get smushed.
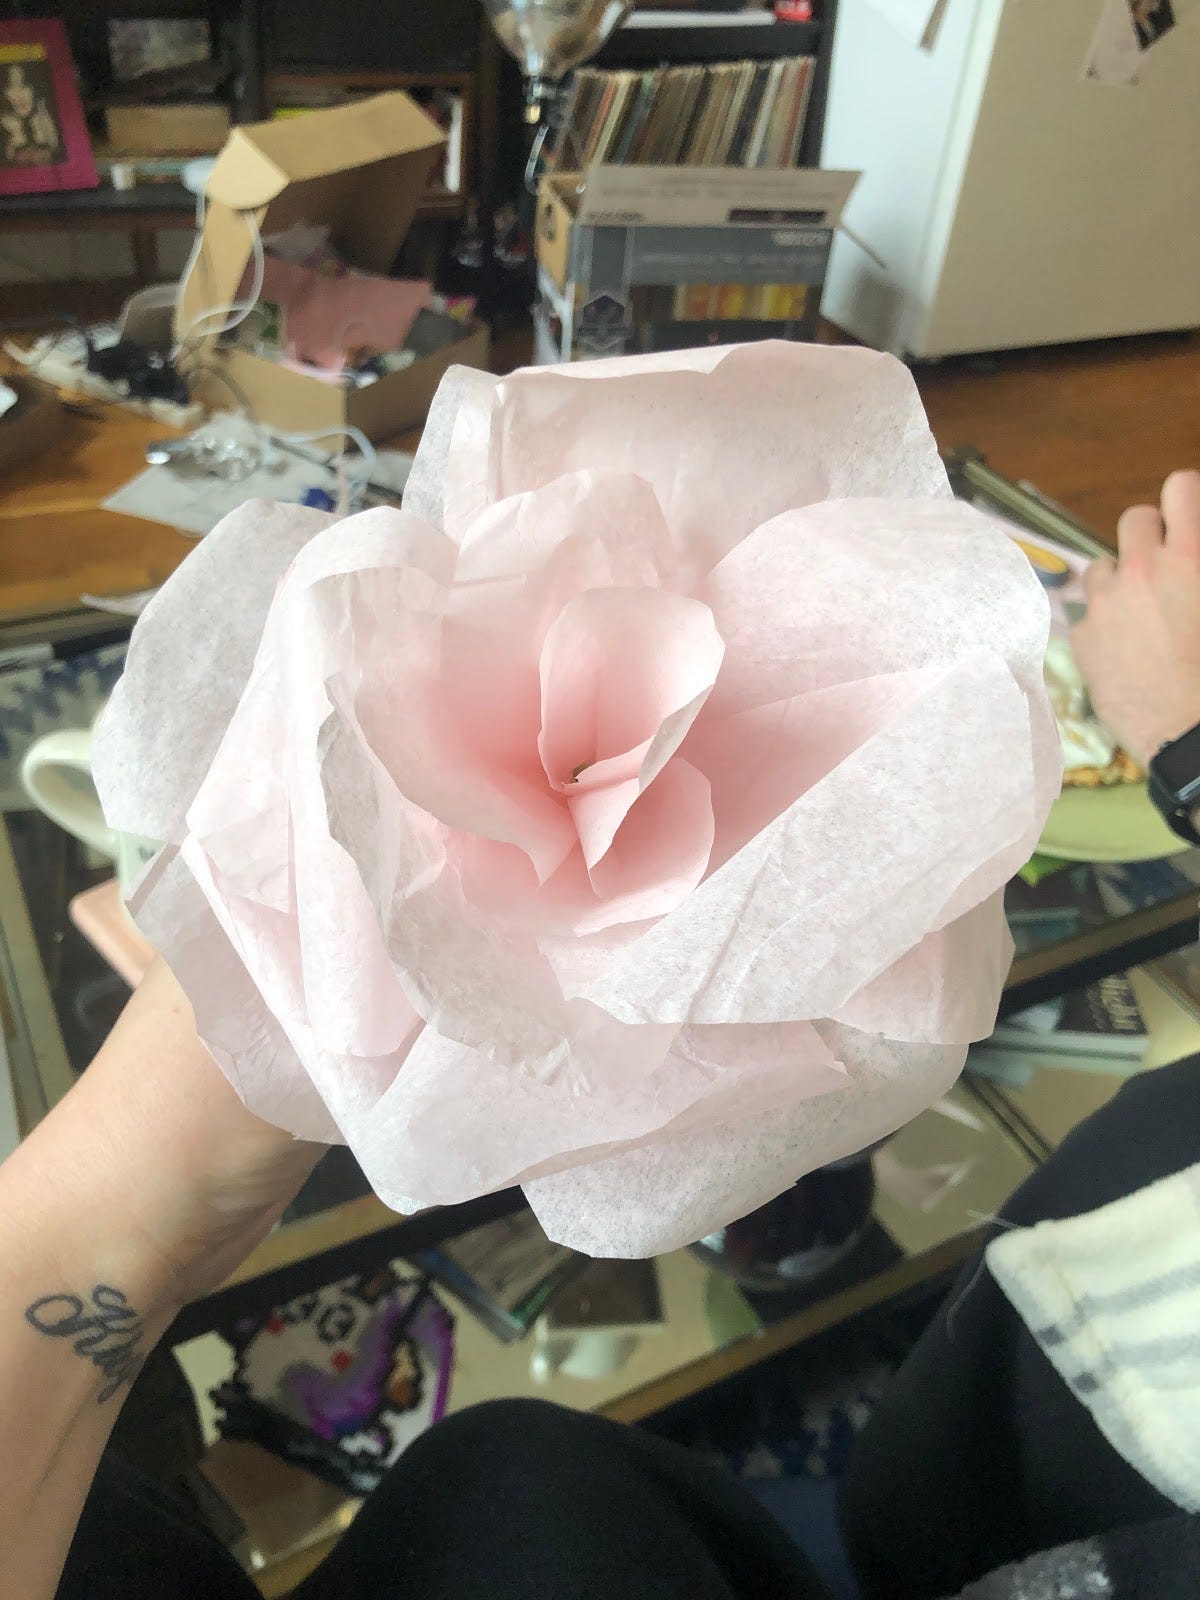
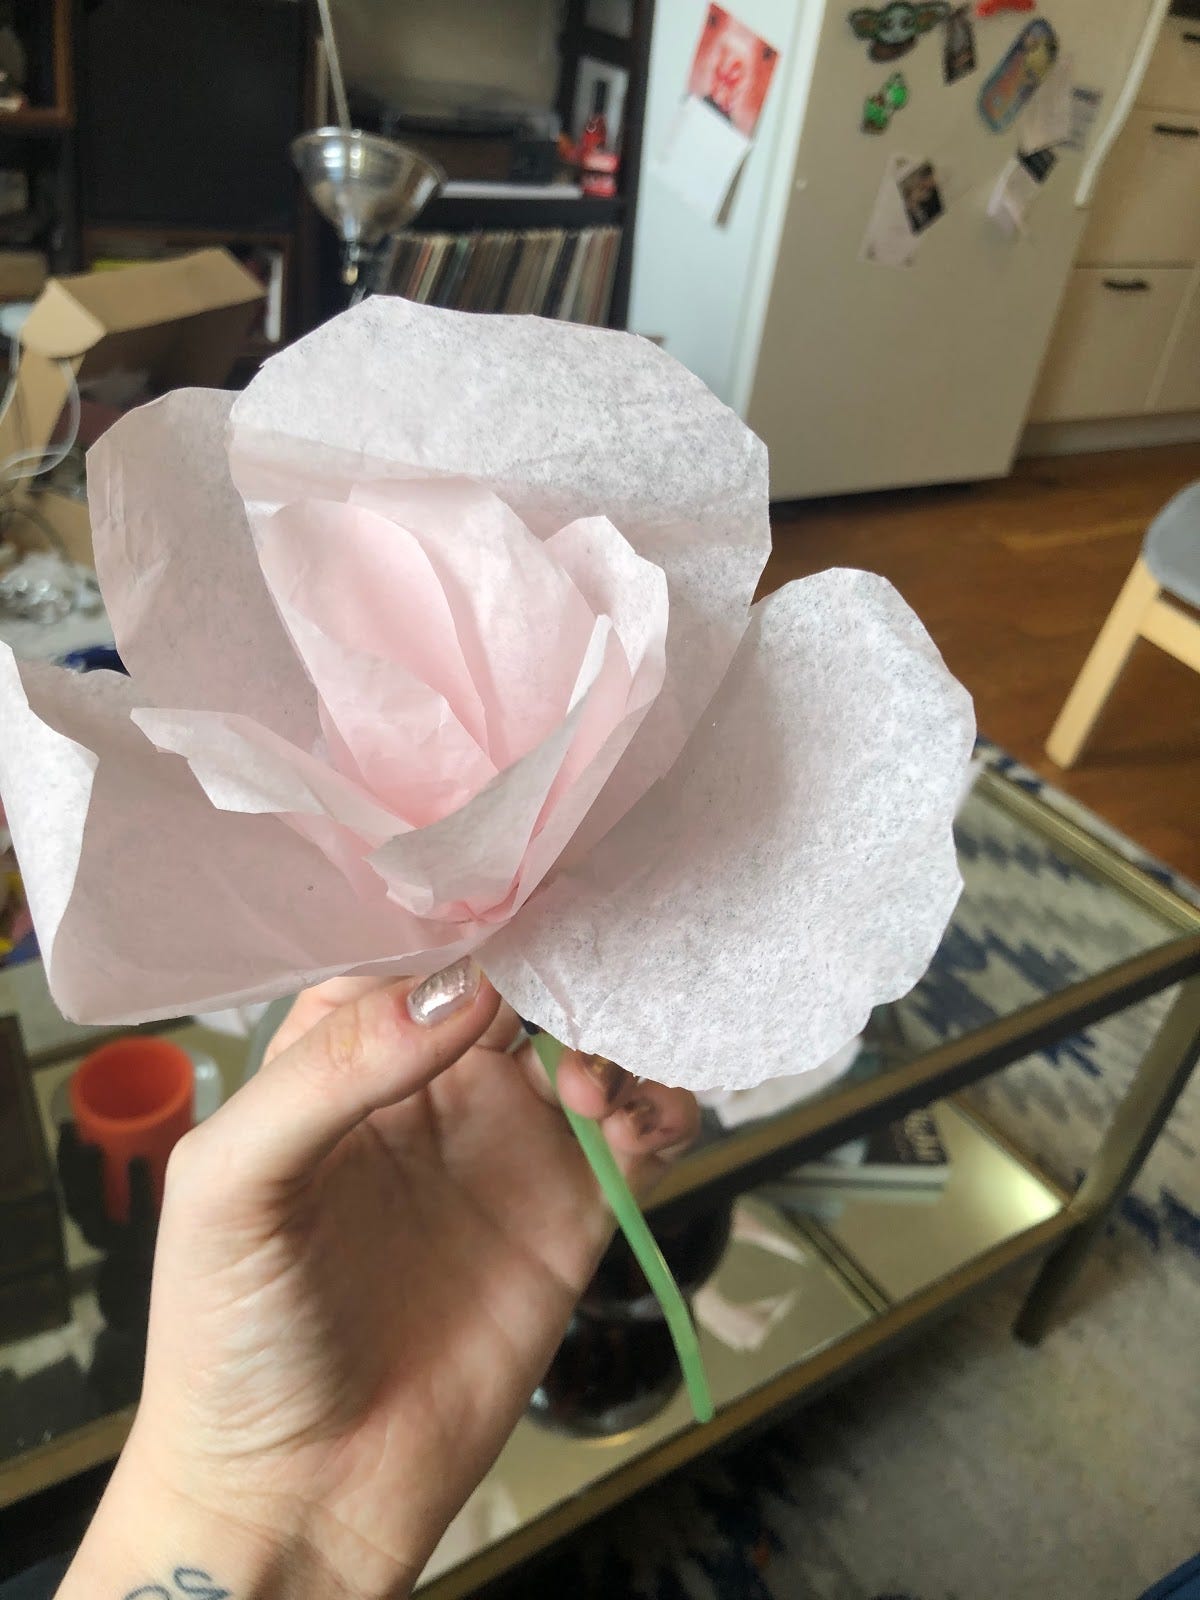
Keep adding petals until you feel like your flower is full. I finished up my flower by adding some green crepe paper I had leftover from our pinata project.
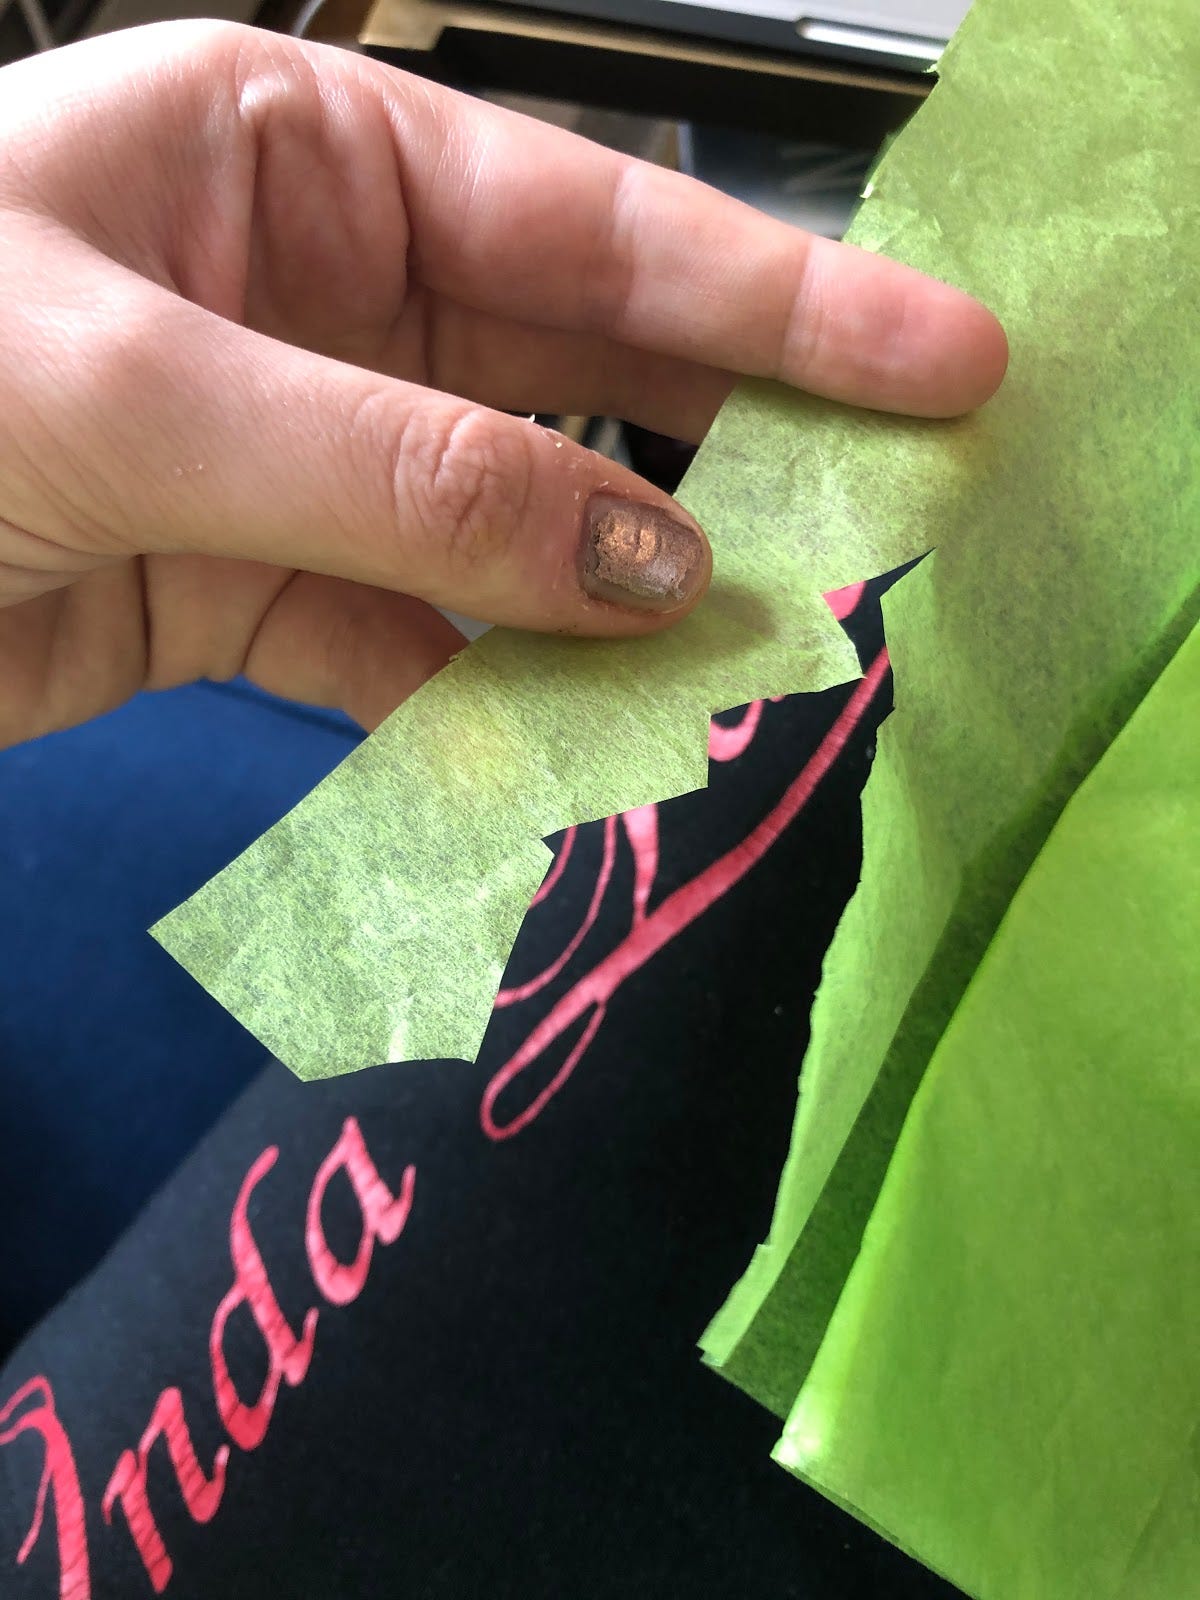
I cut the paper into a rough strip with triangles coming off it. I then wrapped it around the bottom of the flower to blend the rough end of the petals/tape into the stem. I added a very small final piece of tape to keep the green paper on.
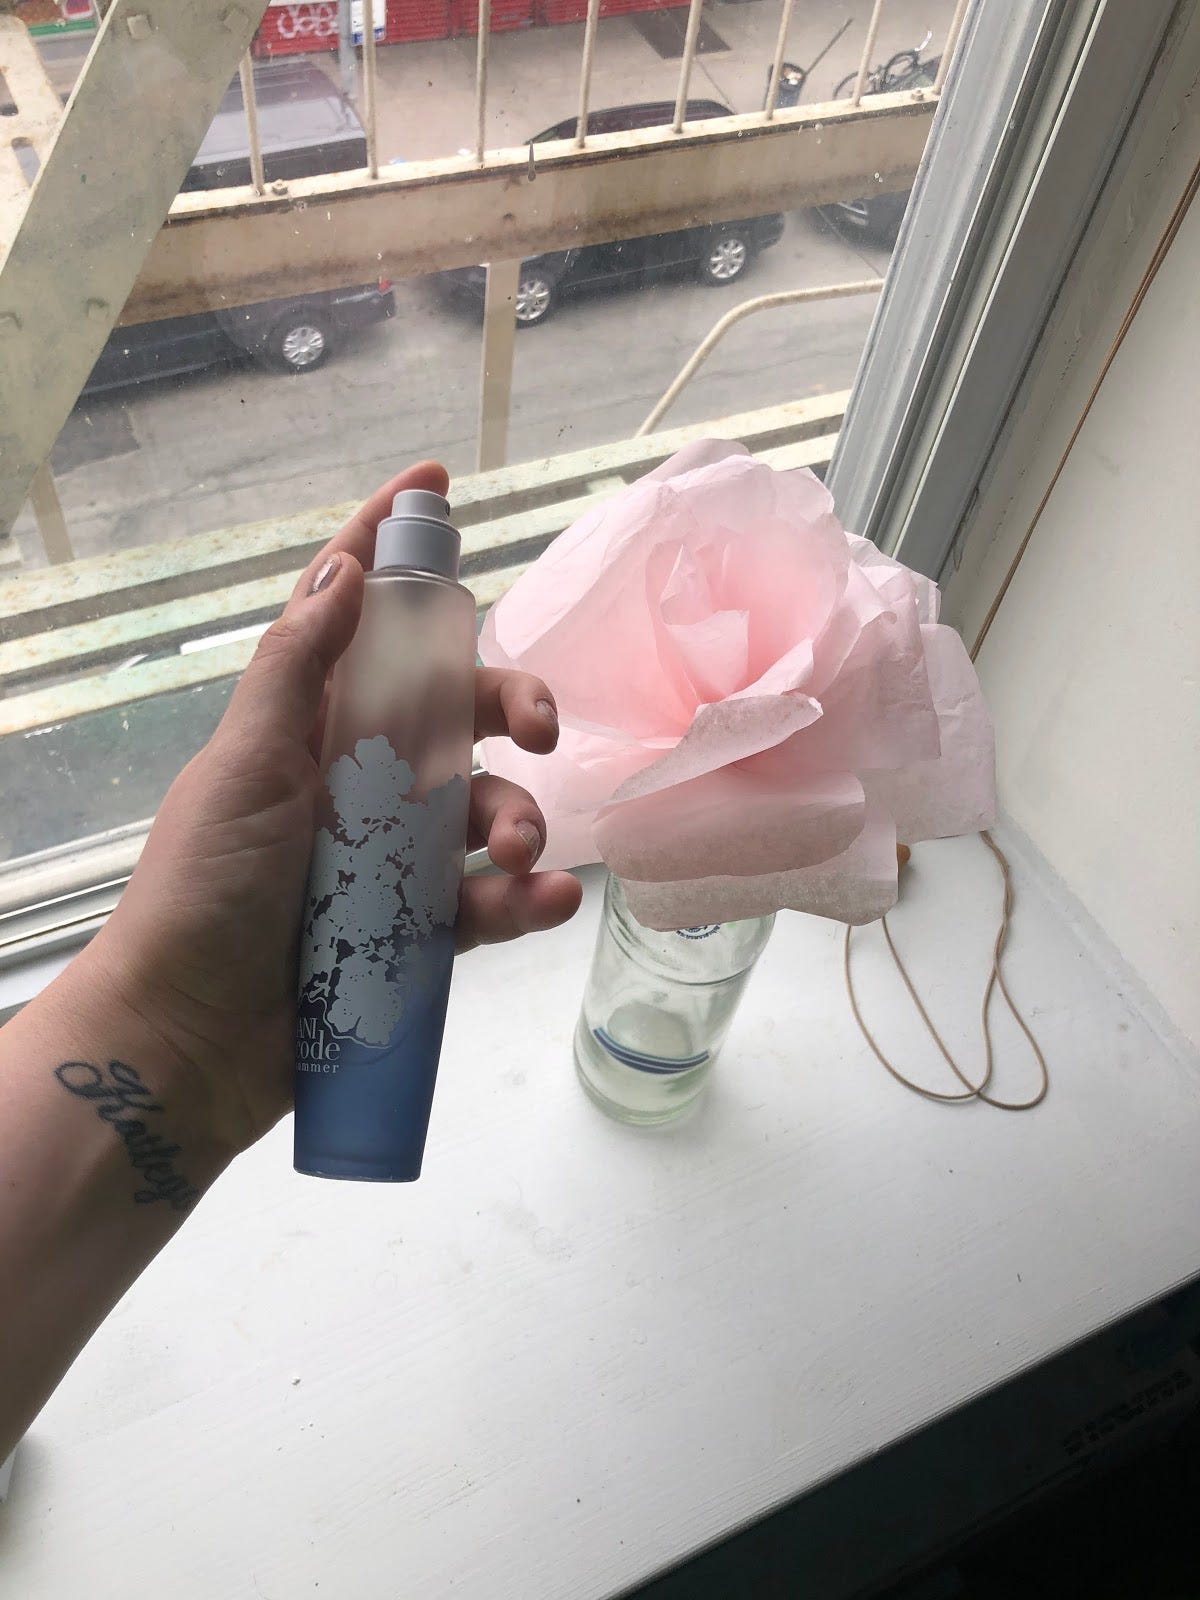
For a final and totally optional step, I put the flower in a vase and sprayed a little perfume on it, because as I often say, “It’s pink….. And it’s scented. It gives it that extra something; don’t you think?”
So there you have it, two crafts for the price of one (as always $0). These are simple, but they can brighten up your home, wedding, or zoom prom. Also please don’t make fun of me for my pizza PJs, bad nails, college dance team I was not on sweats, and my boyfriend eating breakfast which appear in many of these photos. We can all only do so much in quarantine.
I recently asked my comedy friends if they were working on any projects that I could plug at the end of this and unsurprisingly (if you know comedians) got too many responses. So for the next couple of these, I am going to be peppering in some cool things my friends are making that you can check out. Don’t worry, I will recommend other stuff as well.
Today, I want to focus on “live shows.” A lot of people are hosting streaming shows featuring drag, comedy, and storytelling. It can be a great find if you are 6 pages deep in Netflix and feel like you have already seen everything good. Also, it’s a great way to support performers who might have had paying gigs canceled (because man, it happened to me and it’s the worst.) Amber Rollo, who I have mentioned here before, hosts Can I Live? It is Fridays and has hilarious comedians for only $5 which often gets donated to food banks and other great causes. Divorced Diaries is also doing online versions of its live shows. And finally, my sweet darlings, Hattie Hayes and Matt Storrs have made a new Facebook live comedy show during quarantine called Our Topic Tonight which happens every Thursday.
If Comedy isn’t your thing, how about drag? My good friend Vanna Deux co-hosts a brand new show starting tonight and happening Tuesdays 9 PM EST with Bijoux called M.U.A.H. I’m sending this out late for you to catch this week’s, but don’t miss next weeks. If you would rather music, my sweet friend Sarah Kenedy has a new radio show called It's Saraaah! in the style of Delilah, which is super fun.
As always stay inside and stay crafting. If you are enjoying Craft Cult share it with your friends. Your support and shares really do mean a lot to me!
