


Embroidery, it's not just for Vermeer Paintings Anymore!
I haven't embroidered in about 10 years, jump back in with me!

My dearest crafters,
Get ready to call your lover your roommate and sit in a dark room by the sea because today we are talking embroidery. Every time I think of embroidery my mind goes straight to the 1880s and I want to say, England? But in reality, there are so many cool, current artists and crafters who do embroidery. My aunt does amazing pieces, a couple of friends embroider (probably better than me, I’m honestly just ok.) I am going to show you the basics today and then show you a piece that you can do with just the basics.

All of us this quarantine
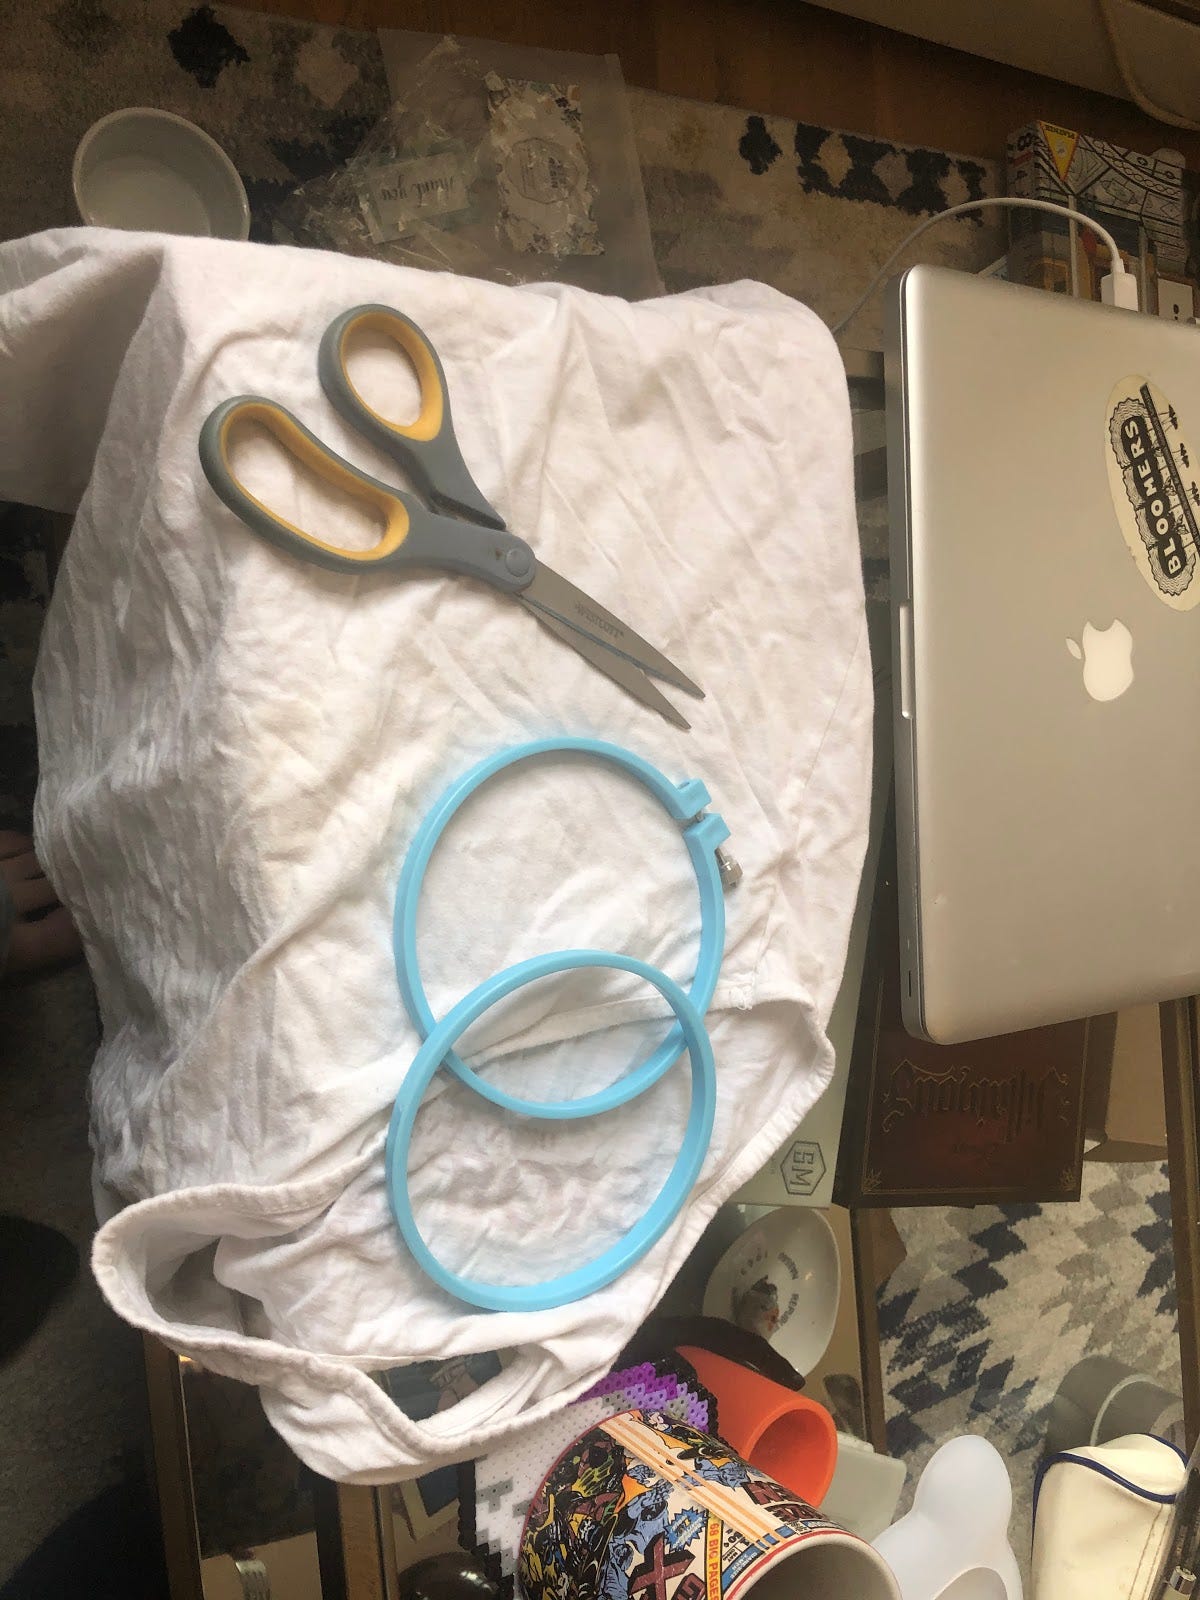
To start your embroidery, you will need 4 things. A needle with a medium to large eye hole, embroidery floss, an embroidery hoop, and fabric. I used an old shirt, the best thing to use is linen or something without much stretch, but you can embroider on any fabric. I would try to find something that isn’t stretchy. I did not follow my own advice and it became an issue.
To start, put the fabric inside the hoop, you can cut the fabric down after you insert it if you want, but make sure to leave some excess around the hoop. You should make sure your fabric is taught. It shouldn’t sag or billow in the hoop. Then thread your needle. I was always taught the easiest way to thread a needle is to put the thread to the tip of your tongue to wet it and then flatten it with your fingers or teeth. I know it sounds a little gross, especially if you plan to give your piece to someone. You can also use water and your fingertips if you are having trouble threading. Tie a knot on the other end of the needle (some embroiderers don’t sure knots, but I think it’s easier if you do especially if you are new to this ), and you are ready to start.
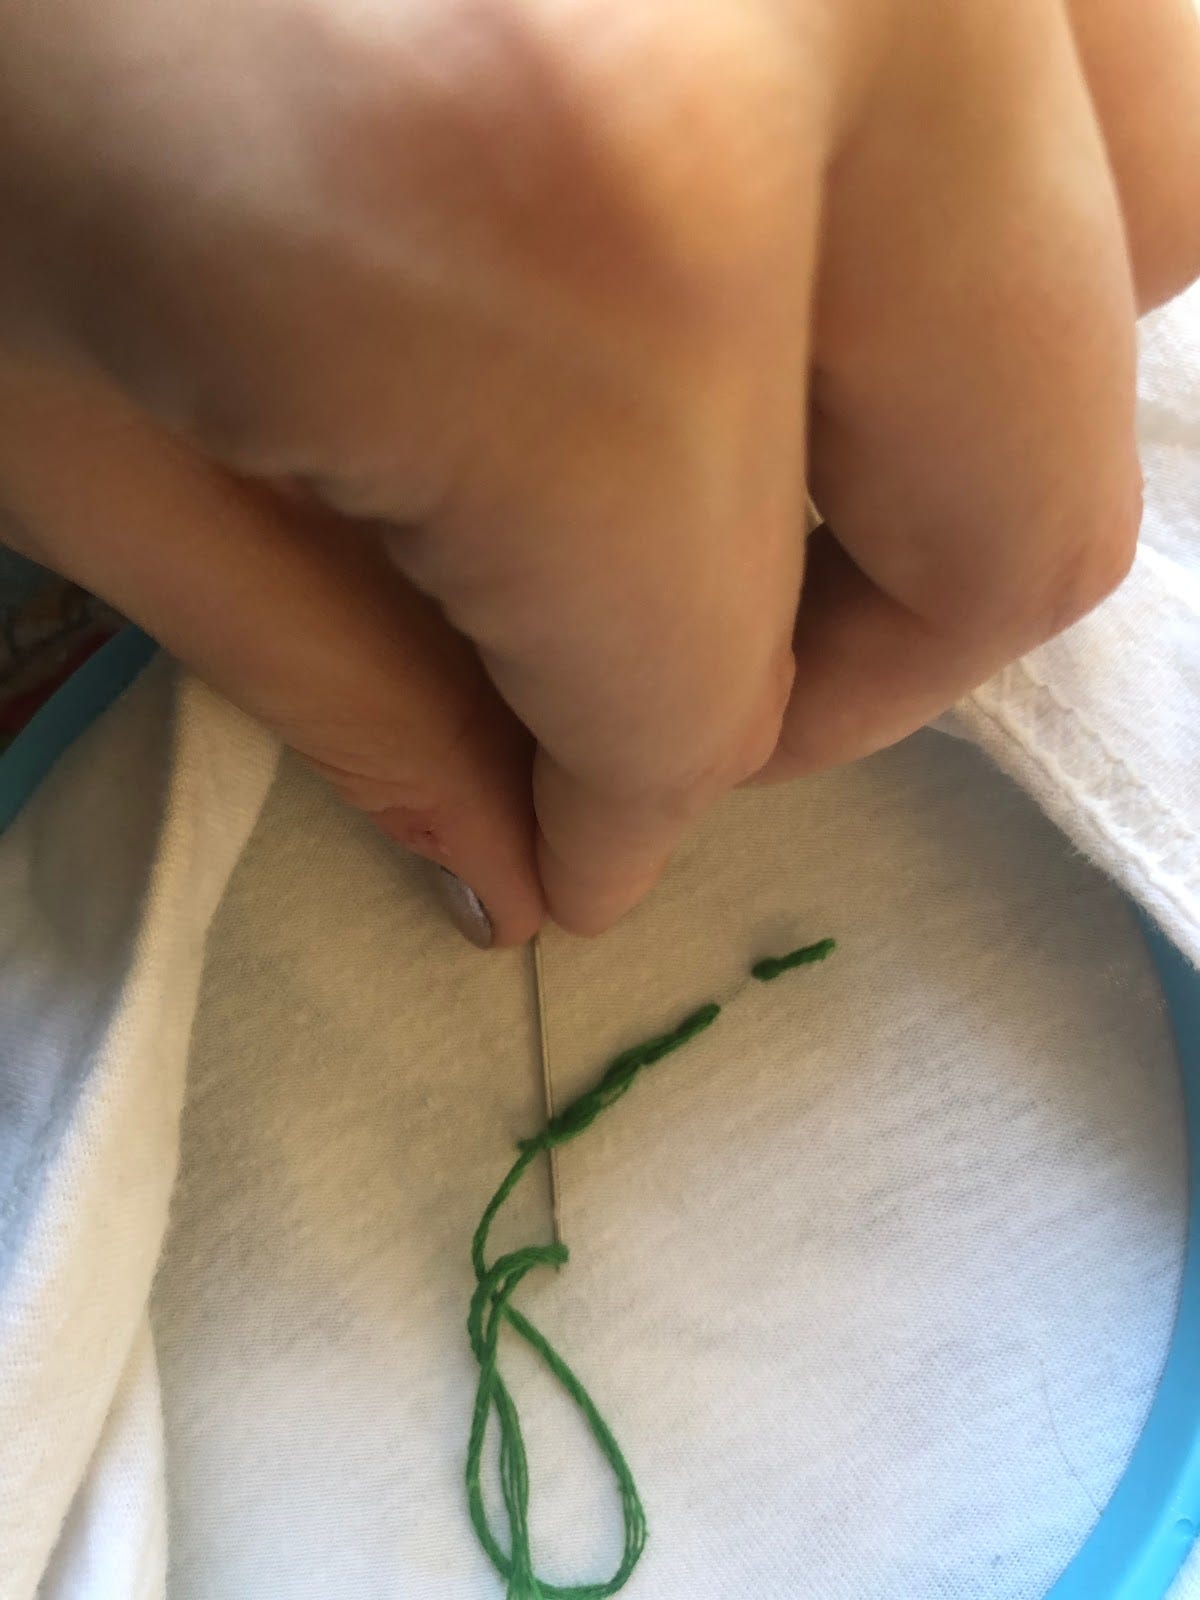
Our first stitch is called the backstitch. It is a really easy stitch that is mostly used to outline. First, come up through the back of your fabric and then go back down through the fabric to create a stitch about the length of a grain of rice. In general, you want to always keep your stitches even when you are embroidering. Don’t get too hung up with it if you are a beginner, just try your best. Bring your needle back up through the fabric. Take your needle back through the fabric close to where your first stitch ended.

Repeat these steps until you have a line. You can tie off your string by going back down into the fabric, threading your needle under a stitch and pushing your needle through the loop made by the excess string. Do this a couple of times for a strong knot.
Once you have completed a line of backstitches you are ready for the whip stitch. The whip stitch starts with a backstitch. Usually, I would do a whip stitch in the same color thread as the backstitch, but it’s easier to see how the stitch works in a different color and it made a fun little candy cane effect.
For the whip, come up through the fabric near the end of the backstitch. Bring the needle under a stitch of the backstitch on the right. Do this again and again (always on the same side as your first stitch, in this case, the right) until you are out of backstitches to go through. Go back through the fabric and tie off that the end.

The next one is easy. Its called the straight stitch. You bring your needle up through the fabric and you bring it down in a straight line. That’s it. You can place a lot of straight stitches next to each other however and create new shapes or shading.

The next two are probably the hardest of the stitches to get in this little tutorial. For the rest of our stitches, we have been pulling them tight as we do them. For these two, you don’t pull the stitch tight. The first is the lazy daisy. Make a loop by coming through the fabric and coming back through in the same area but leaving slack. Then come through the back of the fabric to do a small stitch to anchor down the loop. The blanket stitch shares some similarities but instead of a single flower-like petal, it makes a line. Pull your needle through the fabric and put it down about a stitch length away. Don’t pull it tight. Bring the needle back up through the fabric in between the two stitches. Pull it so it makes an L shape and then repeat the process in a line. Don’t stress the blanket stitch, I am going to use it at the end of this tutorial but you don’t need them to make a similar finished product.

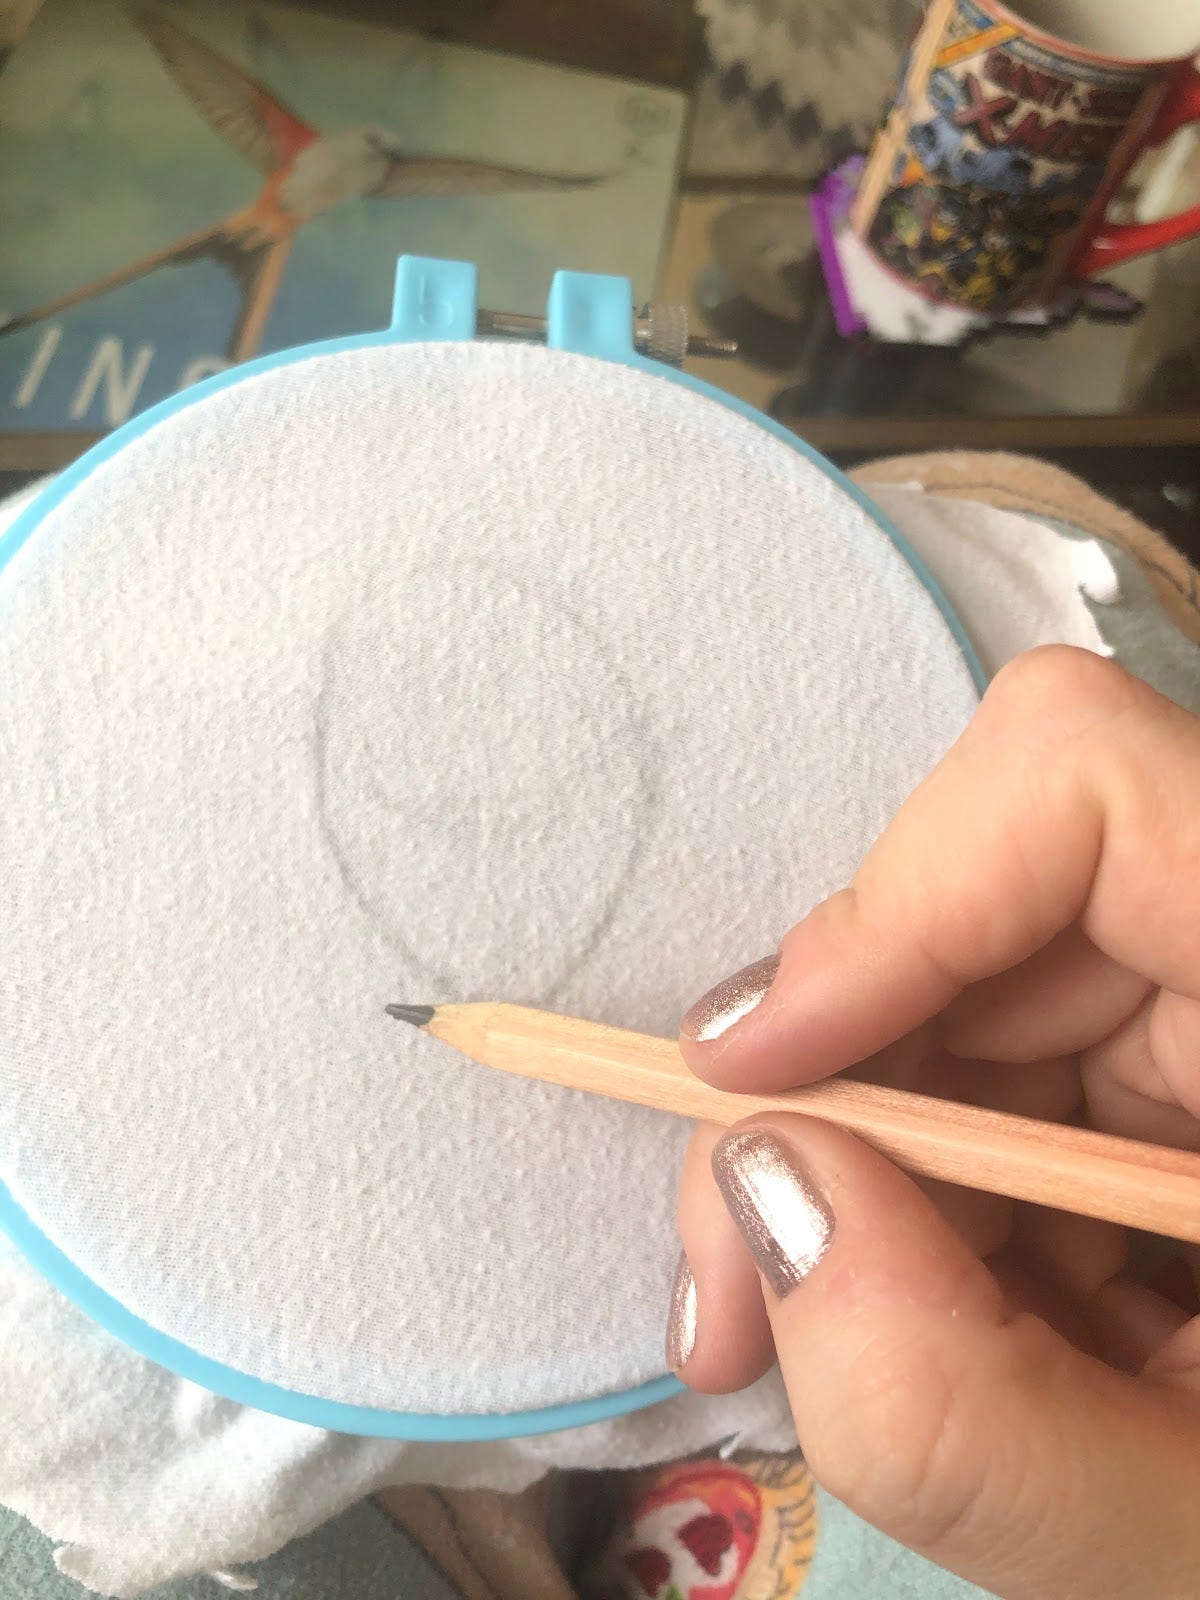
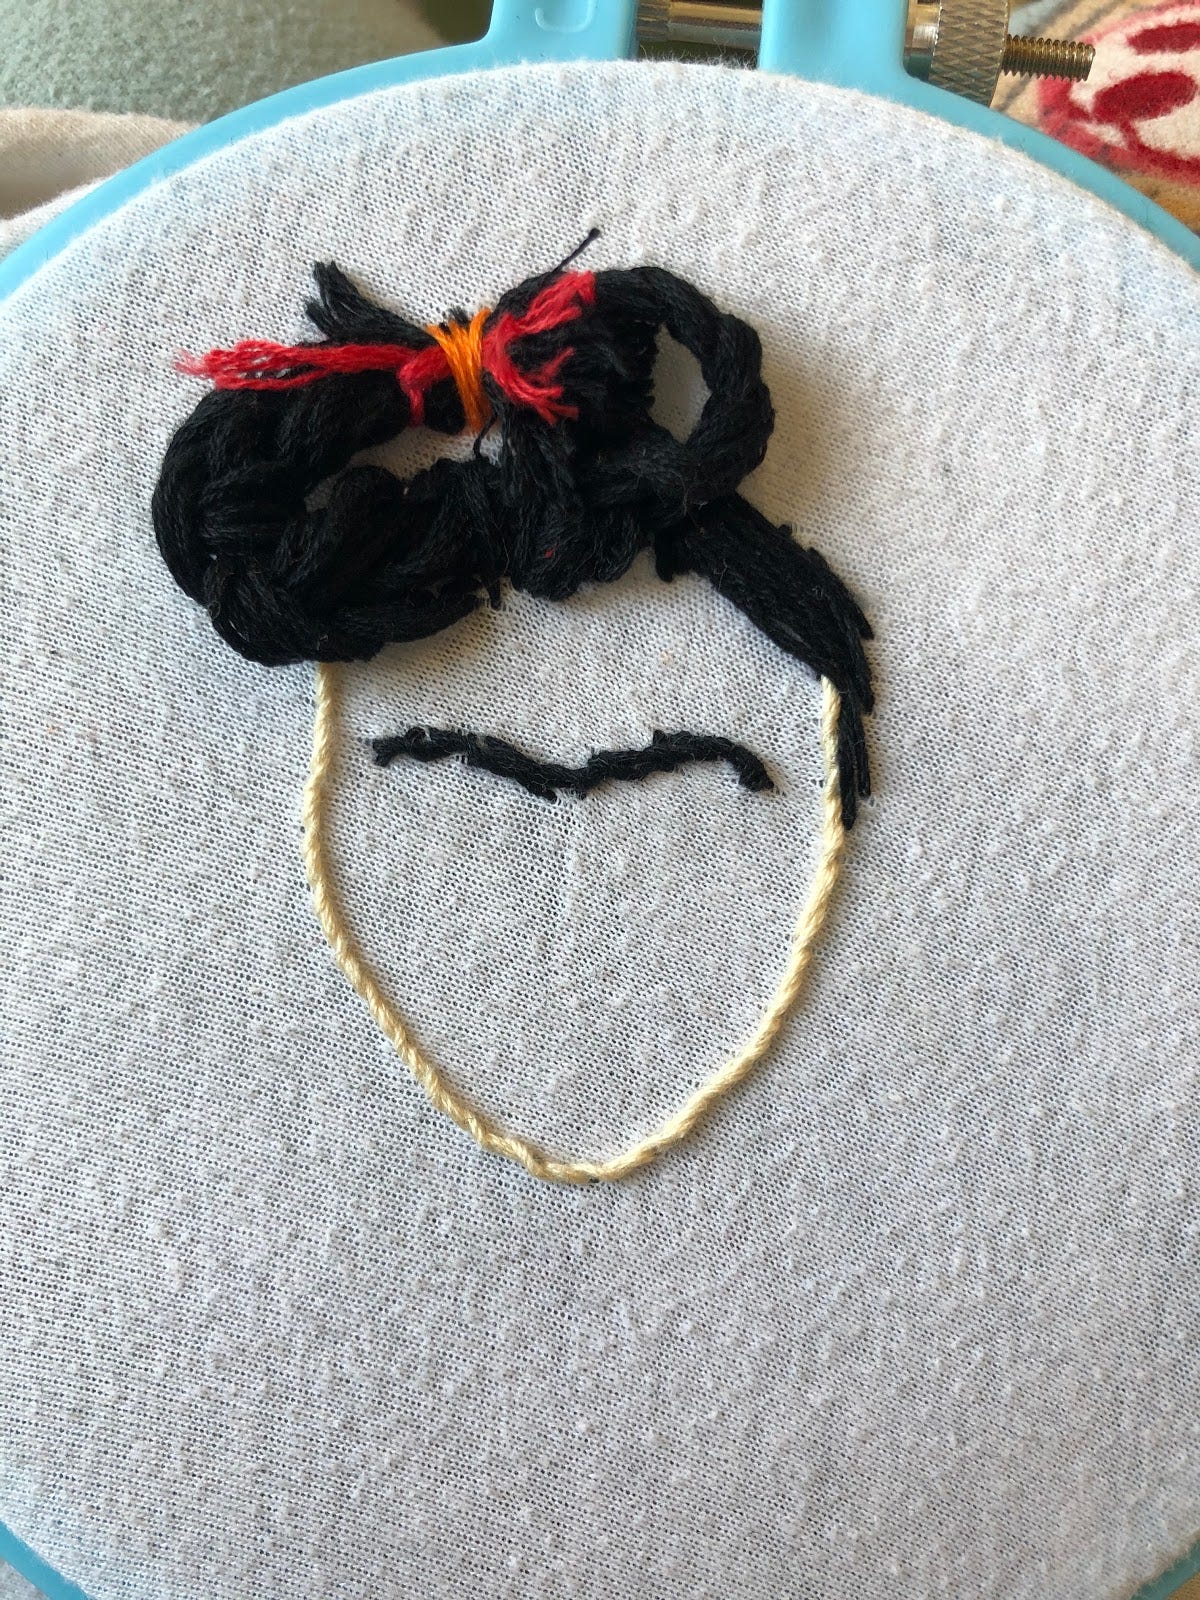
The last time I taught embroidery was at a summer camp when I was 14. I was the counselor that taught 15 6-10-year-old girls how to embroider a face on to Frida Kahlo inspired dolls there were making. So I decided for this project, we are going to do something similar, just for my own personal fun. We are doing a Frida Kahlo inspired face in a garden scene. Get a new fabric to start with and put it in your hoop.
If your fabric is light enough, you can sketch on an outline for your design with a pencil. I sketched on the rough shape of a head.
Next, I outlined the head with a backstitch before going back and finishing it with a whip stitch. Try to keep your stitches consistent and straight. You can see I miss stepped once or twice but you can hide it with the whip.

Now, you can add a lot more detail to this, but I am keeping it really simple since I know some readers aren’t super familiar with embroidery. If you know more stitches, this is a great one to add to.
I then added hair to the top of the head. Okay, I lied a little when I said you only needed the 5 stitches I taught earlier. This is technically a 6th stitch, but it’s almost identical to the lazy daisy. Instead of adding a small stitch at the top of the loop, we add the stitch to the base of the loop. There are a lot of ways to add a hair-like texture, but I think this is the easiest.

Keep doing this stitch in an oval shape to construct the hairline on about 1/2-3/4 of the head. After you meet your original stitch, you can tie it off in the back. I did a completely optional step of doing some straight stitches inside the oval just to give the hair more volume and coverage, but you don’t need to. When you are done, you can cut the loops at the ends.

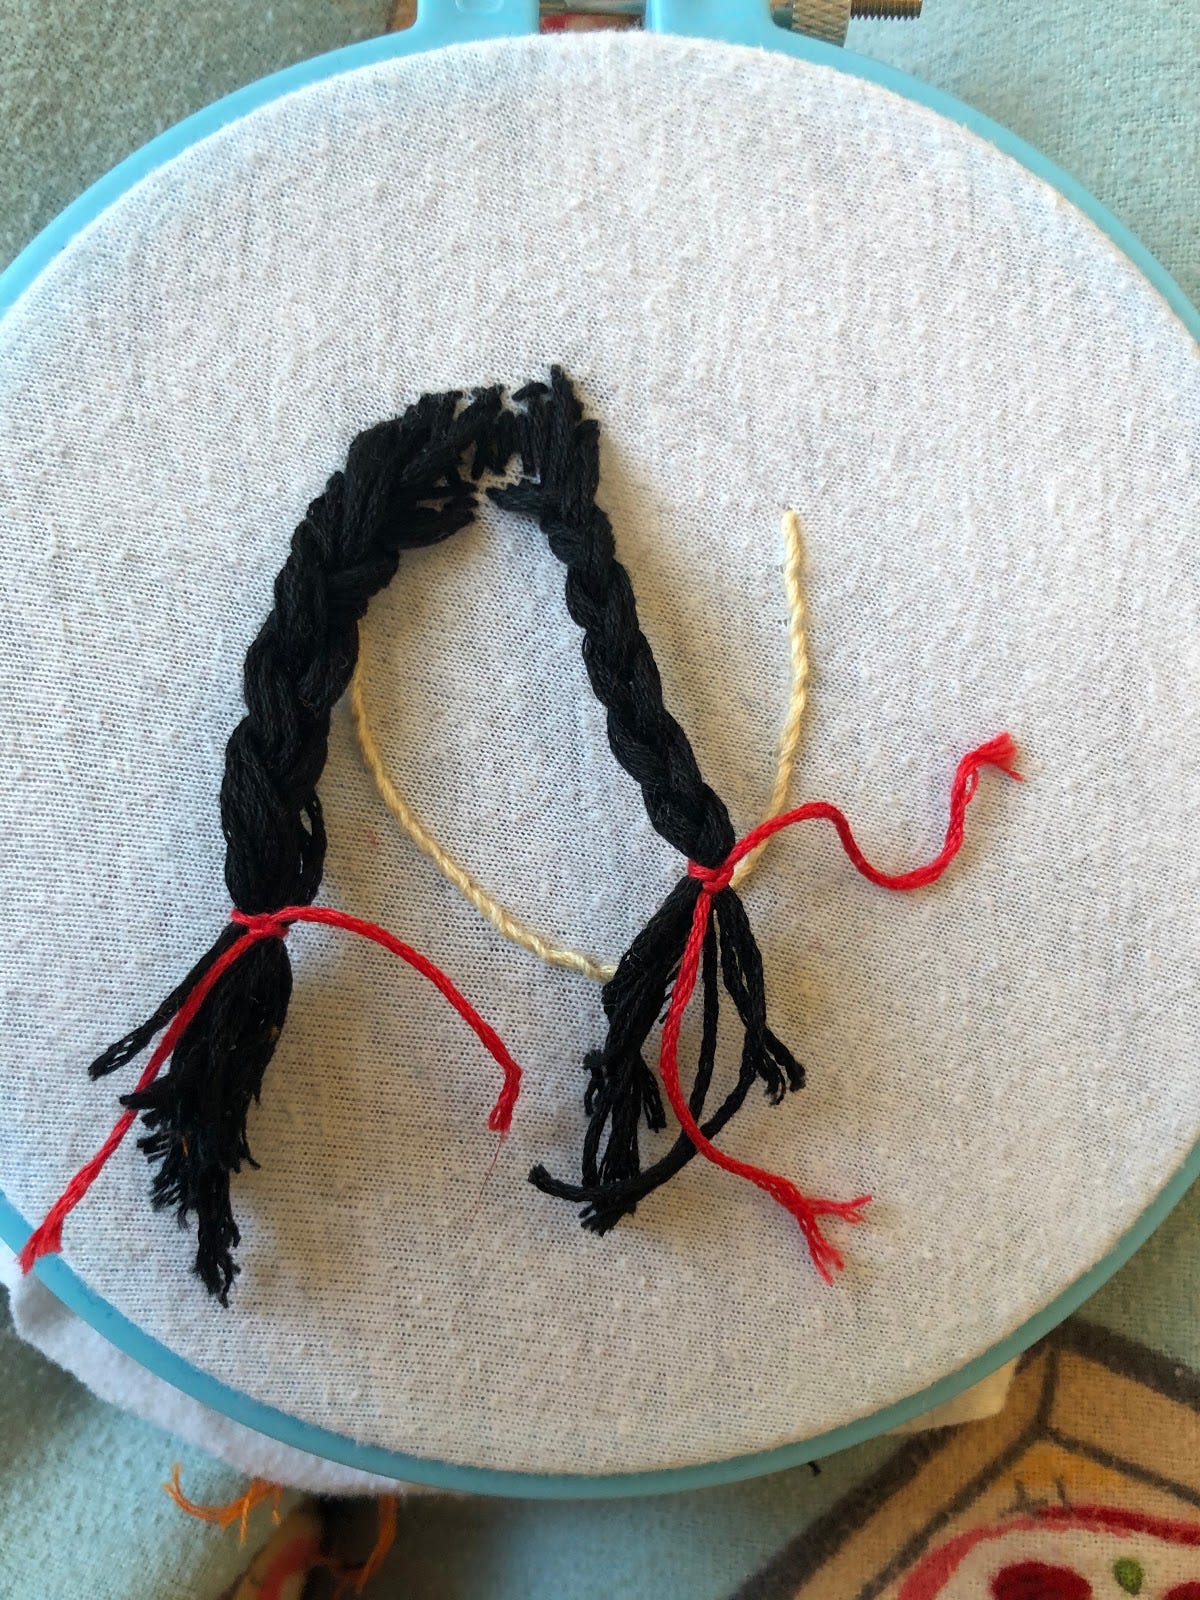
This next step is fun and it takes absolutely no embroidery. Style the hair. I did braids for this. If you can’t braid hair, I am sorry you didn’t have sisters growing up. I did two braids and tied them off at the ends with scraps of string.
I then went and did some straight stitches to fill in the hair on the other side of the head. You can probably see a little hole in the first picture. I am using a less than optimal fabric for this. It has a lot of stretch and that’s not a great choice. You can always cover up a hole you make, however. I did stitches vertically and then horizontally. This covered my mistake and also gave this side of the head more volume.

When I was done, I styled the braids, by placing them on top of the head and then tacking them down with a couple of straight stitches in a new color.

Now, I told you this would be Frida inspired, and what is a Frida without a unibrow? So I added my brow with a backstitch and a whip. I was going to do a set of really fine straight stitches but I think this is much easier. You can add a face however you think is best. There are no wrong answers.
I decided that this is all the details I wanted to add, but you can always add more face details. I then wanted to add some flowers. Flowers are probably how most people start to learn embroidery (a face and hair is not the usual certainly). I find purely floral pieces a little boring sometimes, but everyone who even dips their toes into this art form should be able to do at least 2 types of embroidery flowers.
Let’s start with a simple rose. Start but putting an odd number of straight stitches of roughly the same size originating from a rough point. I used 9 stitches. Then come back up through the fabric with a thread of the same color. Use that thread to weave over and under the straight stitches. Don’t pull too tight, just keep weaving around and around in a circle.

As you go around and around, at some point, there will not be enough stitch left to weave your thread under. When that happens, go back down through the fabric and tie off.
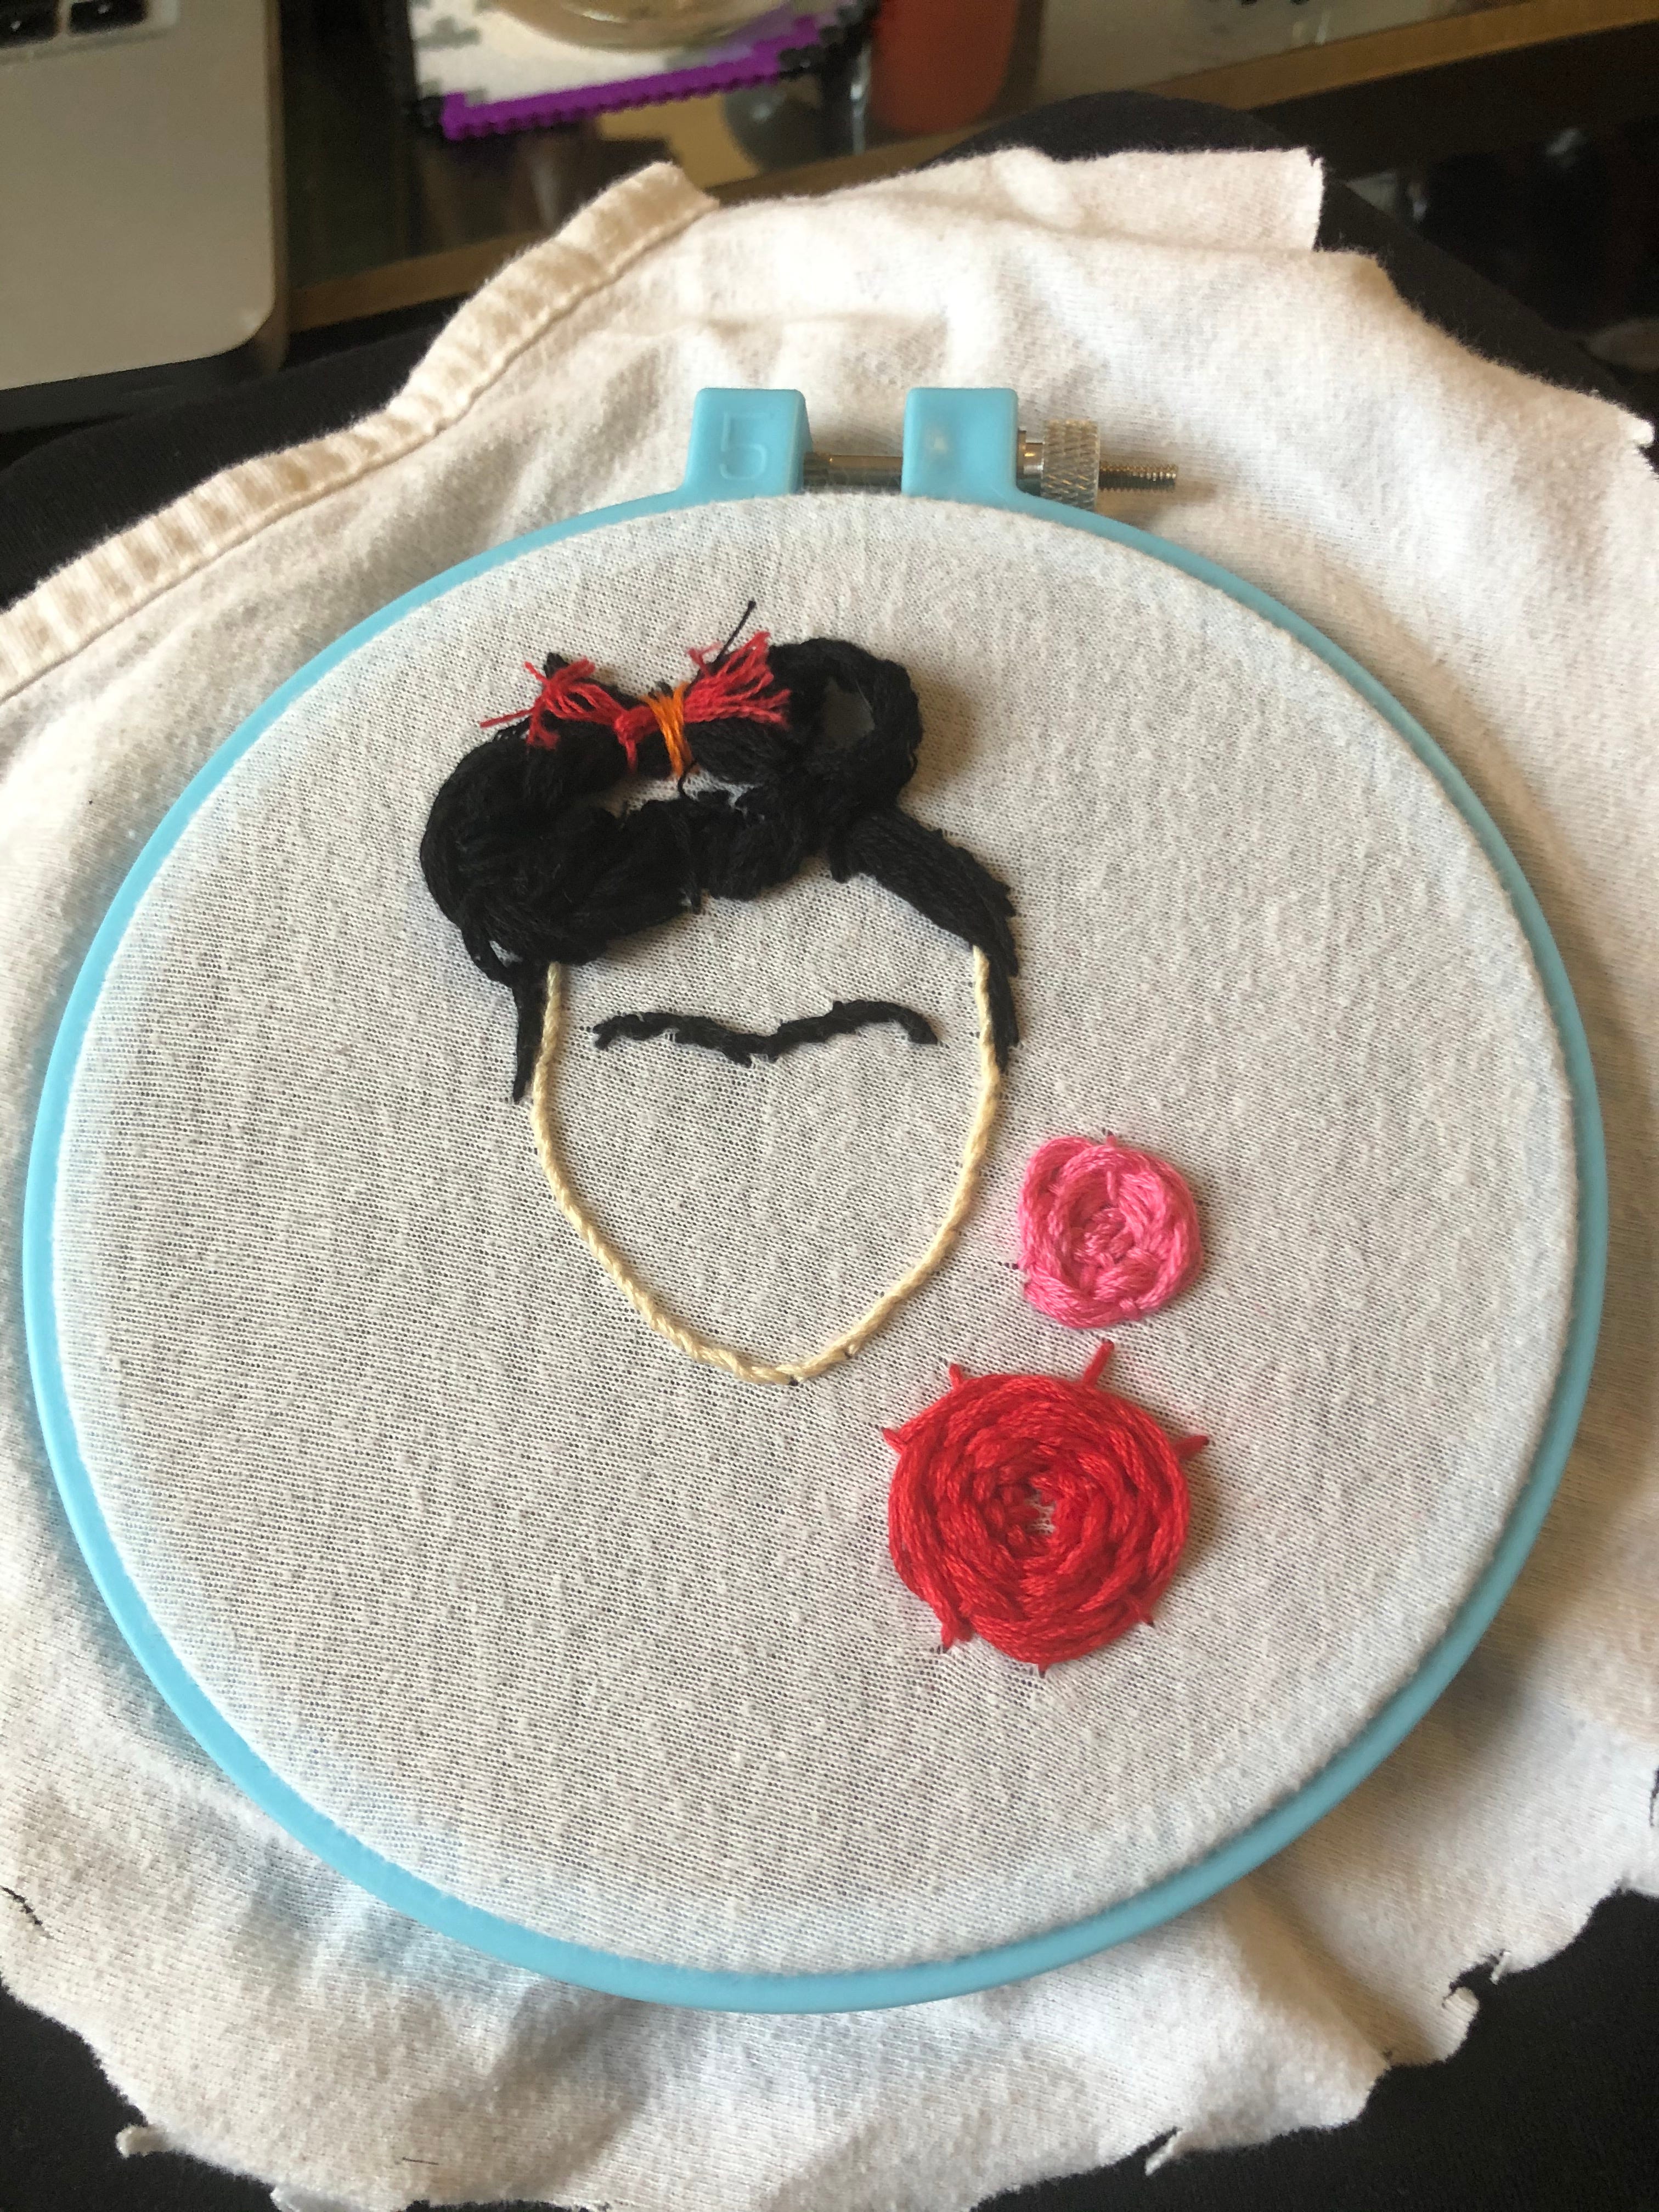
I added a second rose in a different color by repeating these steps but with smaller straight stitches. I then added some green straight stitches around the roses.

Let’s do our next type of flower. Start with our lazy daisy stitch. Add a couple of them originating from the same area. I liked the purple so I added some purple straight stitches in a different area while I had it out, but you can ignore that for now.

I then added some pink lazy daisy stitches on top of my purple ones. Ignore the pink knots I did above that. That is called a French knot and while it is a basic of embroidery, I decided not to teach it in this one, because I was already doing a lot and I didn’t want to scare people off this craft. I am attaching a video about the French knot here if you want to do them, but they aren’t aesthetically my favorite anyways.
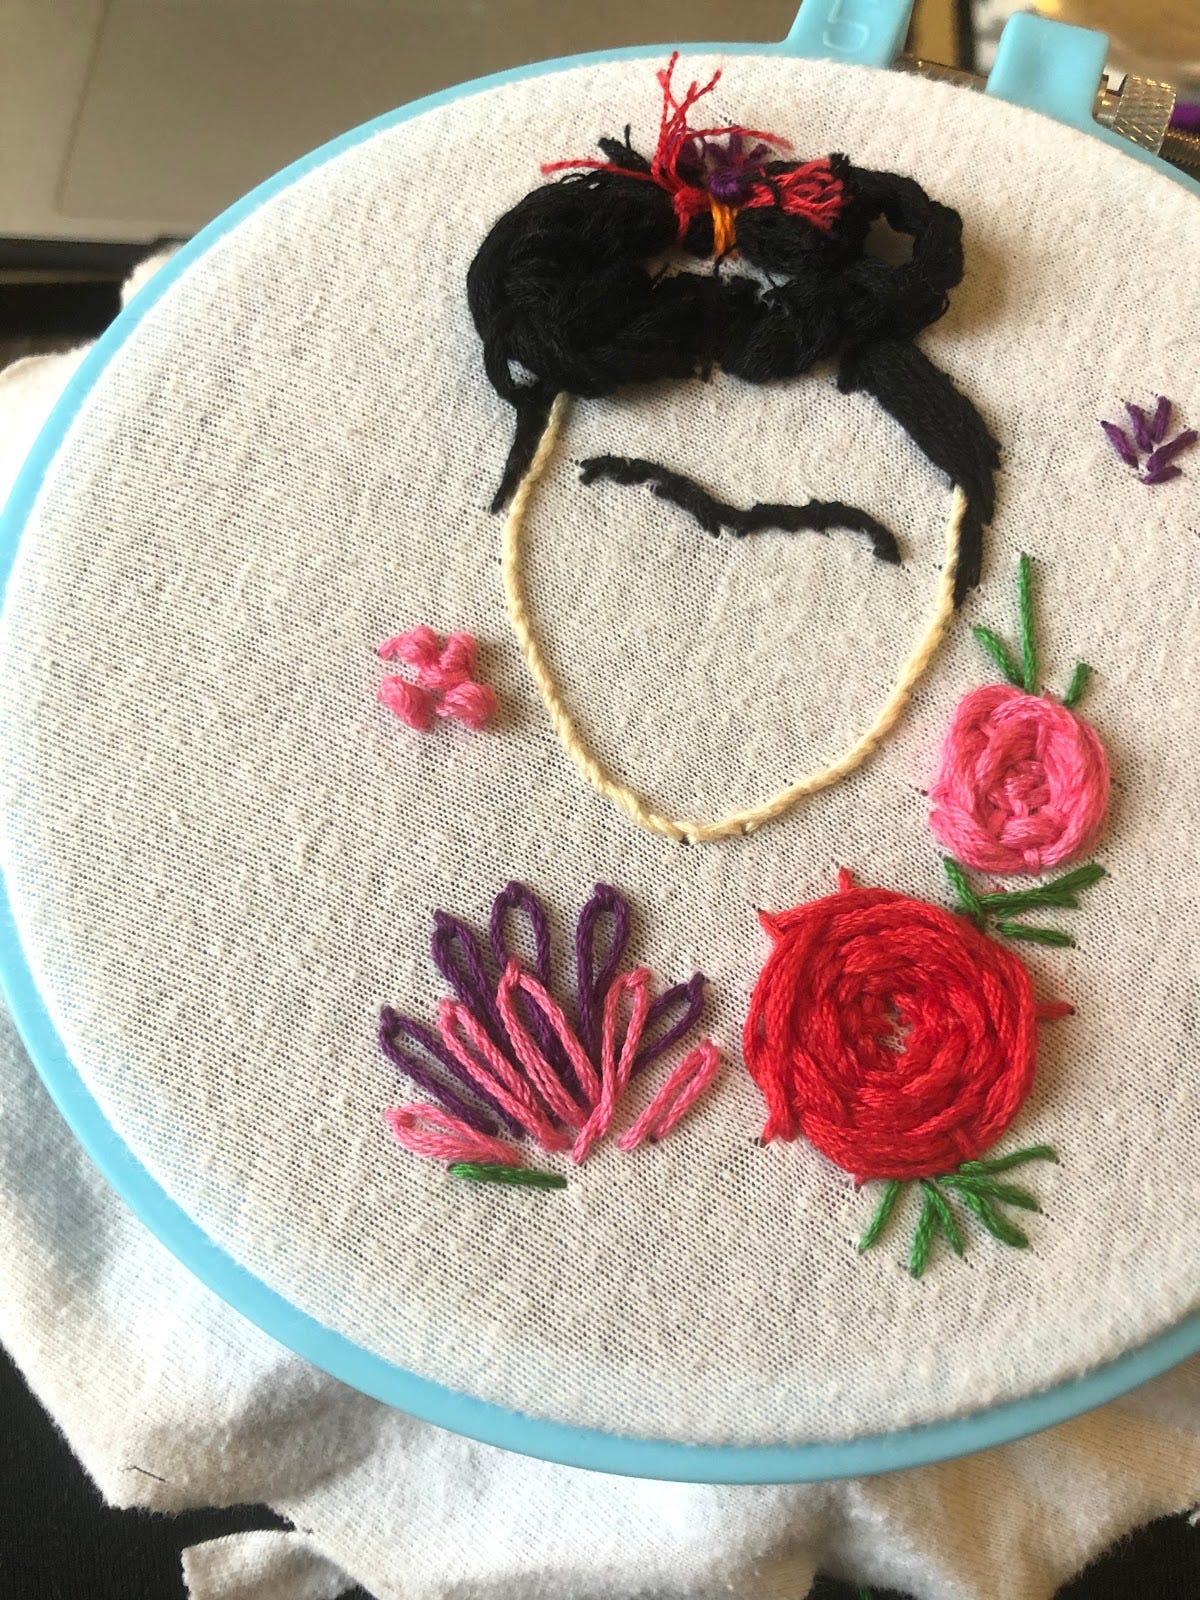
After the pink, I added some green straight stitches at the bottom. This is where I want you to get creative. Use straight, blanket, or backstitches to add stems or more flowers to fill in the negative space. You have all of these stitches in your arsenal now, so go crazy. See where you want to add. I added some small straight stitched flowers in her hair as well. This is the part where you should experiment with your new skills. Make straight stitches in rough circles to make flowers, blanket stitches to make stems. Whip some things to see how they look. Practice and experimenting are how you will get better at this point.
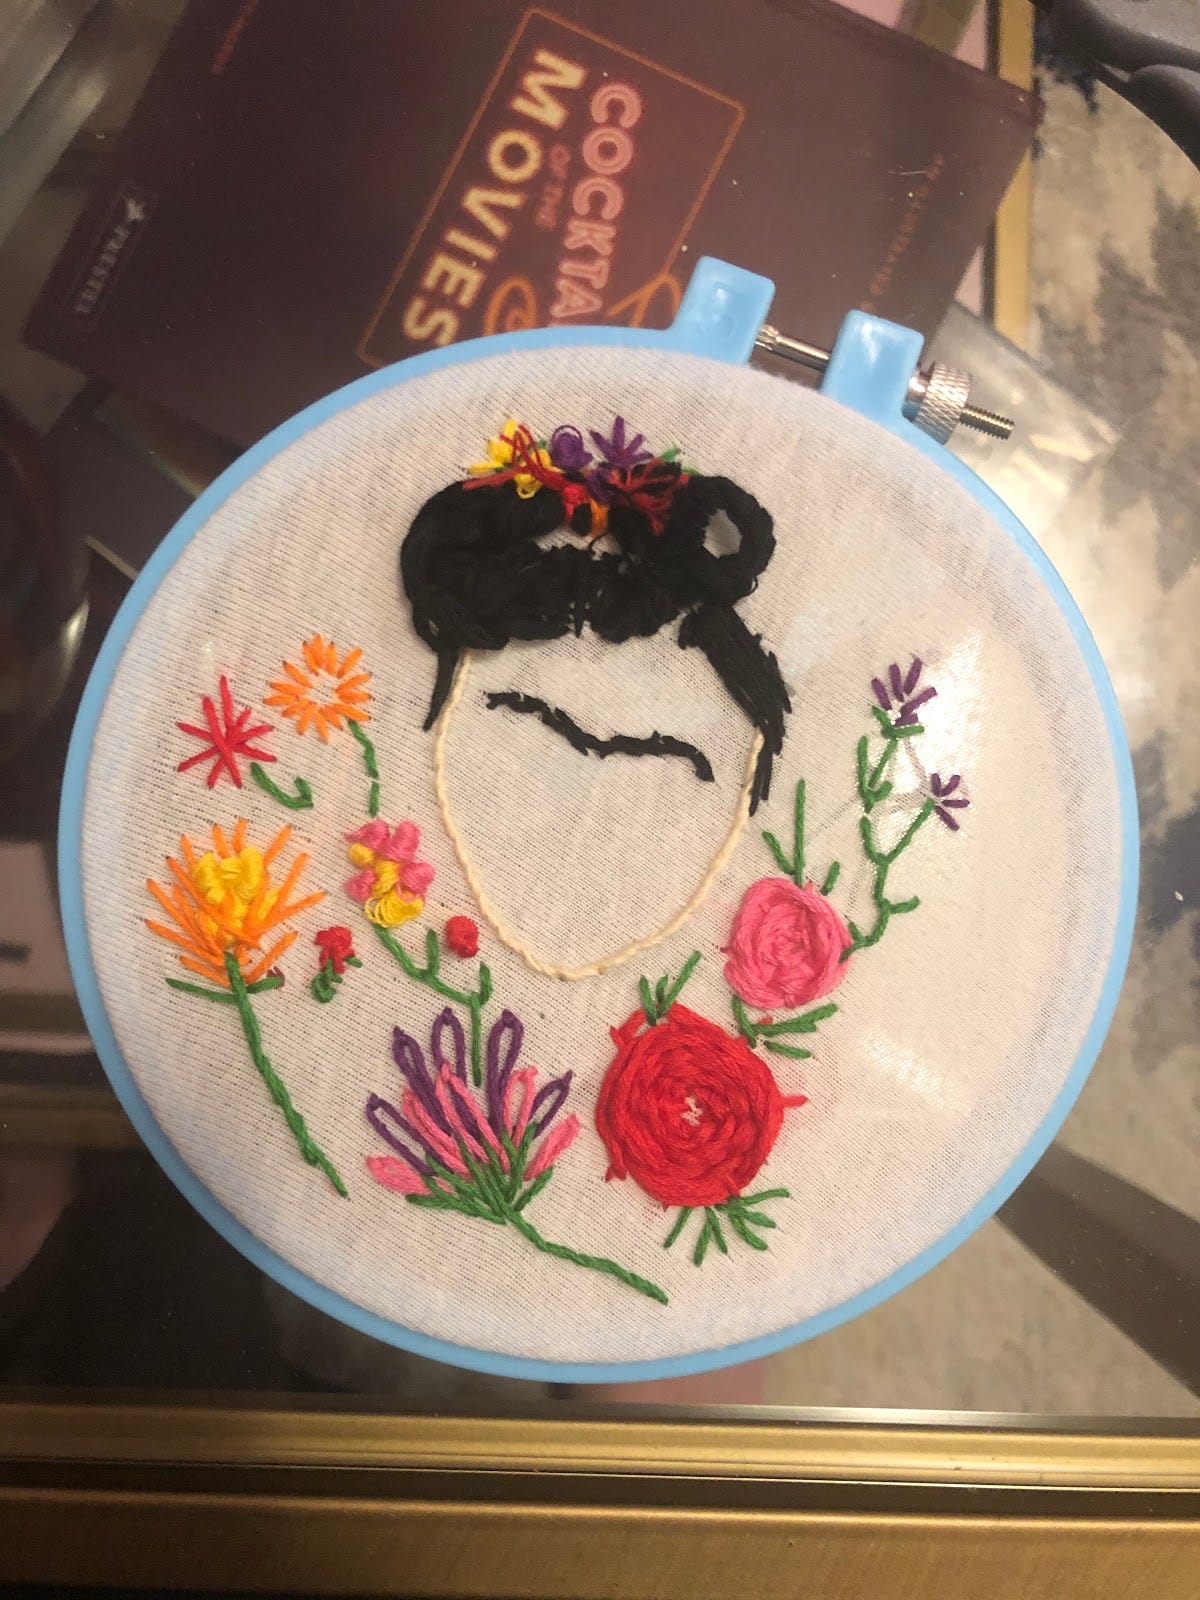
Here is where I decided to finish the piece, but I could have added a lot more flowers. Fill in as much as you want. You can overlap your flowers if you want. It will give the piece even more texture.
After I was done, I cut down the back and took it out of the hoop. Some people keep it in the hoop to display, but personally, I only have one hoop so that isn’t going to happen.
I know this might have been a hard one for some people, I promise the next will be much easier. In the meantime, I’ll sign off with some stuff I’ve been loving. I have been volunteering on a local campaign here in New York. Not to get political on the main, but I don’t like Joe Biden and actually, I am always political on the main.
Instead of getting sad about him becoming the de facto nominee, I decided to get involved in local races. There are so many more races happening right now. If you like me want to support progressive candidates, figure out who is running for office in your state. I have been volunteering with the Lauren Ashcraft Campaign here in New York by phone banking from home. There are a ton of progressive candidates running all over the country who can use your support if you have extra time. If you are quarantined out of state or not sure you will be able to go to the polls for primaries or in November, remember to request your absentee ballots. State rules vary, but you can do it here in New York for both.
Stay safe, stay inside, and stay crafting.
(Or drugs, I am not a narc)
Not signed up yet?