


Mâché Horses, Couldn't Drag Me Away.
Let's get all French and make a mess with these two fun papier-mâché projects.

Bonjour mon culte,
Une fois, je suis allé à Paris et je n'ai vraiment rien pu dire à personne, because I don’t speak French. So why am I starting this newsletter by going full Ratatouille? (Other than my well-documented love of Patton Oswalt.) Well, today we are going to do some Papier-mâché or Paper Mache if you’re nasty.

I am going to do two crafts. Both are pretty simple, but one is foolproof. Both are great to do with kids. One of them is based on the first time I did papier-mâché as a child. The first time I ever did this project, I must have been about 10 and my mother’s girlfriend at the time taught me how to do it and made this beautiful sculptural paper mache horse. That horse is still in my mother’s house on an end table and it’s beautiful.
I probably hadn’t revisited paper mache for at least 10 years before last year when my sketch group needed a Mr. Met head for a sketch we wanted to do. I told them I could make it and was met with disbelief. Little did they know, I could make that head. So today, I am teaching two projects, one is going to be a paper mache horse, the other is the same technique you would use to make a mascot head, but for a probably more useful everyday object, a bowl.

Comedian Mark Volinski on 29th st. with the Met head
At the heart of any good paper mache, there is a skeleton or armature. Both my horse and my bowl will start with a shape. For the horse, I used two-wire hangers that I had to get rid of because as we all know no wire hangers. No WIRE HANGERS EVER. I used pliers to take apart and then shape the wire. You don’t need pliers, but it does make it easier to manipulate the wire. If you have a softer wire, like a crafting wire, it works better, but I am all about reuse if you can.
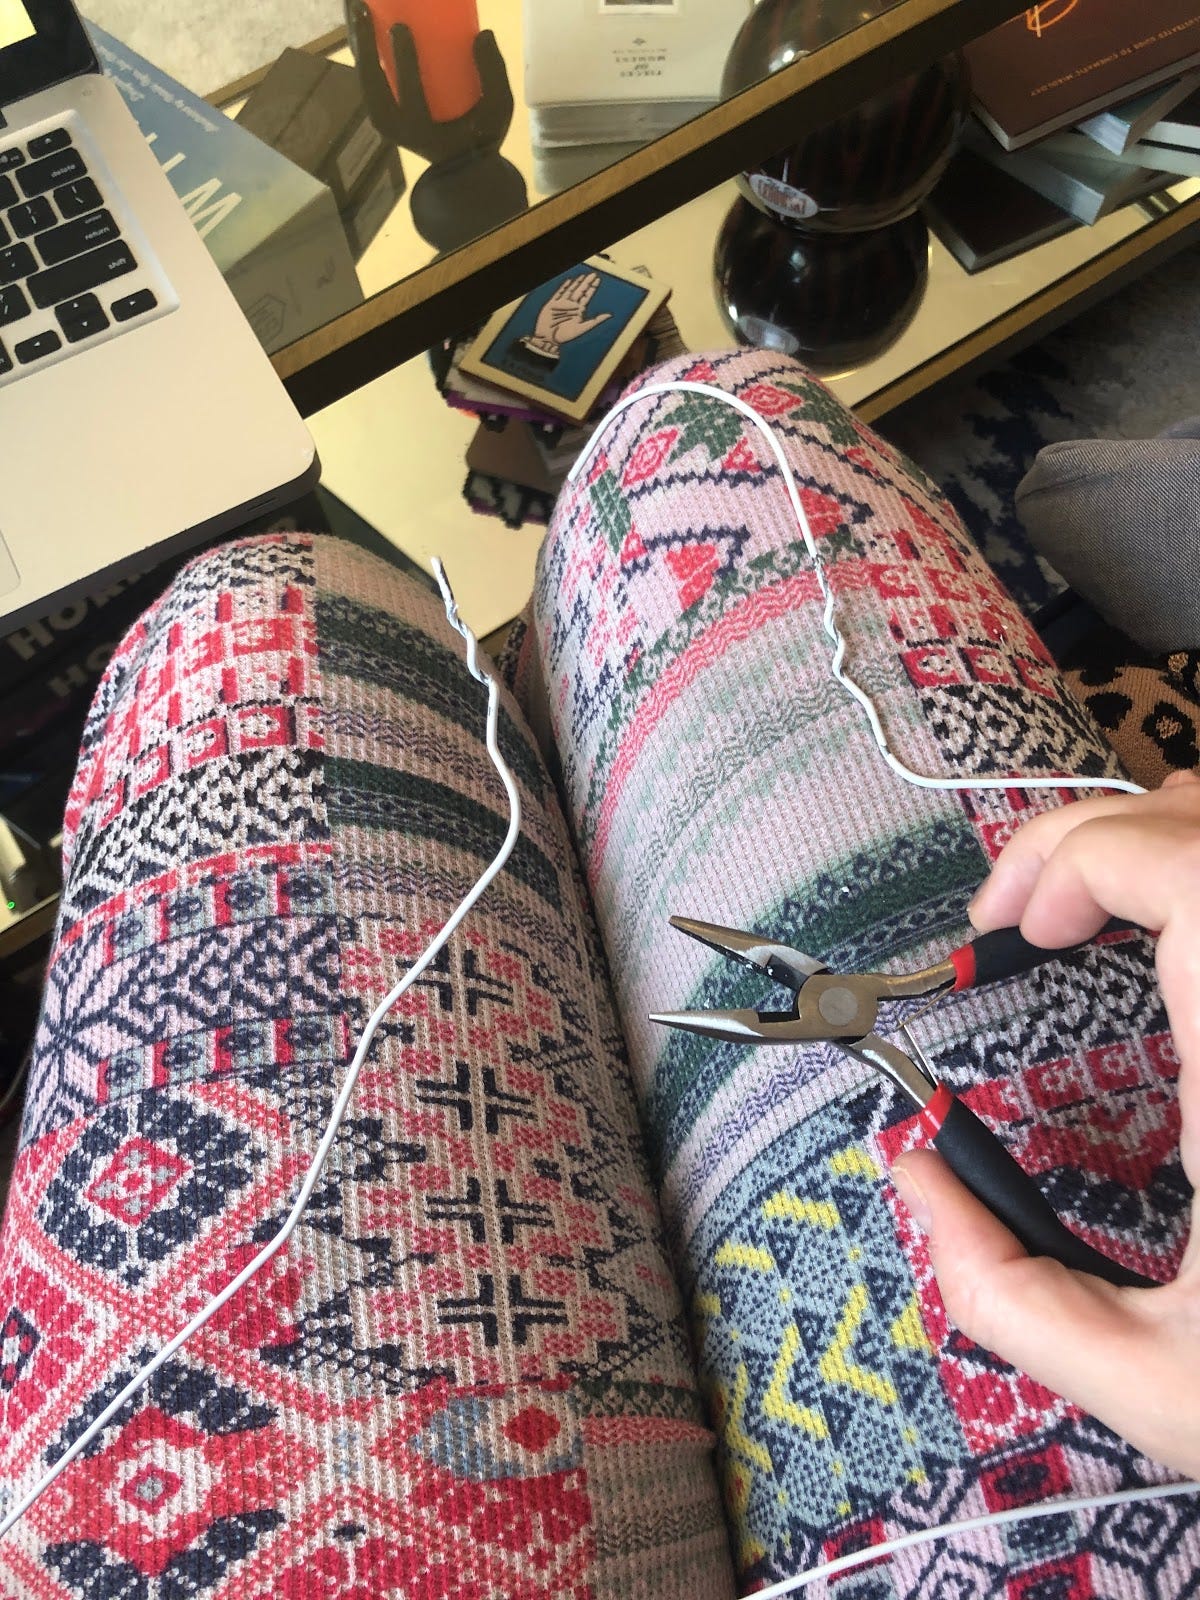
Once the wire was undone at the top of the hanger, I started shaping it into roughly a horse shape. I first did the one side of the head, then the back legs, then the tail.
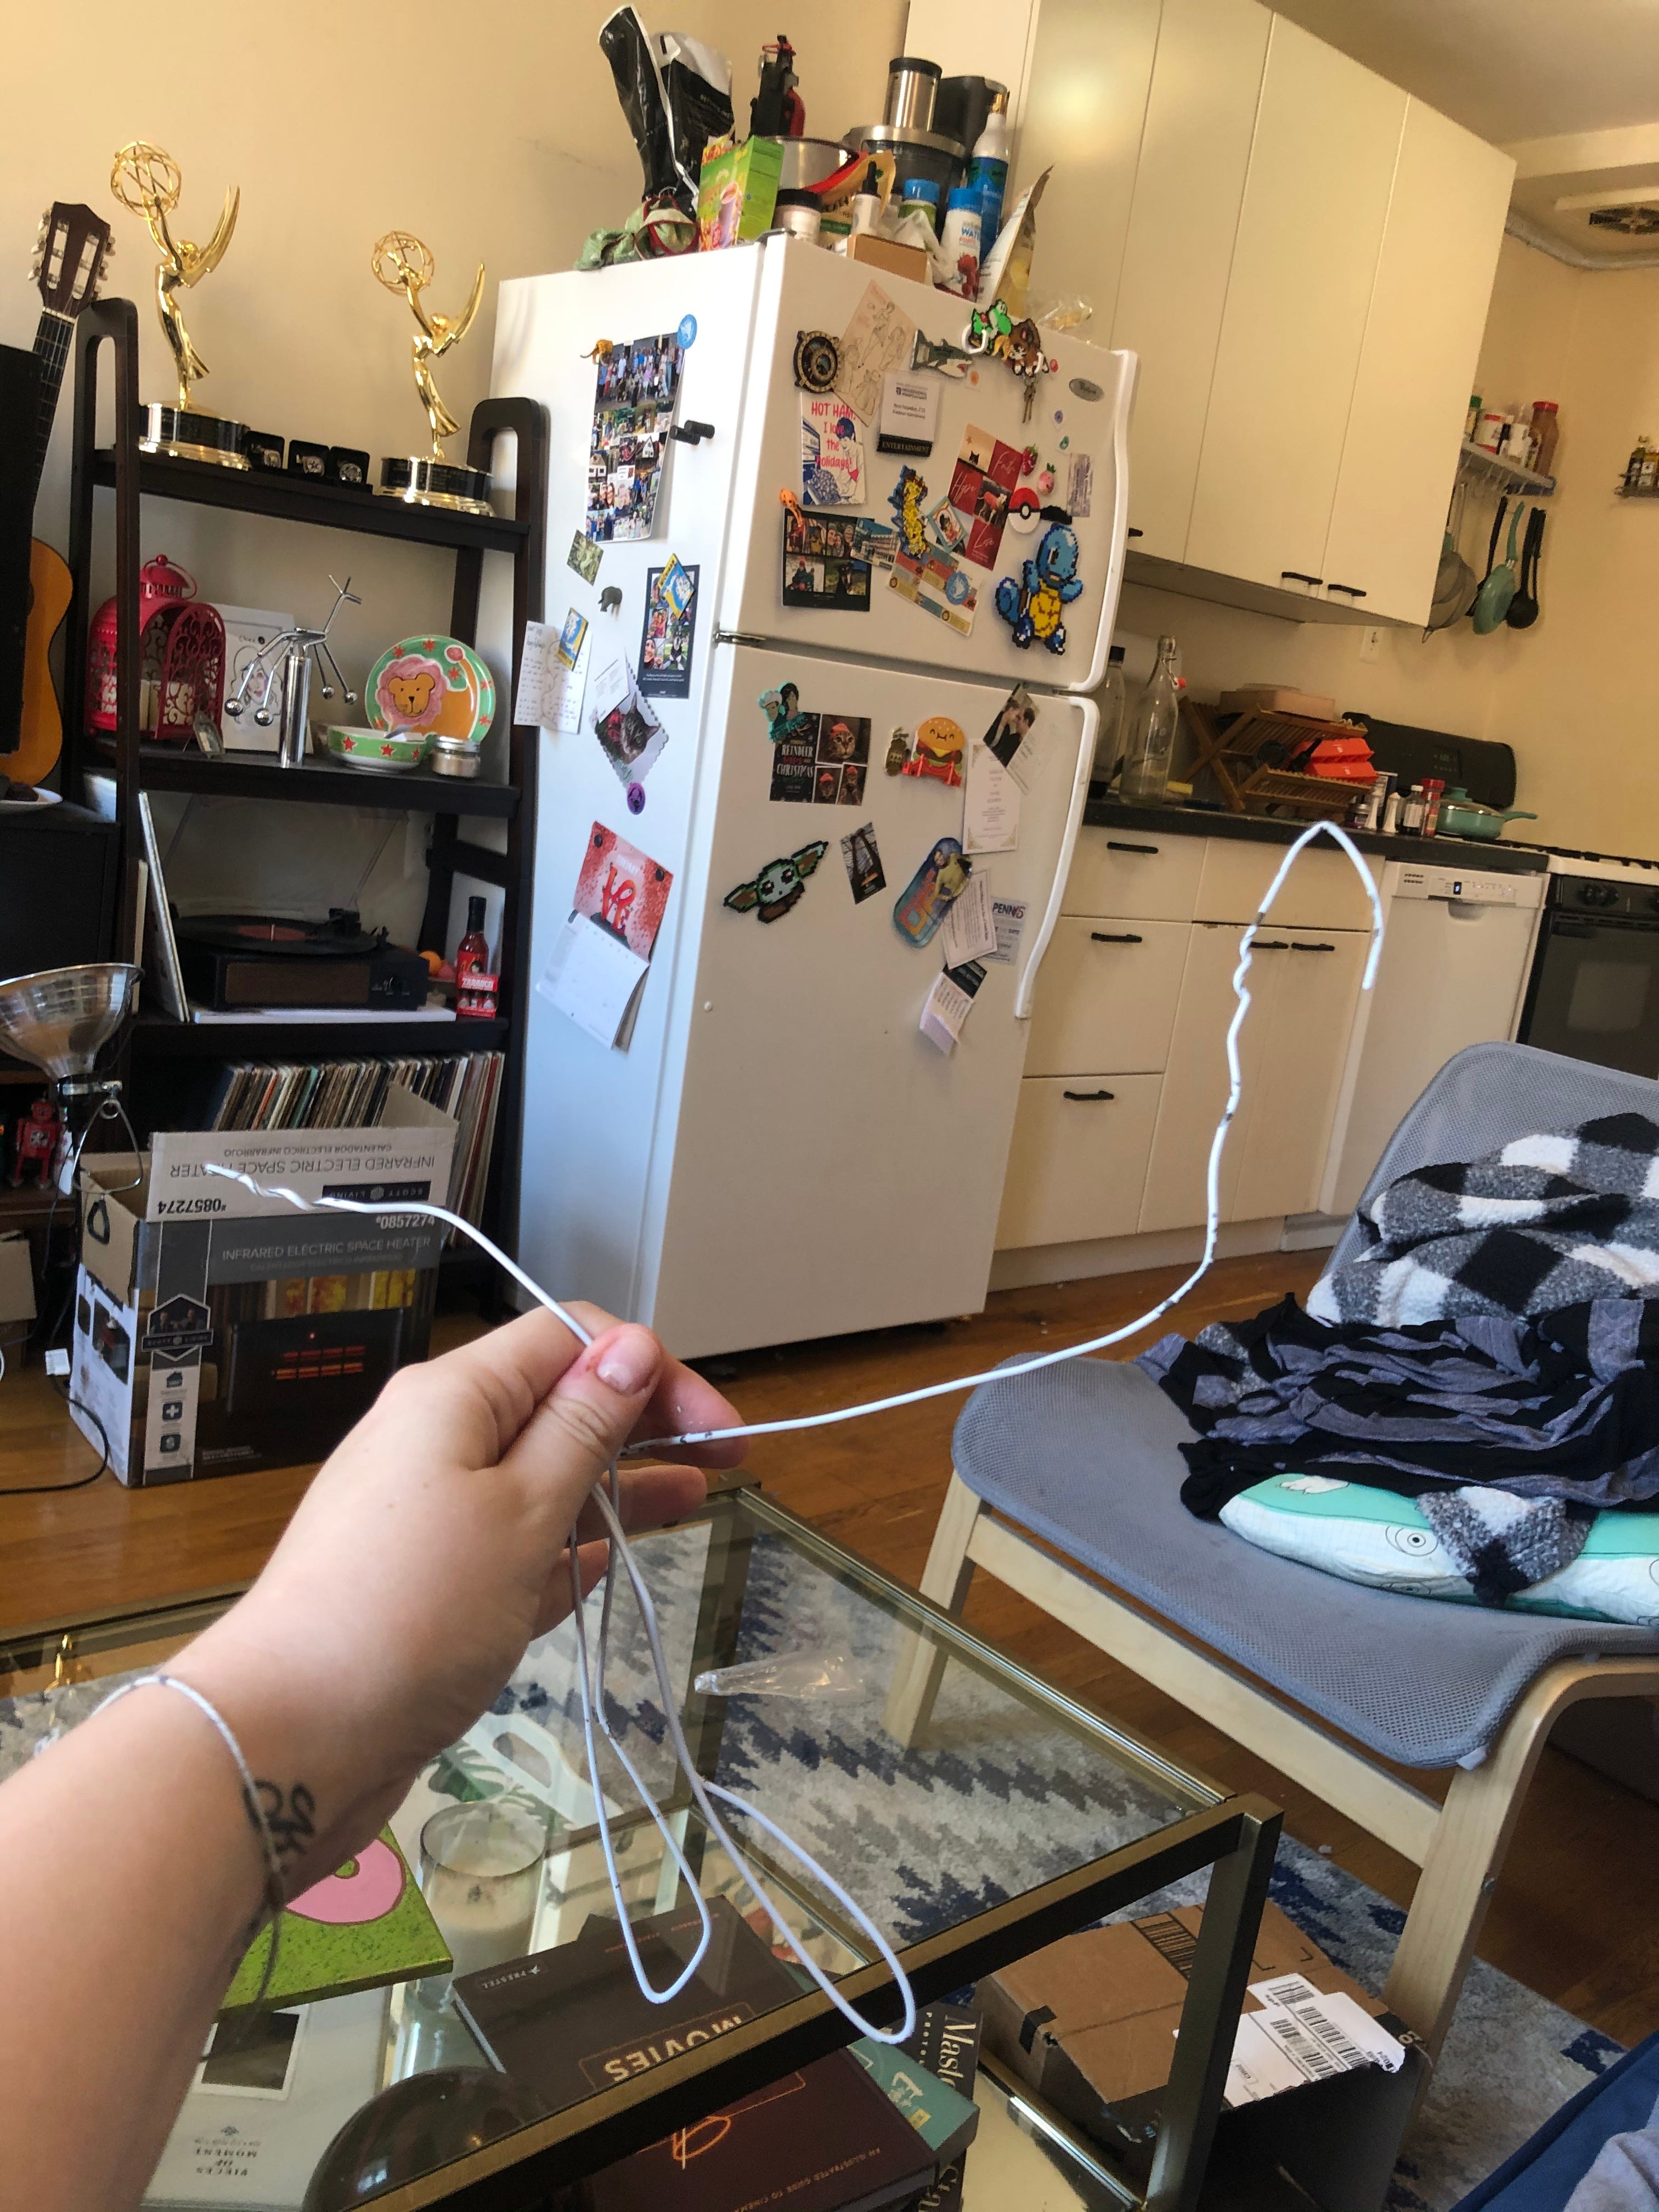
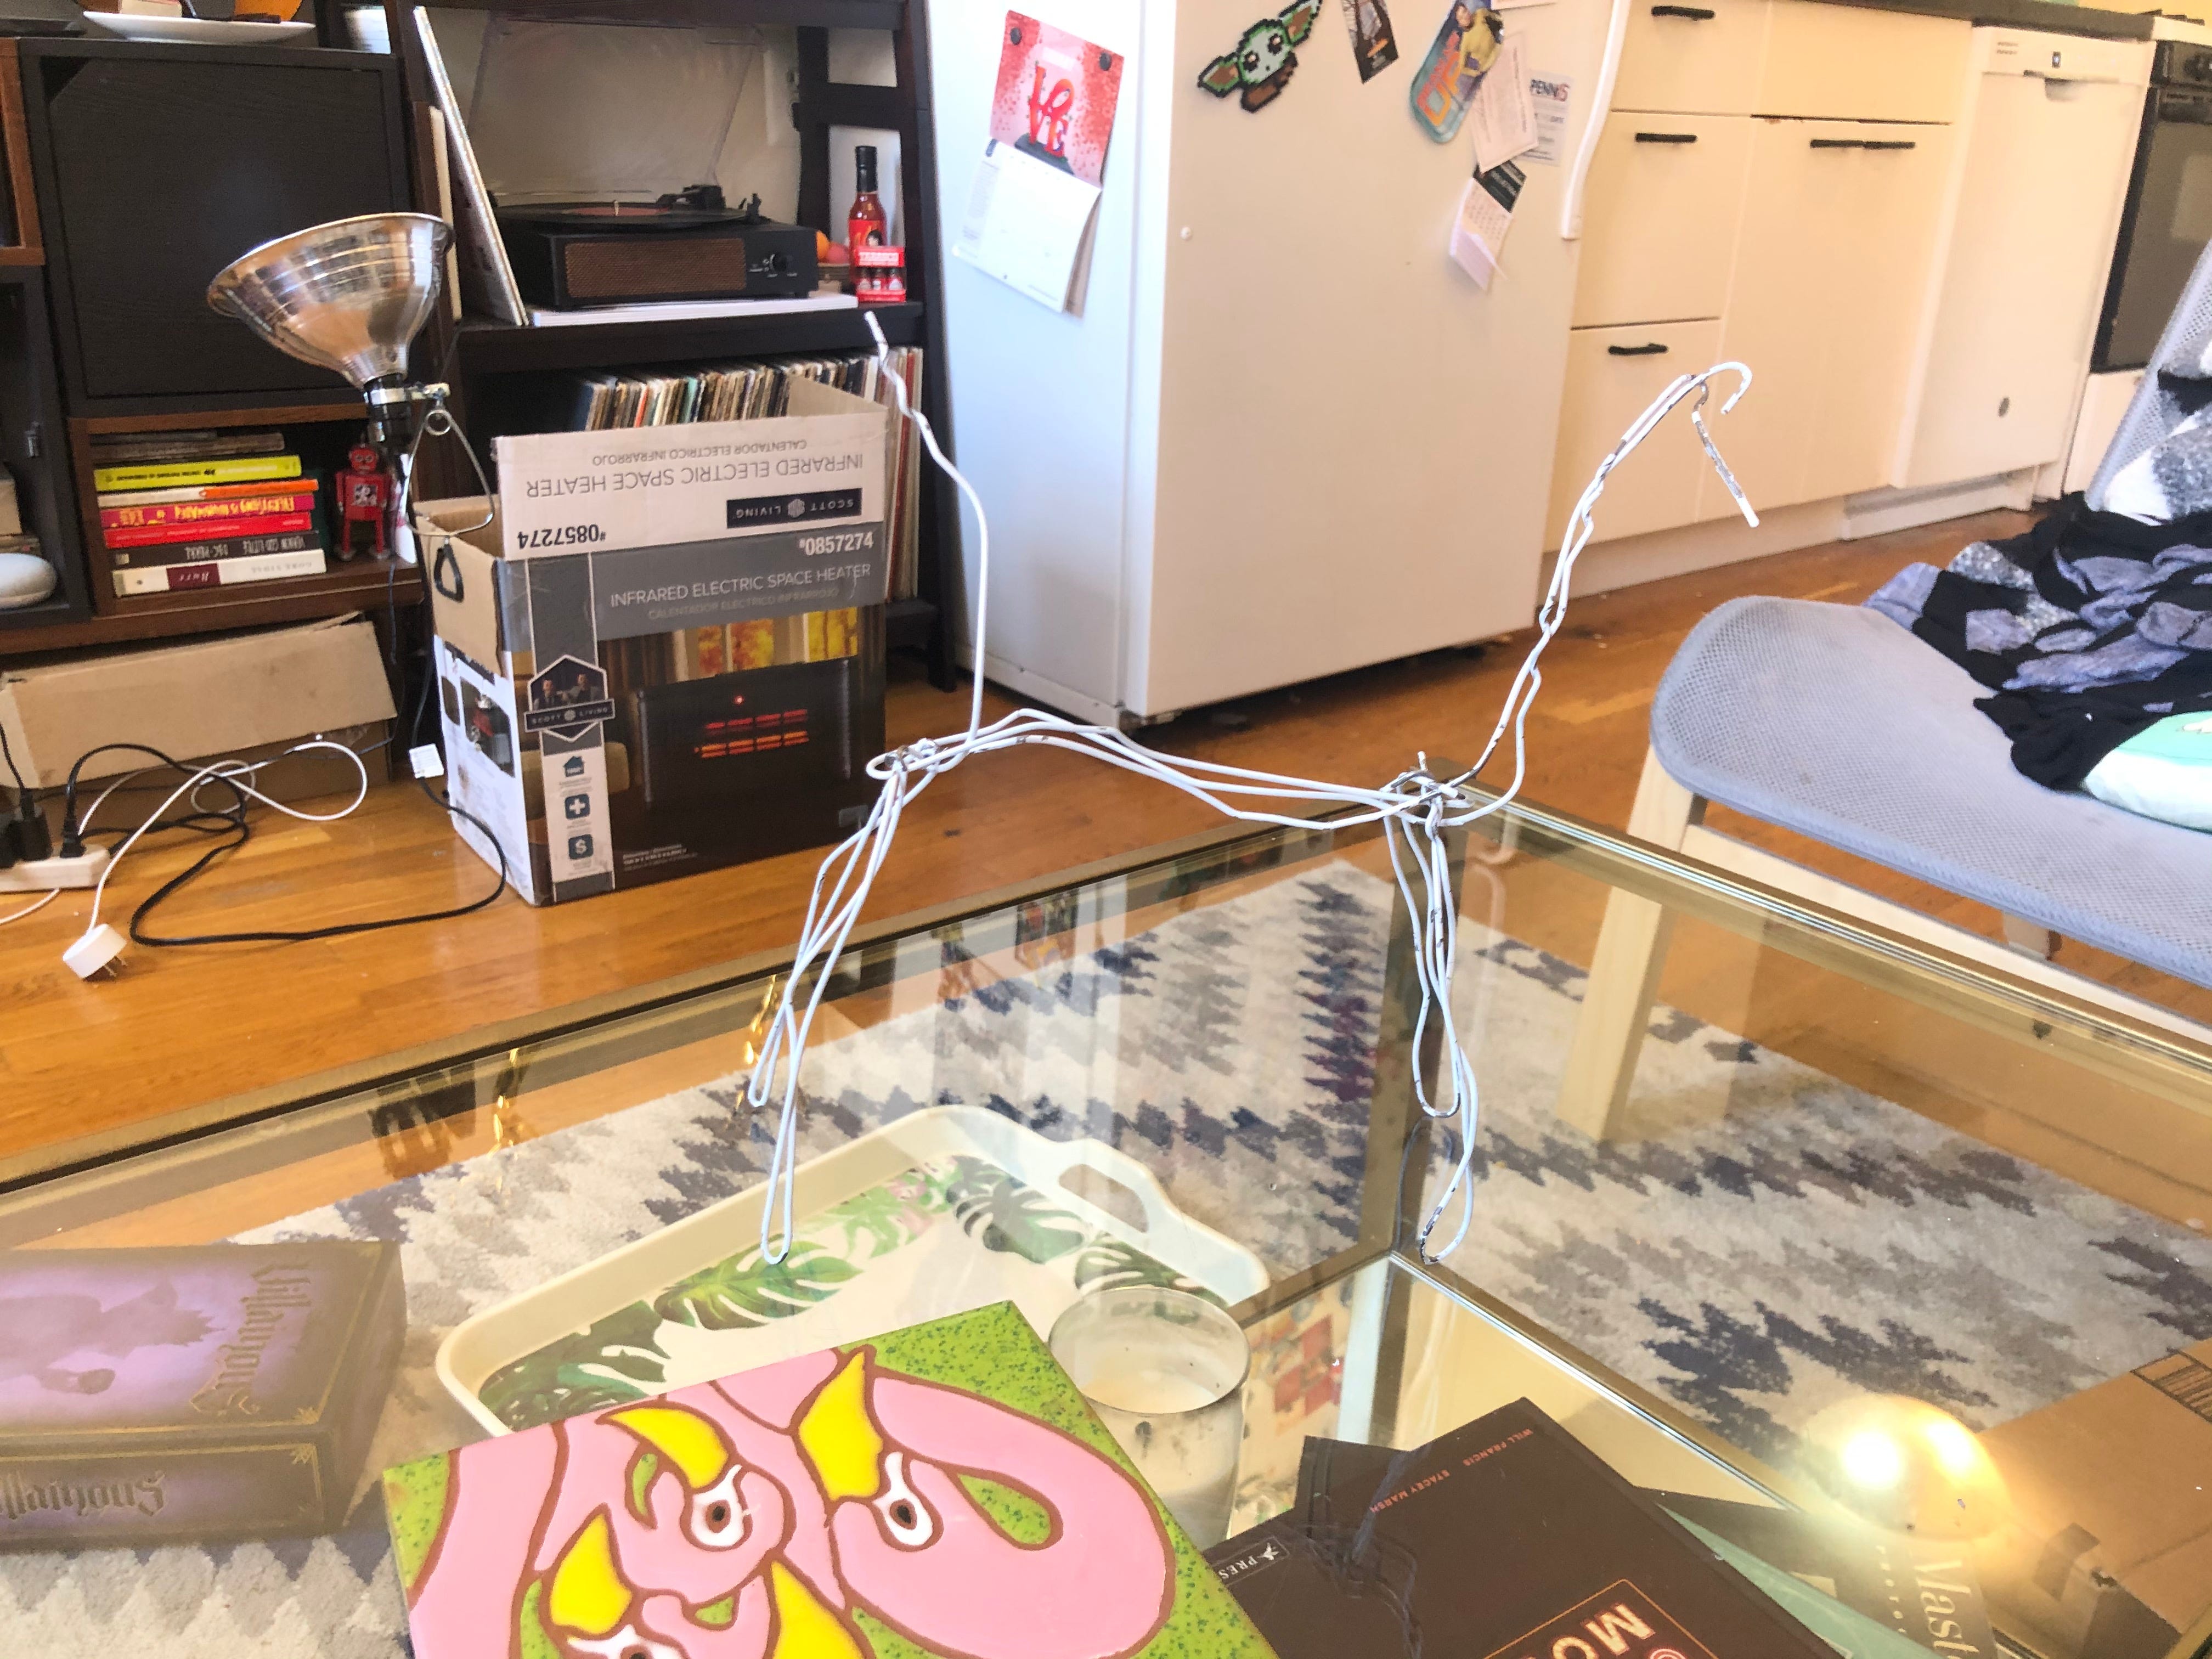
I then got my second hanger and shaped the front legs and the other side of the head. I used the unused length of wire to strengthen the body and connect the front and back legs. At this point, I thought it kind of looked like a Jeff Koons Balloon Dog. Which honestly, would be a great paper mache project, but not what we are doing today, so I tightened parts of the wire with my pliers in the hopes of making it more like a horse.
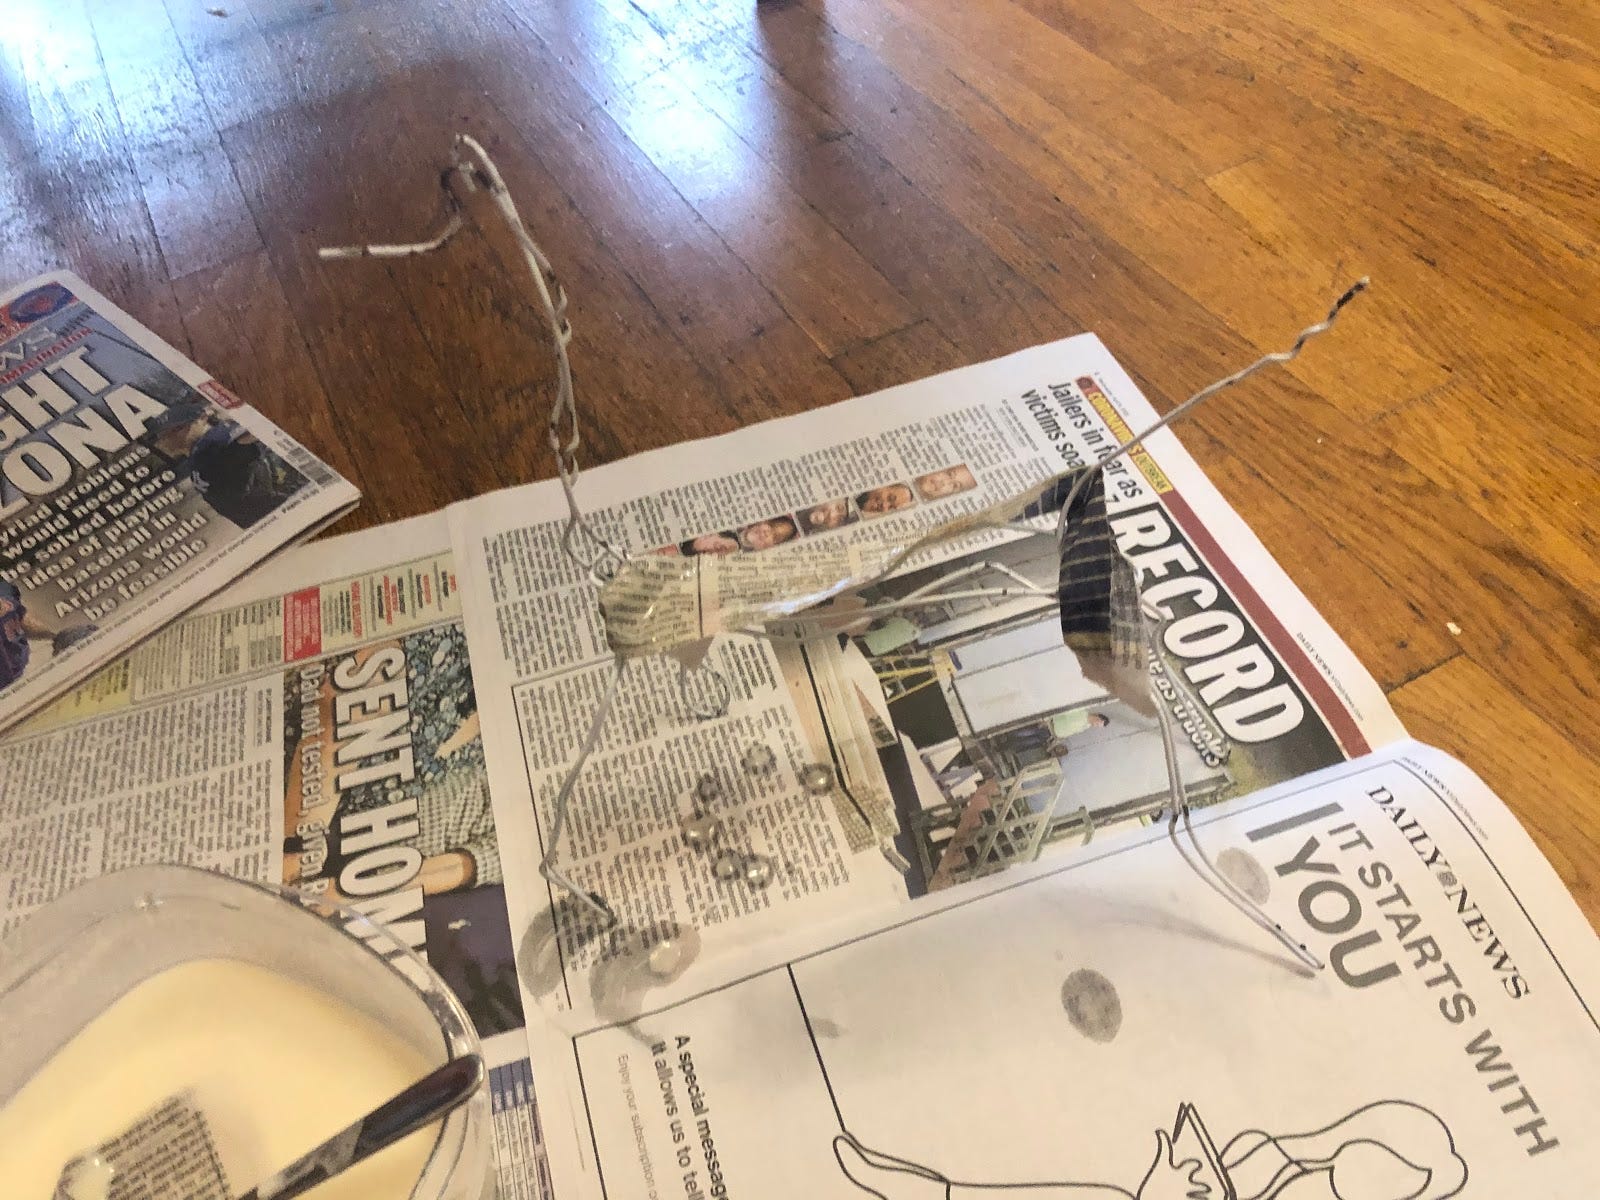
Once I was happy with my skeleton. I was off to make the paste solution. Now, as you have probably realized by now, I have an insane amount of crafting supplies in my apartment, but strangely enough, I did not have Elmer’s glue. I found later that I did have tacky glue, but not in time for this. Most people make paper mache with glue or paste, but you don’t need glue if you have flour.
It’s a real old school way to make paper mache, but if you take 1 part flour to two parts water and whisk them together, you can make the paste. Make sure to get out all the lumps.

I did an extra step of putting the paste in the microwave. Technically, you don’t need to heat this mixture, but if microwave for 2-4 30-second intervals, stirring in between you get a really nice, thick, strong paste.

If you microwaved your paste, let it cool for a while before use since it will be hot. While you are waiting, rip up some old newspapers into strips (it feels good to rip up the news these days anyway.) When your paste is cool, you are ready to start paper mache-ing.

Let’s start with the horse. Take your strips, dip them into the paste, squeeze off the excess paste, and start adhering them to your wire. Add layers to build up certain parts of your horse. This is arguably the most artistic step. I focused on the neck and body/hind legs, but feel out where you think the strips should sit. The first layer is the hardest to get on since the paper sticks better to itself than the metal. The first layer can be messy, you will have much more control over the second and third.
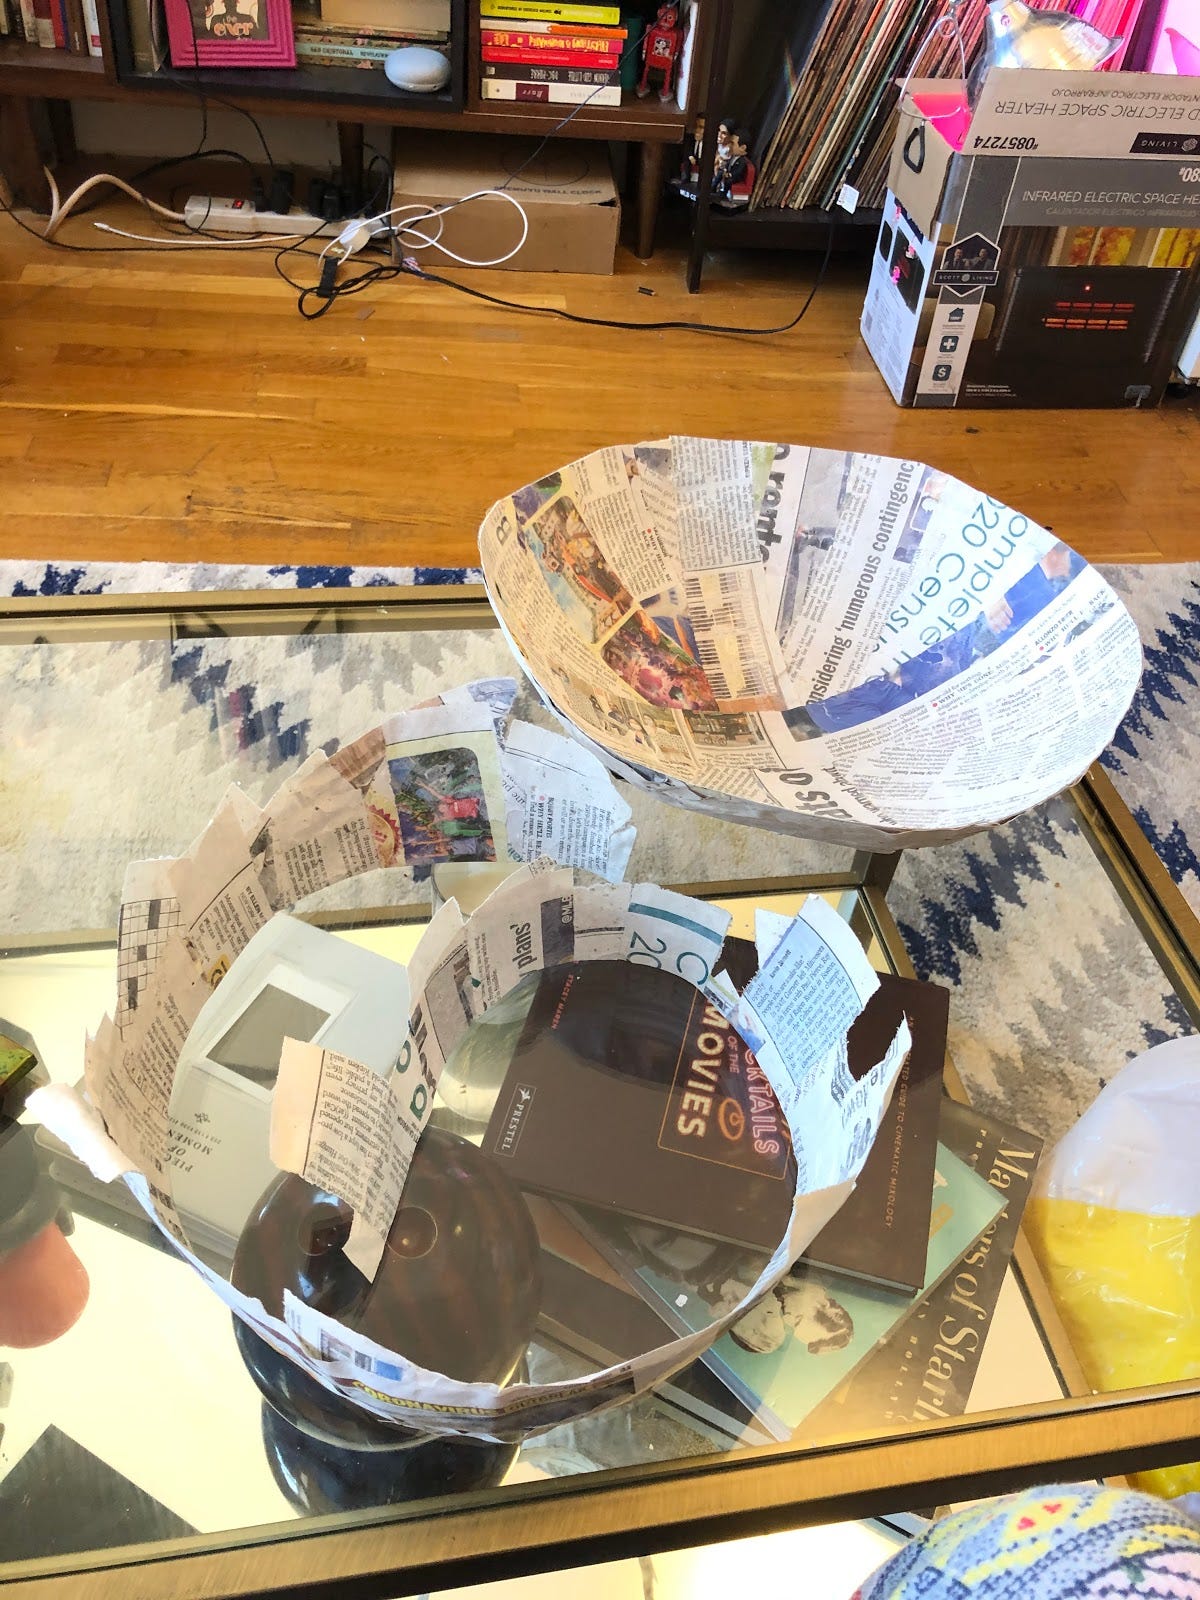
If this seems too hard or daunting. Let’s talk about my second project, the bowl. I didn’t talk about the armature for the bowl and that’s because, you don’t need to make it, you just have to blow it up To start your bowl, get a beach ball or balloon. This is going to be used to make the curve of your bowl. It’s helpful to balance the ball of something. I used an old pot steamer.
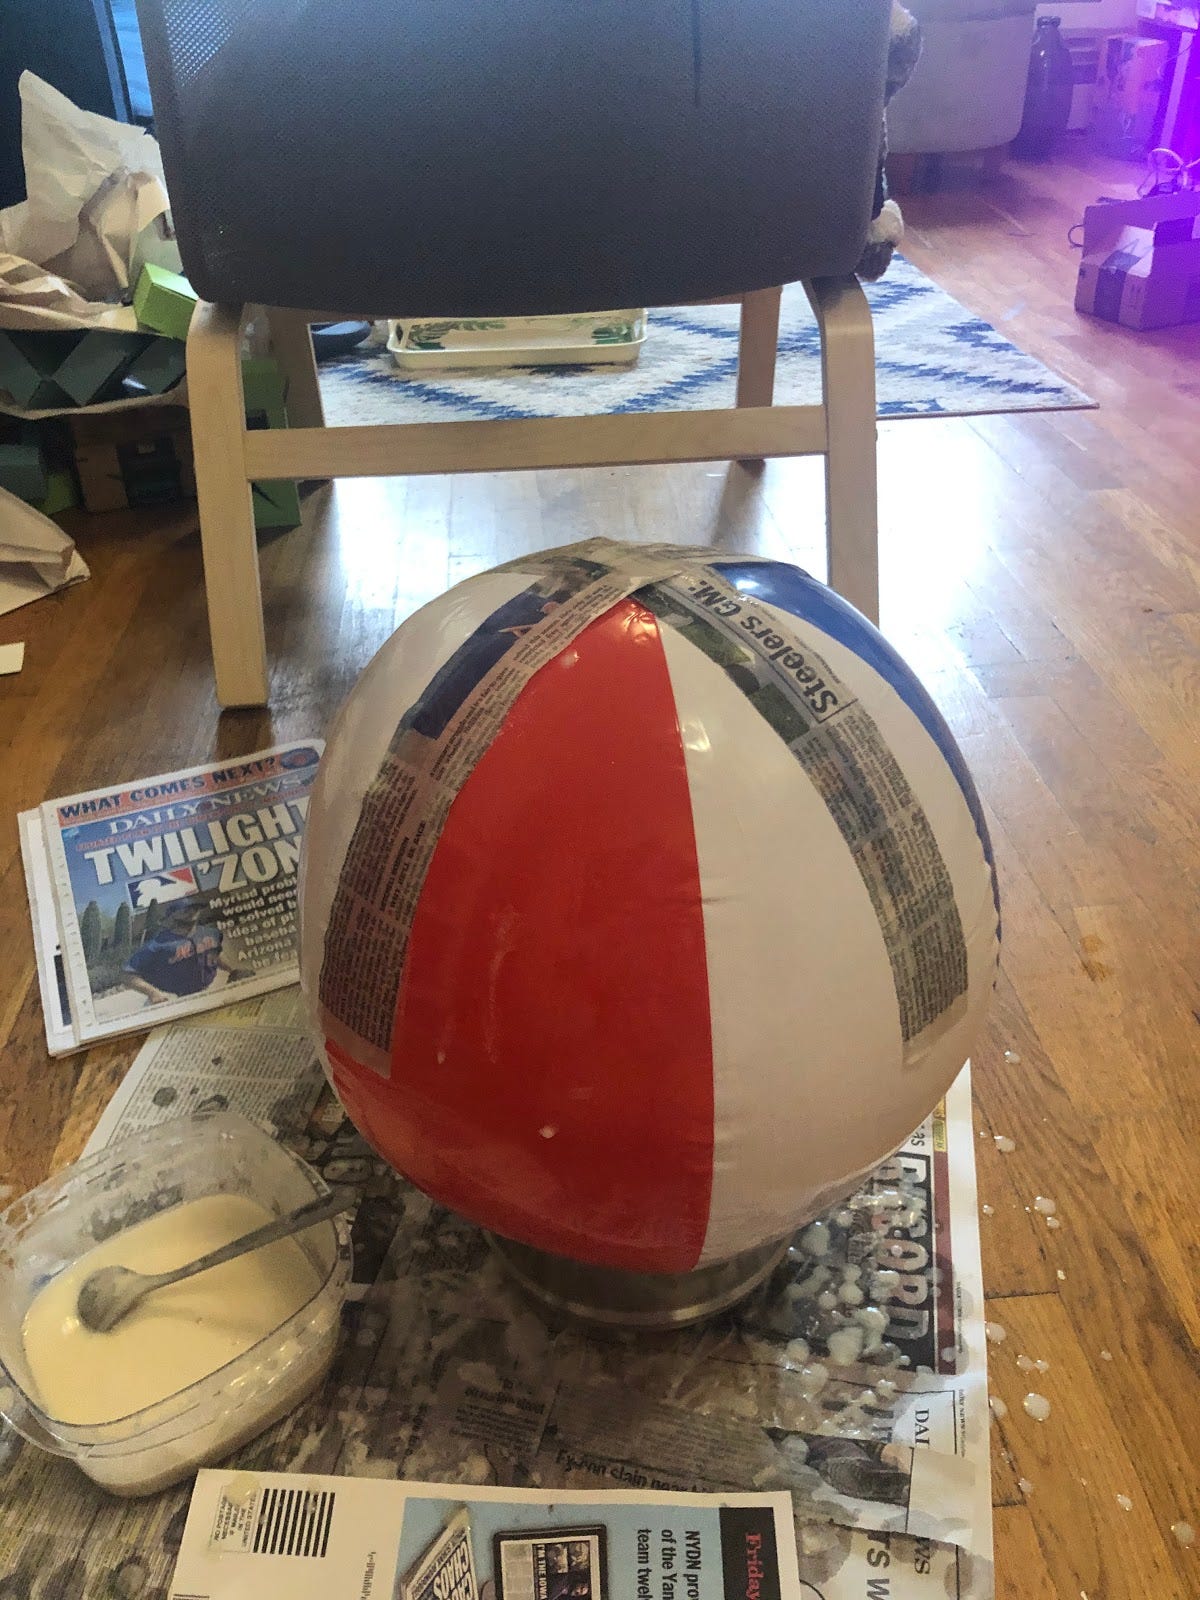
Add strips of pasted paper to the top of the ball. You should aim to have several layers with no gaps. It is easy to start with laying the strip so that the center of the strip is on the very top of the ball and then adding the next strip in the same way but at a perpendicular angle to the strip you just laid. Continue this process until the whole top is covered. You can then add more strips around the sides to make your bowl more sturdy.
As you can see from these pictures, this is a messy process. I would throw down some paper under where you are working and be prepared to clean the floor after. If you use flour instead of paste, it’s easy to Swiffer off.
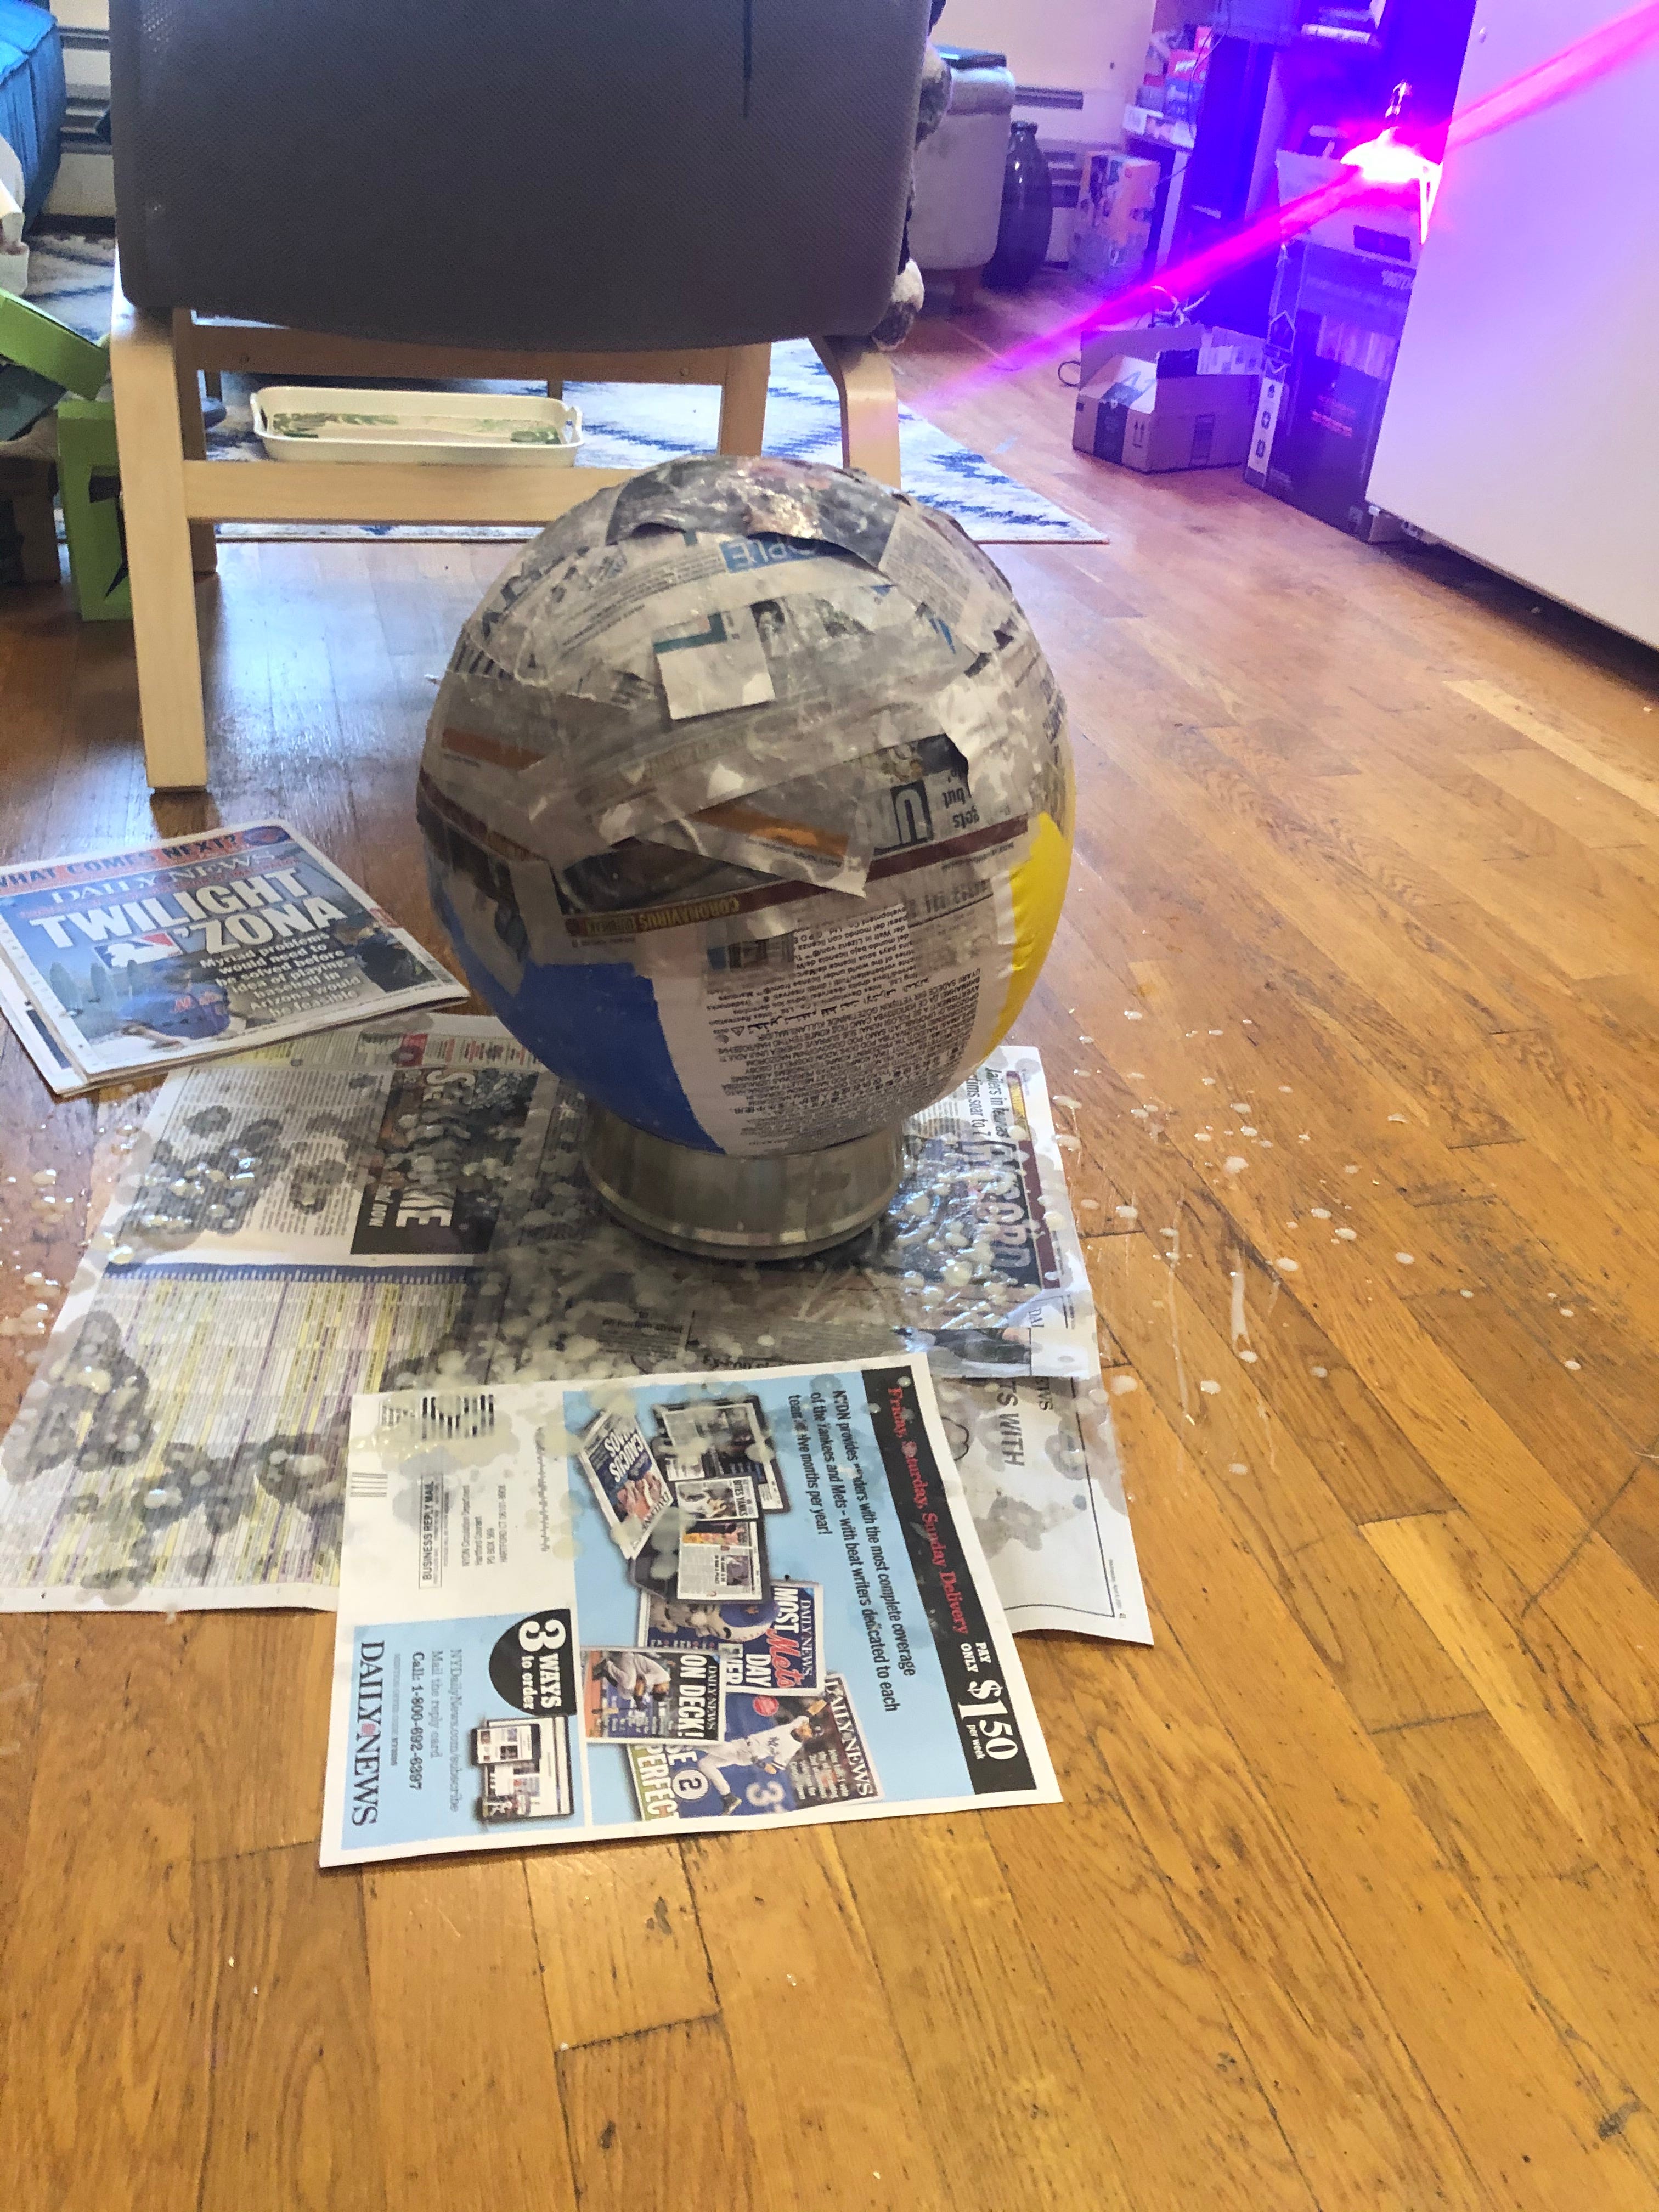
After you are done, adding paper, let your pieces dry for at least 24 hours (mine took closer to 42, which is why we did a bank craft before this). Sorry, I didn’t take more photos of the horse getting made, my hands were a nightmare and it was hard to touch my phone.
The less paste you squeeze out of the stips and the number of strips you used will affect drying time. It can take up to 3 days if your piece was really wet. Wait until it is completely dry to decorate your piece.
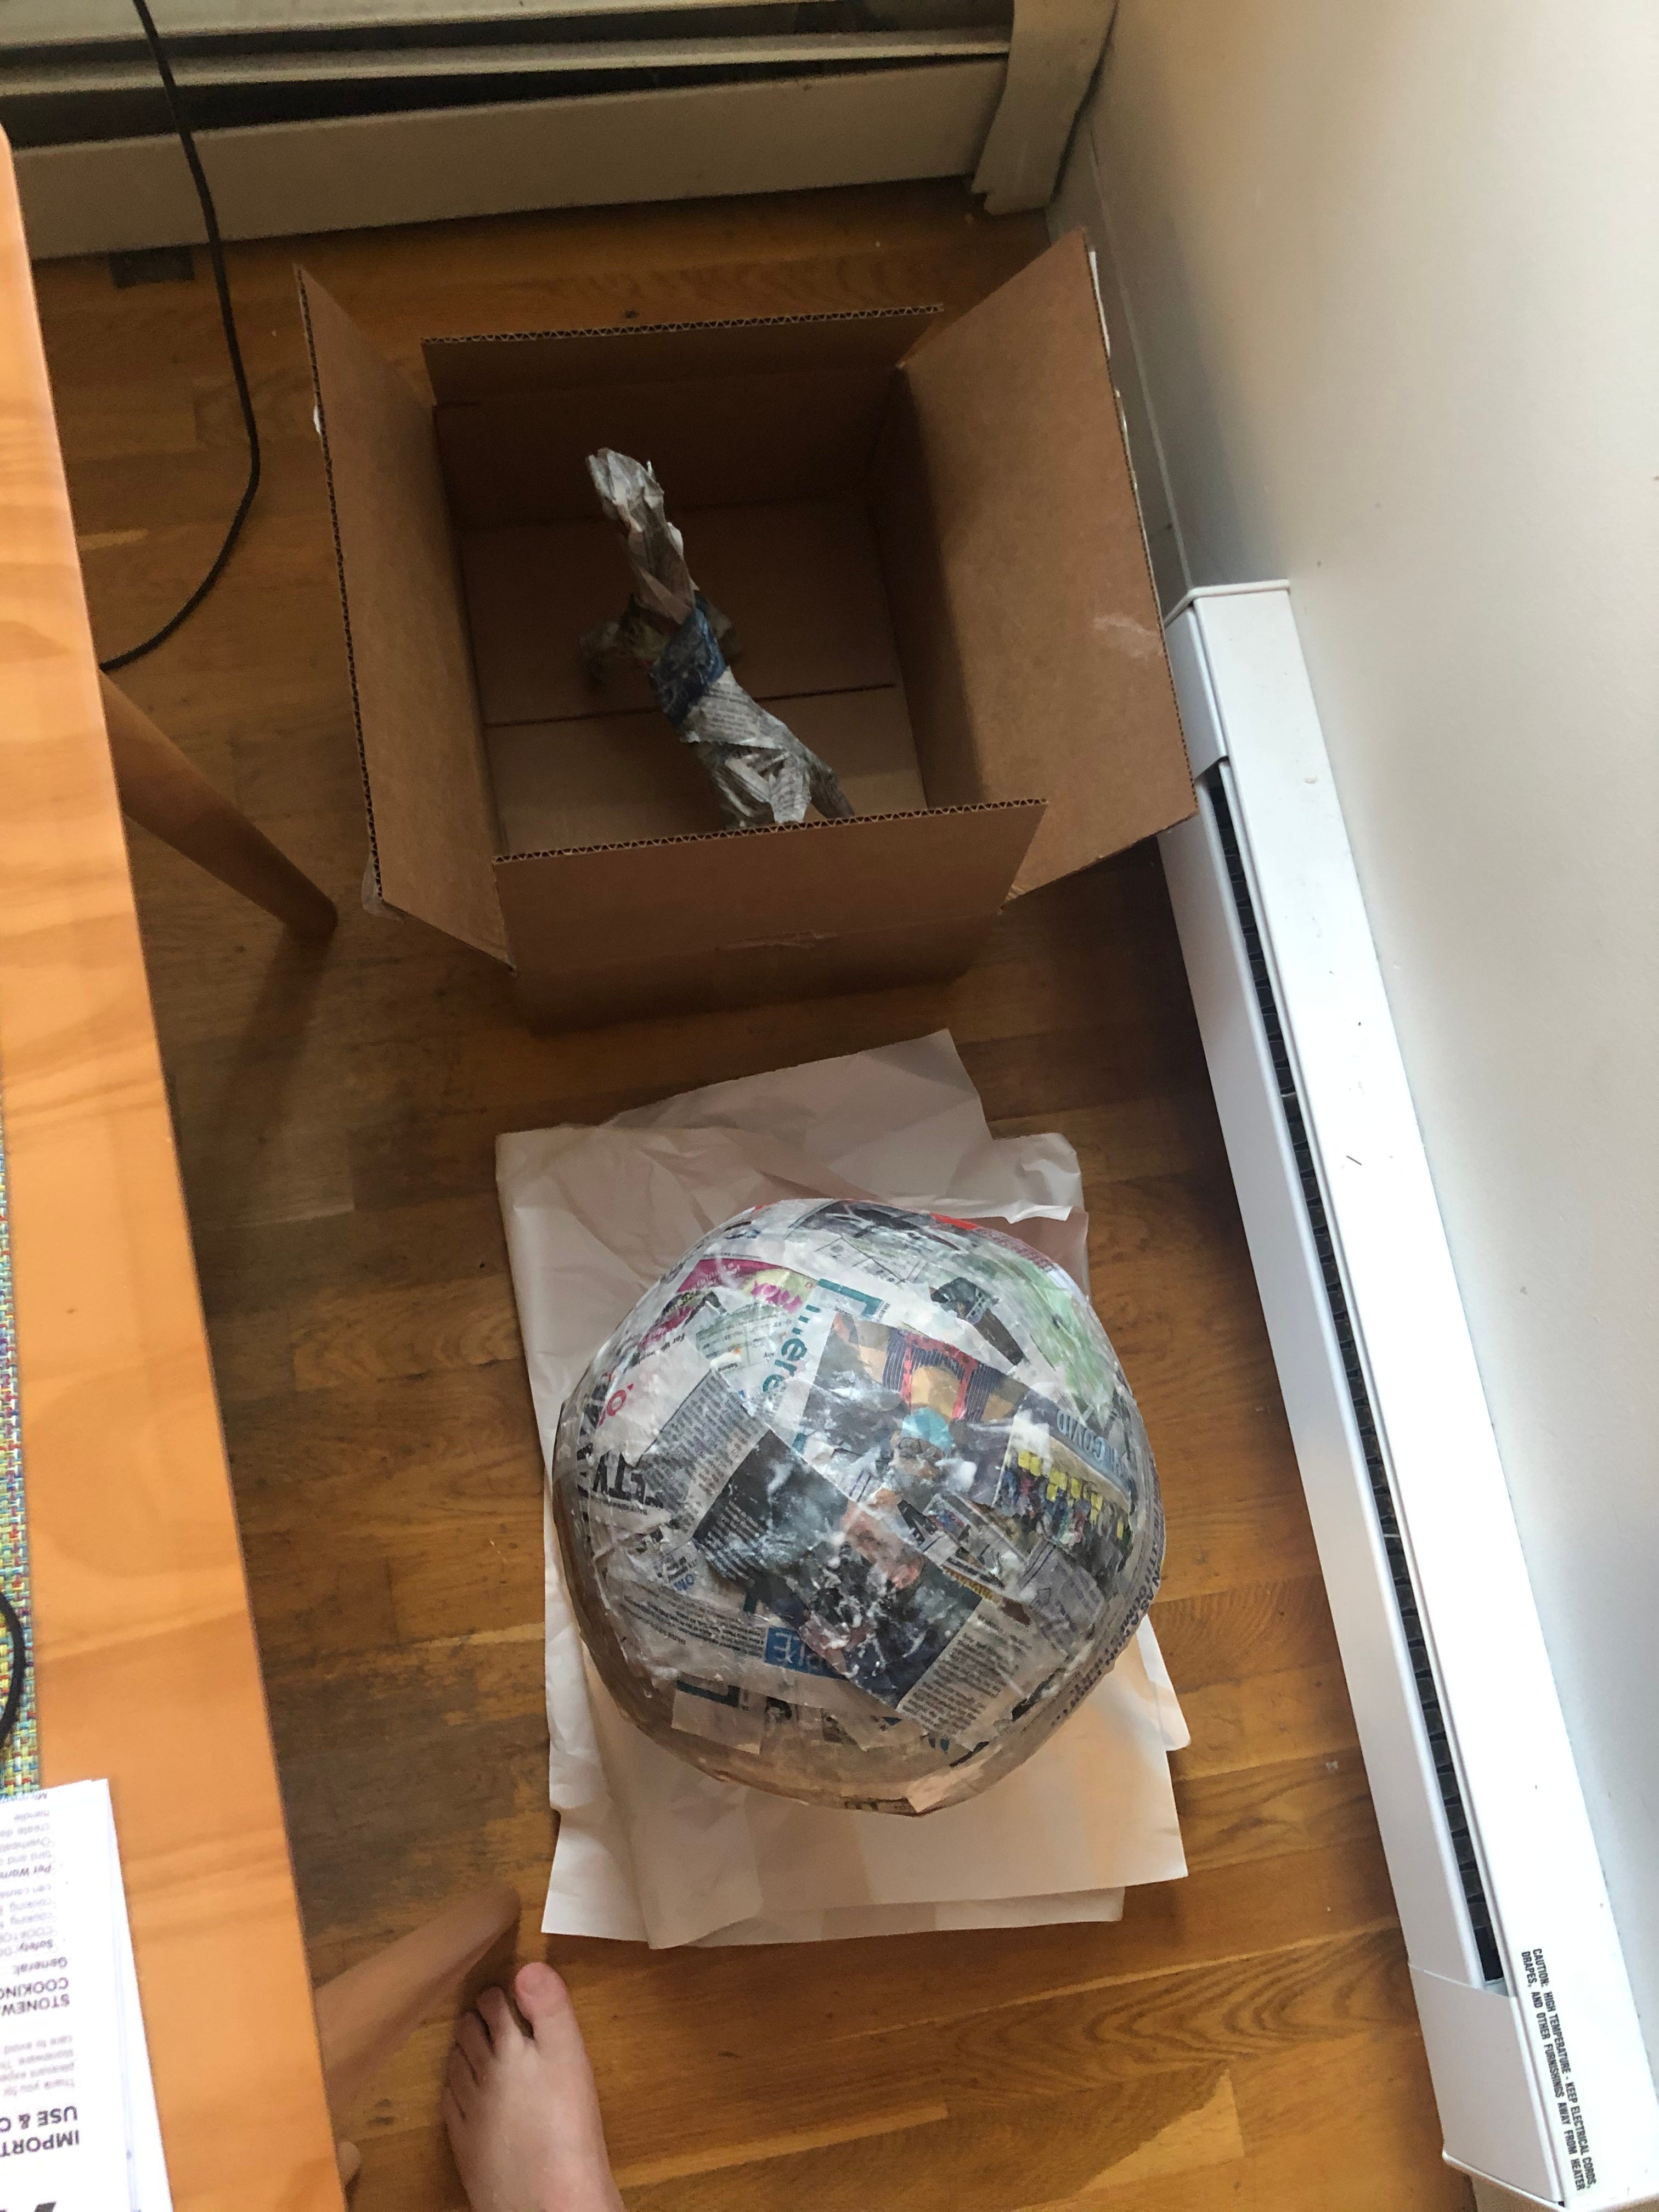
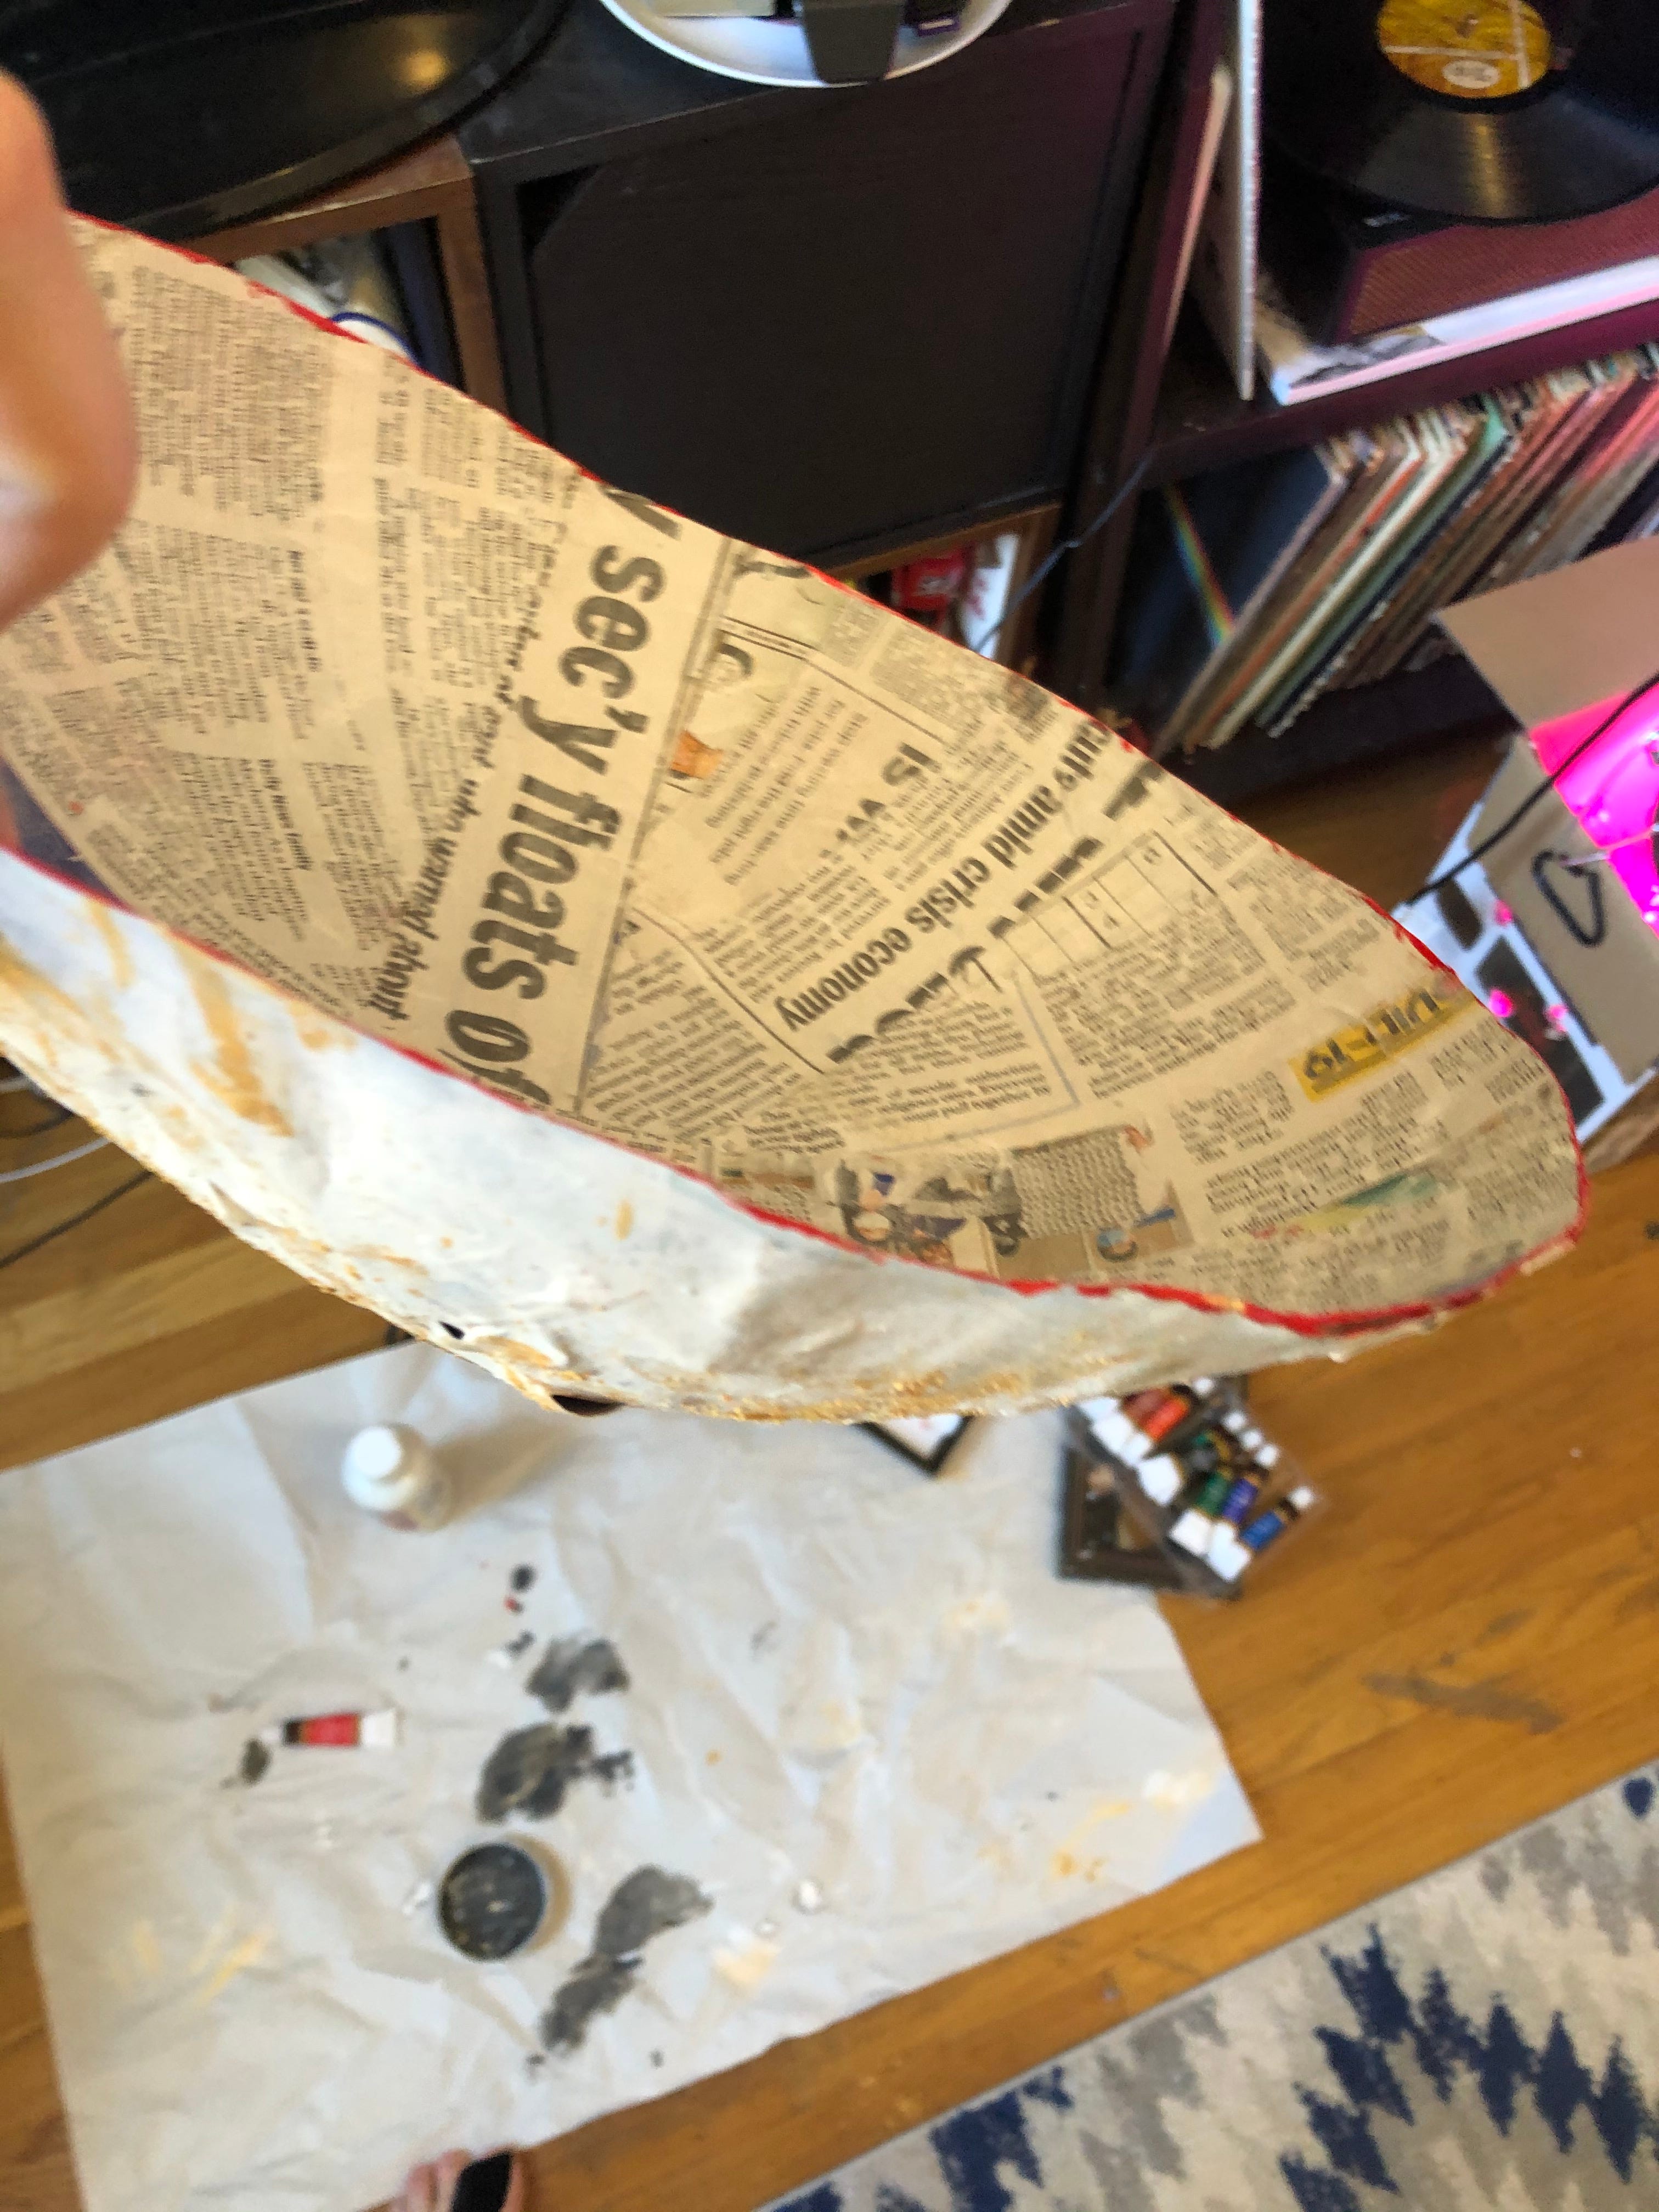
The skeleton of the horse stays inside the finished horse, but you have to get detach of the balloon or ball from your bowl when it is dry. Let some of the air out of the ball slowly. As it deflates, it will pull itself away from the bowl. When your bowl is free, you can wash off the ball and keep it.
Once my bowl was out, I decided to cut it down. You can keep it as is if you want a more organic looking bowl.
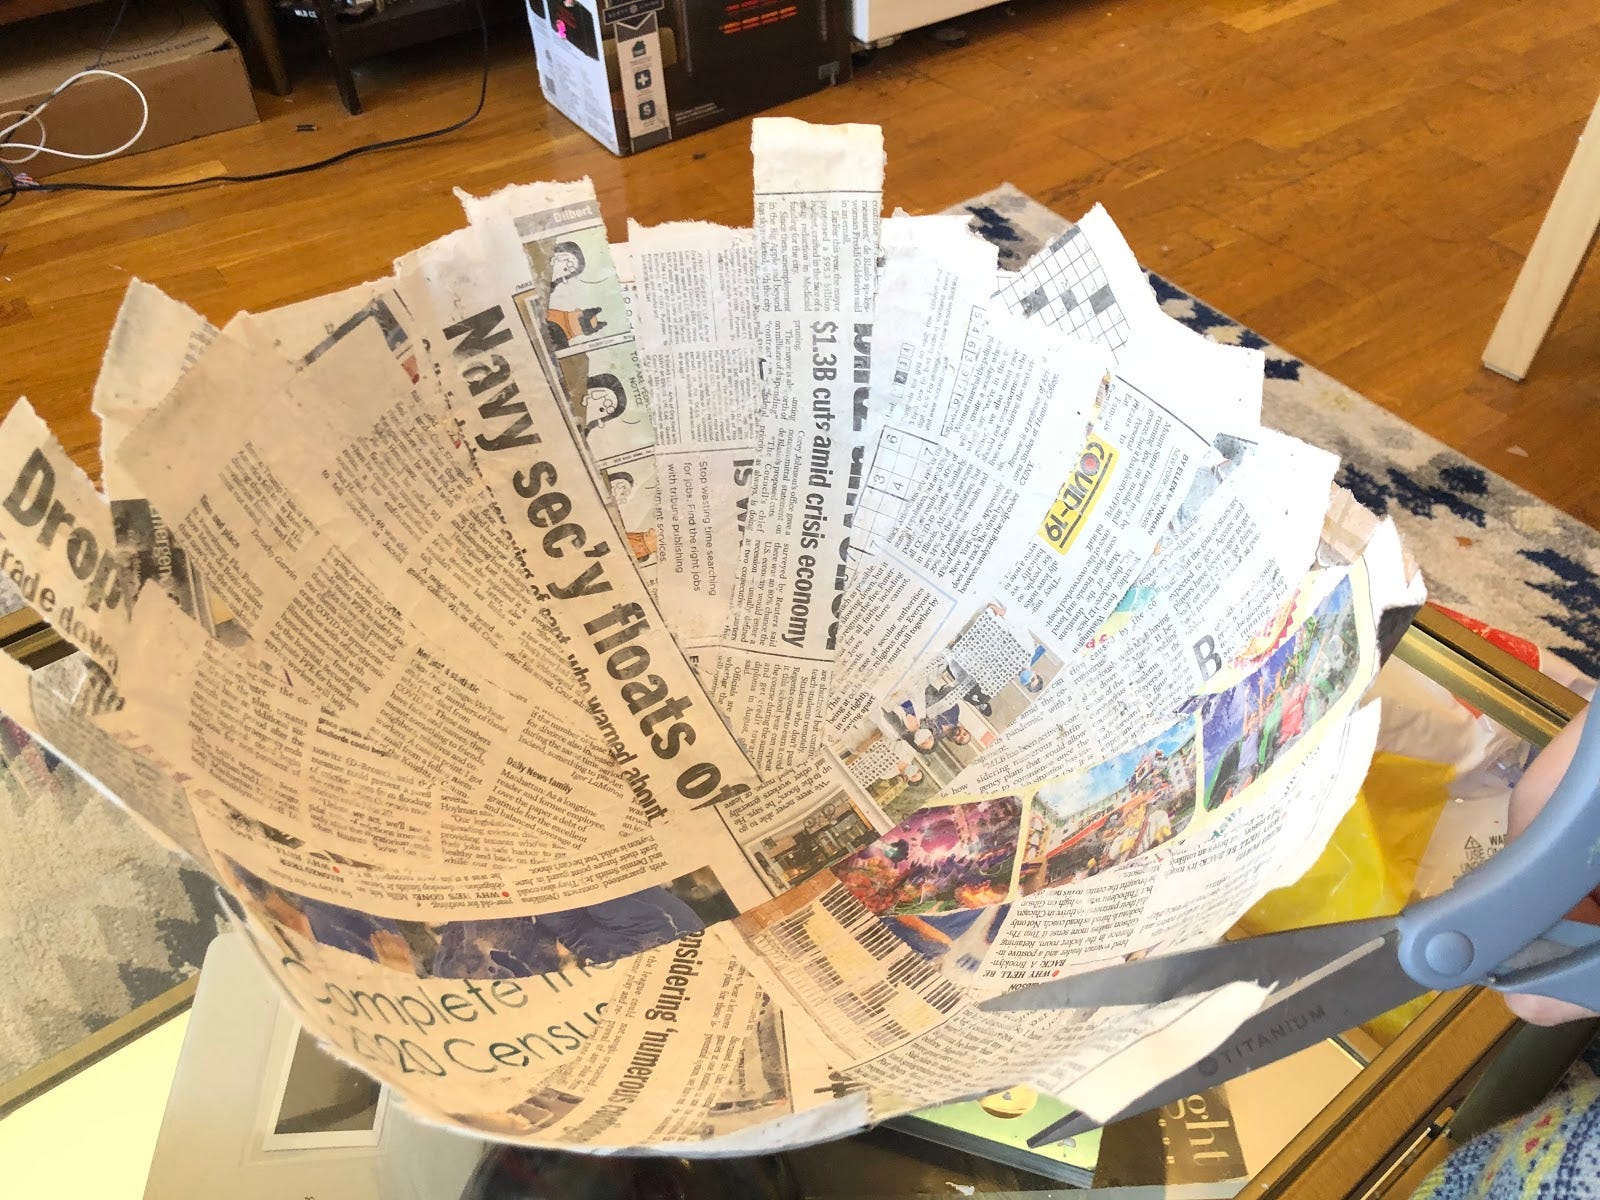
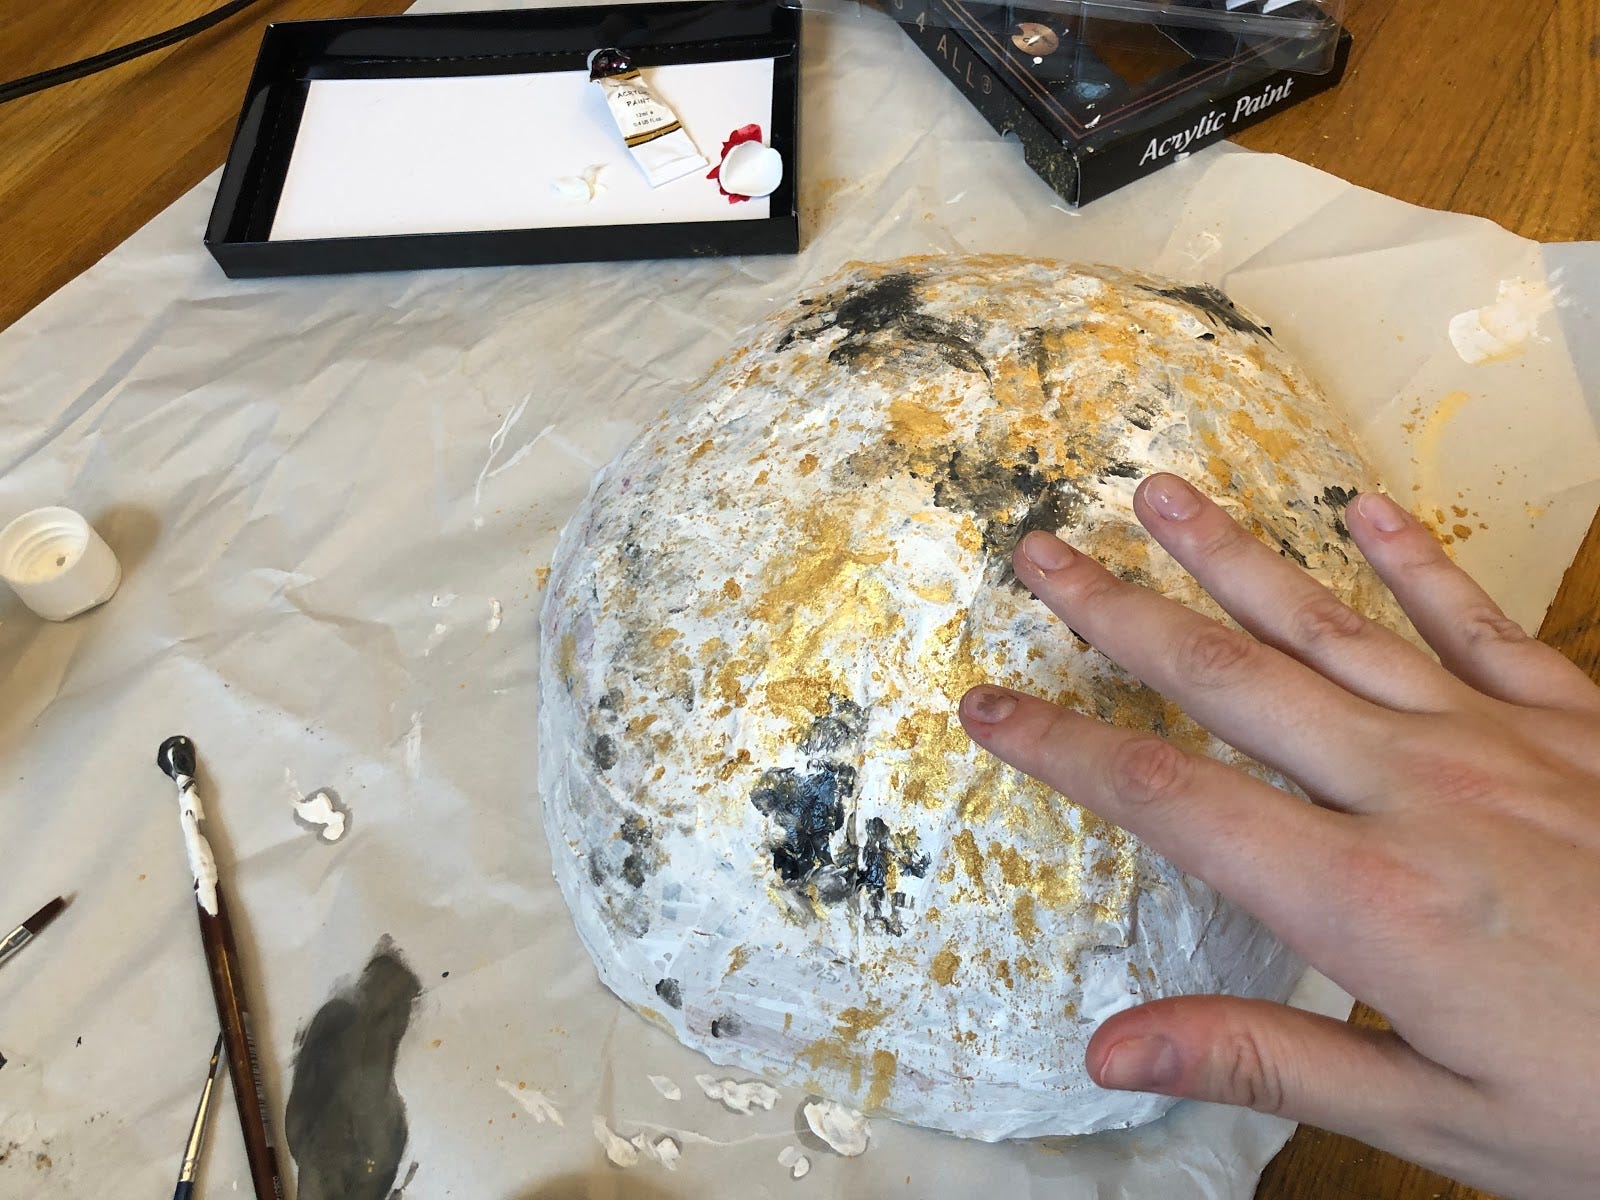
It was now time to decorate it. I decided to do a more simple decoration on these than I would usually do, just to show how easy it can be, but if you want to go wild, do it. This step is all about creativity.
I painted the bottom of the bowl white with some tempera paint. After it dried I then added details in the form of gold pearl powder and acrylic paint. I used my fingers to add it. I wanted to have it look a little like marble. I am not sure if I accomplished that, but it was a fun way to add to the outside of the bowl.
When that dried, I decided I liked the inside of the bowl as newspaper, so I just added a little red paint to the rim of the bowl and called it a day.
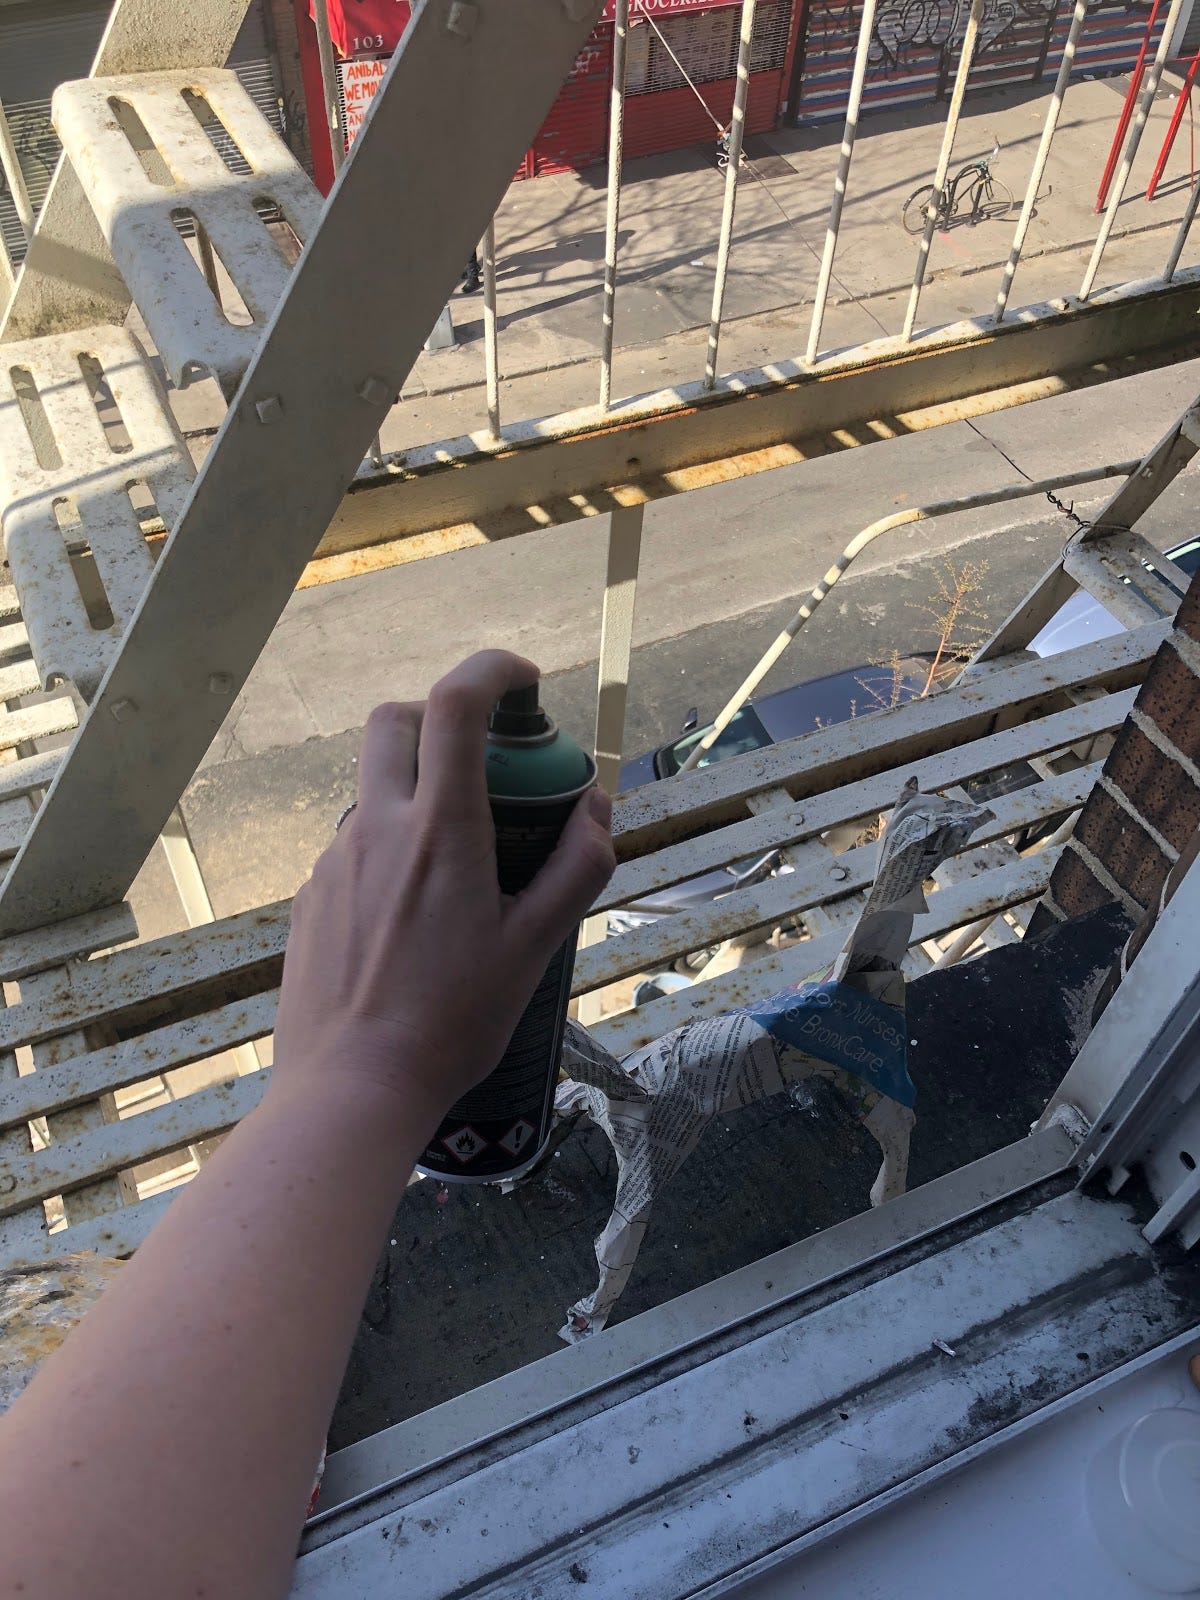
For the horse, I would usually paint it with acrylics too, but it has some weird angles, so for those new to paints, it could be tricky. Instead, I decided to spray paint it.
Couple things about spray paint, always do it outside. If you don’t want it on your hands, wear gloves. And finally, it’s easier than it looks. Always read the label, it will tell you exactly how to use it. Brands can vary and there are different types. I have traditional graffiti style paint, but there are a lot of crafting spray paints too which would probably work even better for this. Always read the instructions and make sure to clean your caps after you use them.
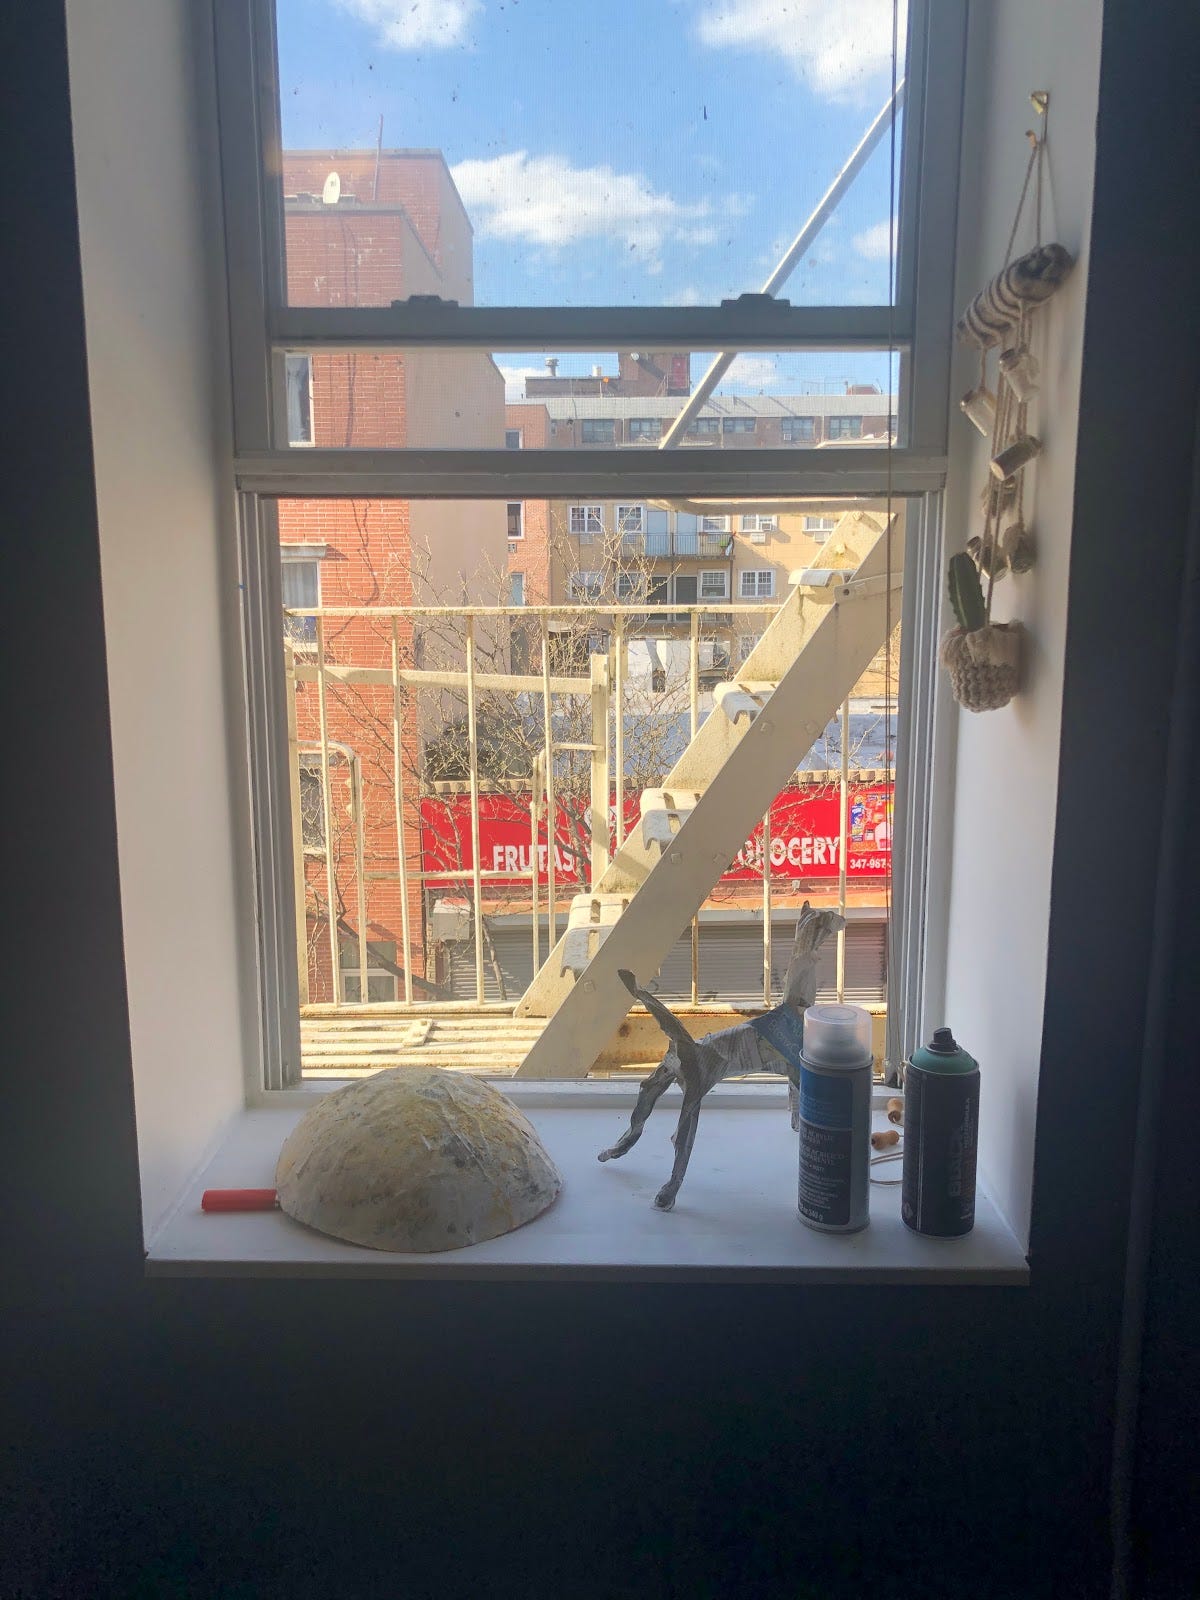
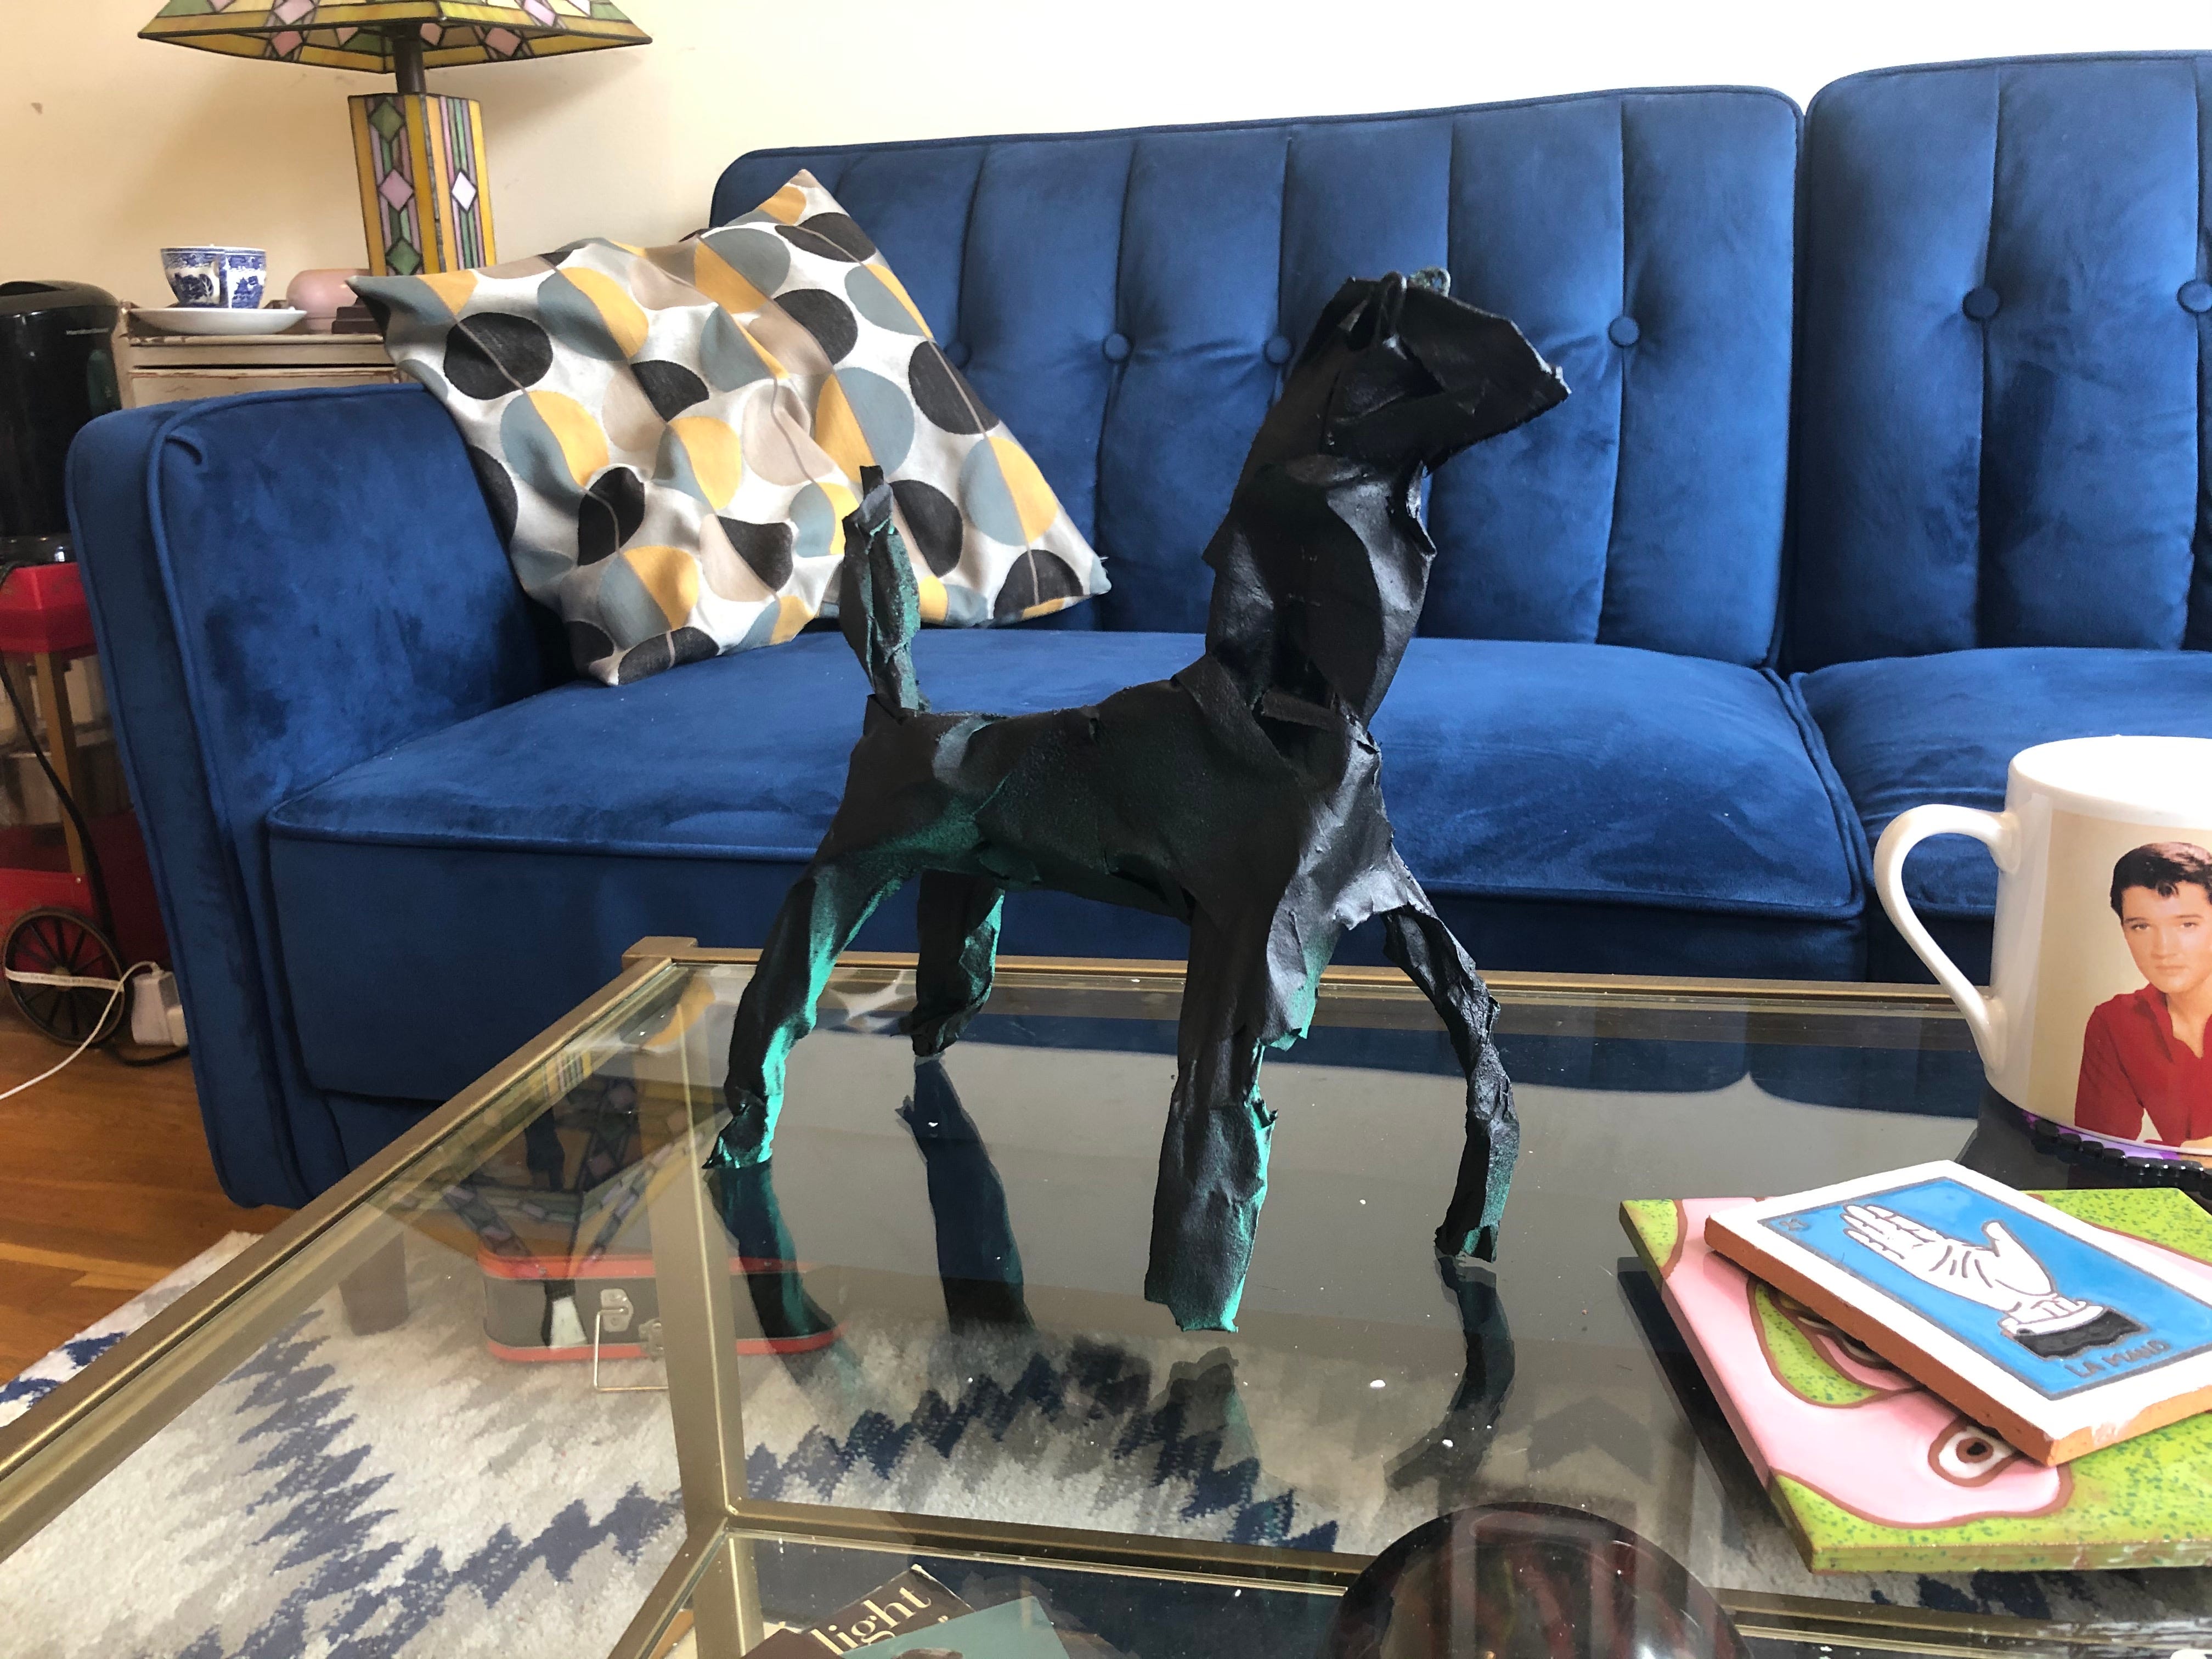
I sprayed my horse with black spray paint and then I added a clear sealant spray to both the horse and bowl. We don’t have outdoor space here in New York, so yes, I sprayed them with my arms out the window on my fire escape. Add a couple of thin layers of the spray paint until your piece is fully covered. Let the coats dry before you add the sealant if you plan to use it.
When your pieced are sprayed let them dry in a well-ventilated space. When they are dry, they are ready for use or display.

Okay, so I did one last thing. I thought my black horse was a bit drab. So I added a resin crystal, I had shaved down slightly as a horn.

And I attached it with a little hot glue.
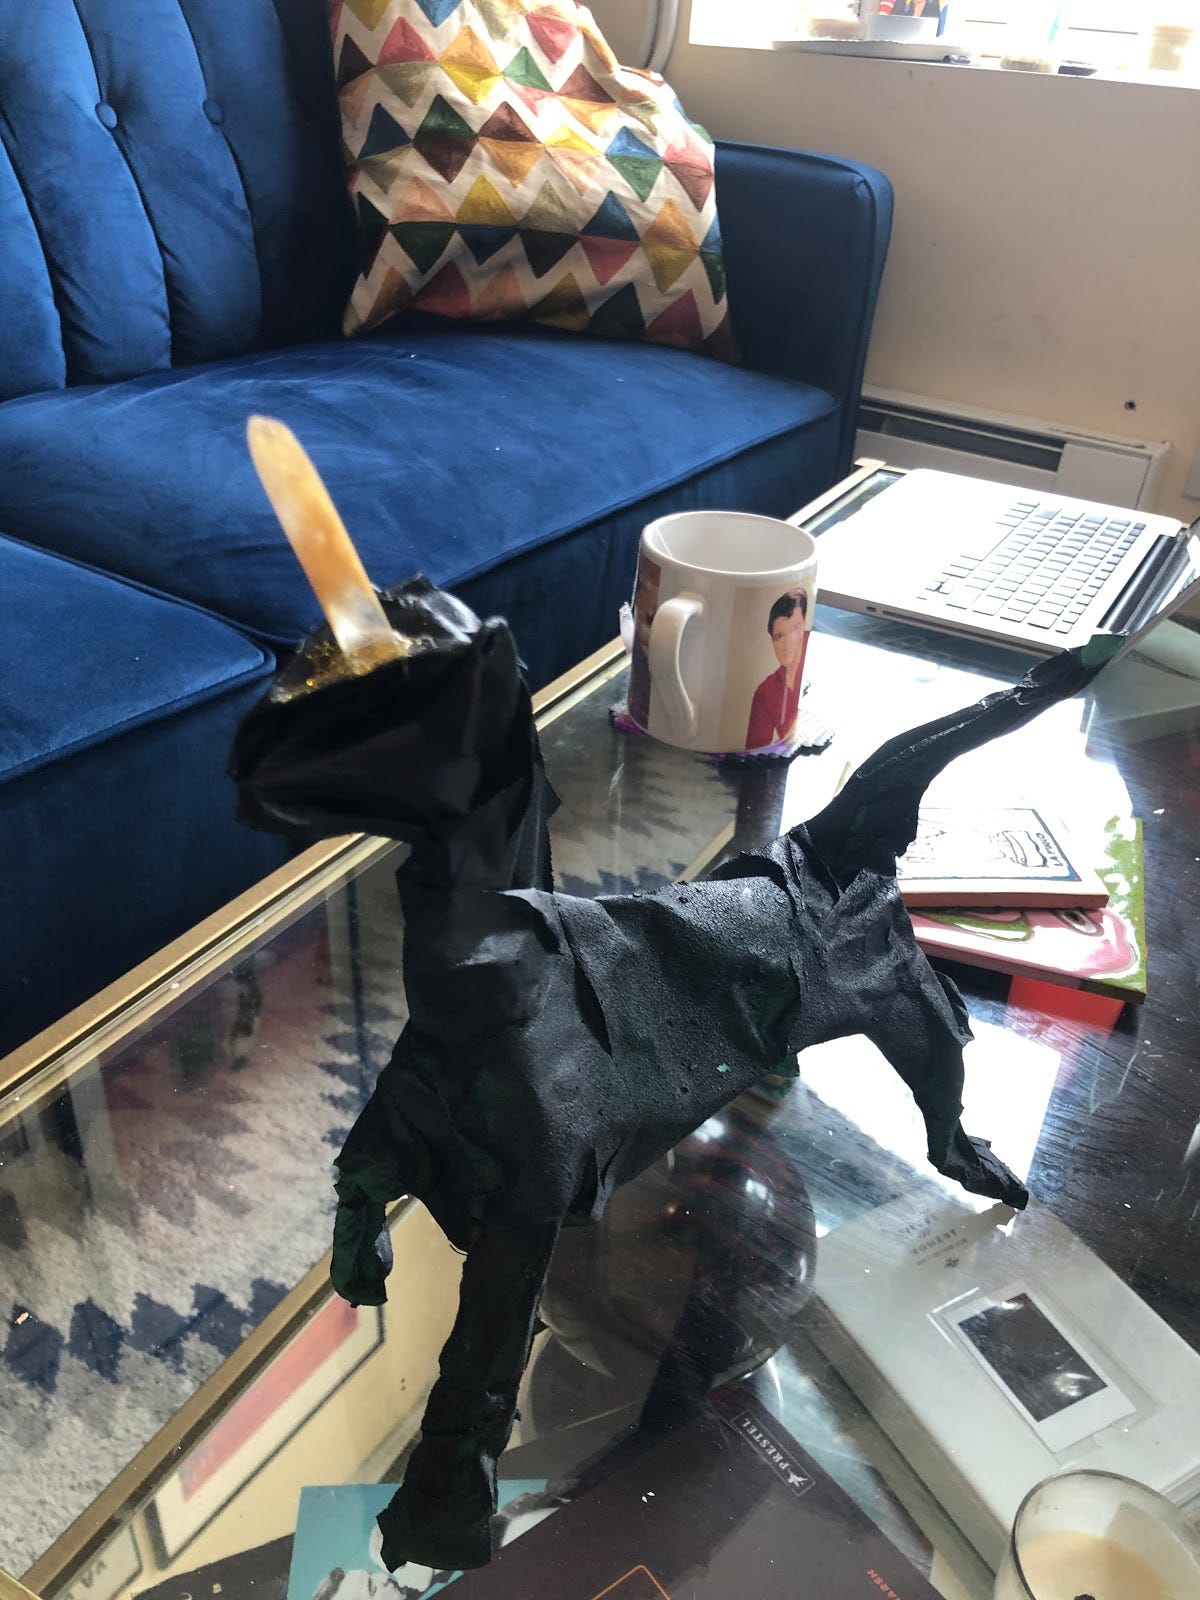
So I guess I was making a unicorn this whole time.
Wow, what an M. Night ending? Thank you for sticking around for Craft Cult. I have been getting a lot of targeted adds from publishing these. One this morning was for a box that taught you how to tattoo at home, so I know people are hungry for crafts (plz don’t tattoo yourself because of quarantine.)
Things to do instead of that I recommend: did you know you can explore museums online? The Getty LA, The Rijksmuseum in Amsterdam, The D’Osray in Paris have particularly good ones. There are a ton more on Google Art and Culture too. Other than museums, I have also been missing fast-casual dining chains. I am not sure why, but I truly have. My boyfriend made us knock-off Cava bowls this week and it got me googling, there are a ton of copy cat recipes to make your favorite New York lunch rush food at home and honestly, I am going to make some. Whether it’s a Crunchwrap or a Dole Whip. You can find out how to make it. That’s power.
If you haven’t subscribed yet, please become part of the Craft Cult and if you like this newsletter, tell your friends and keep sharing your arts!