For your Dyes Only
alternatively No time to Dye aka Dye Another Day

Hello a certain 1996 Teen Witch Movie (get it cause it’s the Cult classic the Craft),
Maybe I am feeling a little 1990s today. I think it’s because today’s craft is tie-dye. In 1996, I was 3 and living in Richmond, California. Richmond is a little more Raiders gear than tie-dye, but it borders Berkeley, CA (well if you ignore Albany, CA, and El Cerrito which we all can) which means my childhood saw a lot of tie-dye.

A lot of this
I was on a call with an old friend of mine and she told me she recently got a tie-dye kit and said I should do tie-dying for the Cult so she could get some tips. I had to think about it because I would feel a little dirty teaching y’all how to do a kit. So instead we are doing tie-dye completely from scratch. Which means making our fixatives and dyes from things you probably already have at home. I am doing 2 ways to dye. The first is fun and kid-friendly; the second is adults only.
To start, let’s make some dye. You can make all-natural dye with things you might already have around your house. A bunch of different vegetables, fruit, and flowers can be used to make natural dyes. Today I am going to make 2. The first is a turmeric-based dye that makes a great yellow-orange and the second is a red onion that makes a burgundy. I am usually not a fan of how I look in yellow and red, see me dressed but like a mustard below, but these are really rich nice colors.

This was on the front page of a local newspaper at one point.
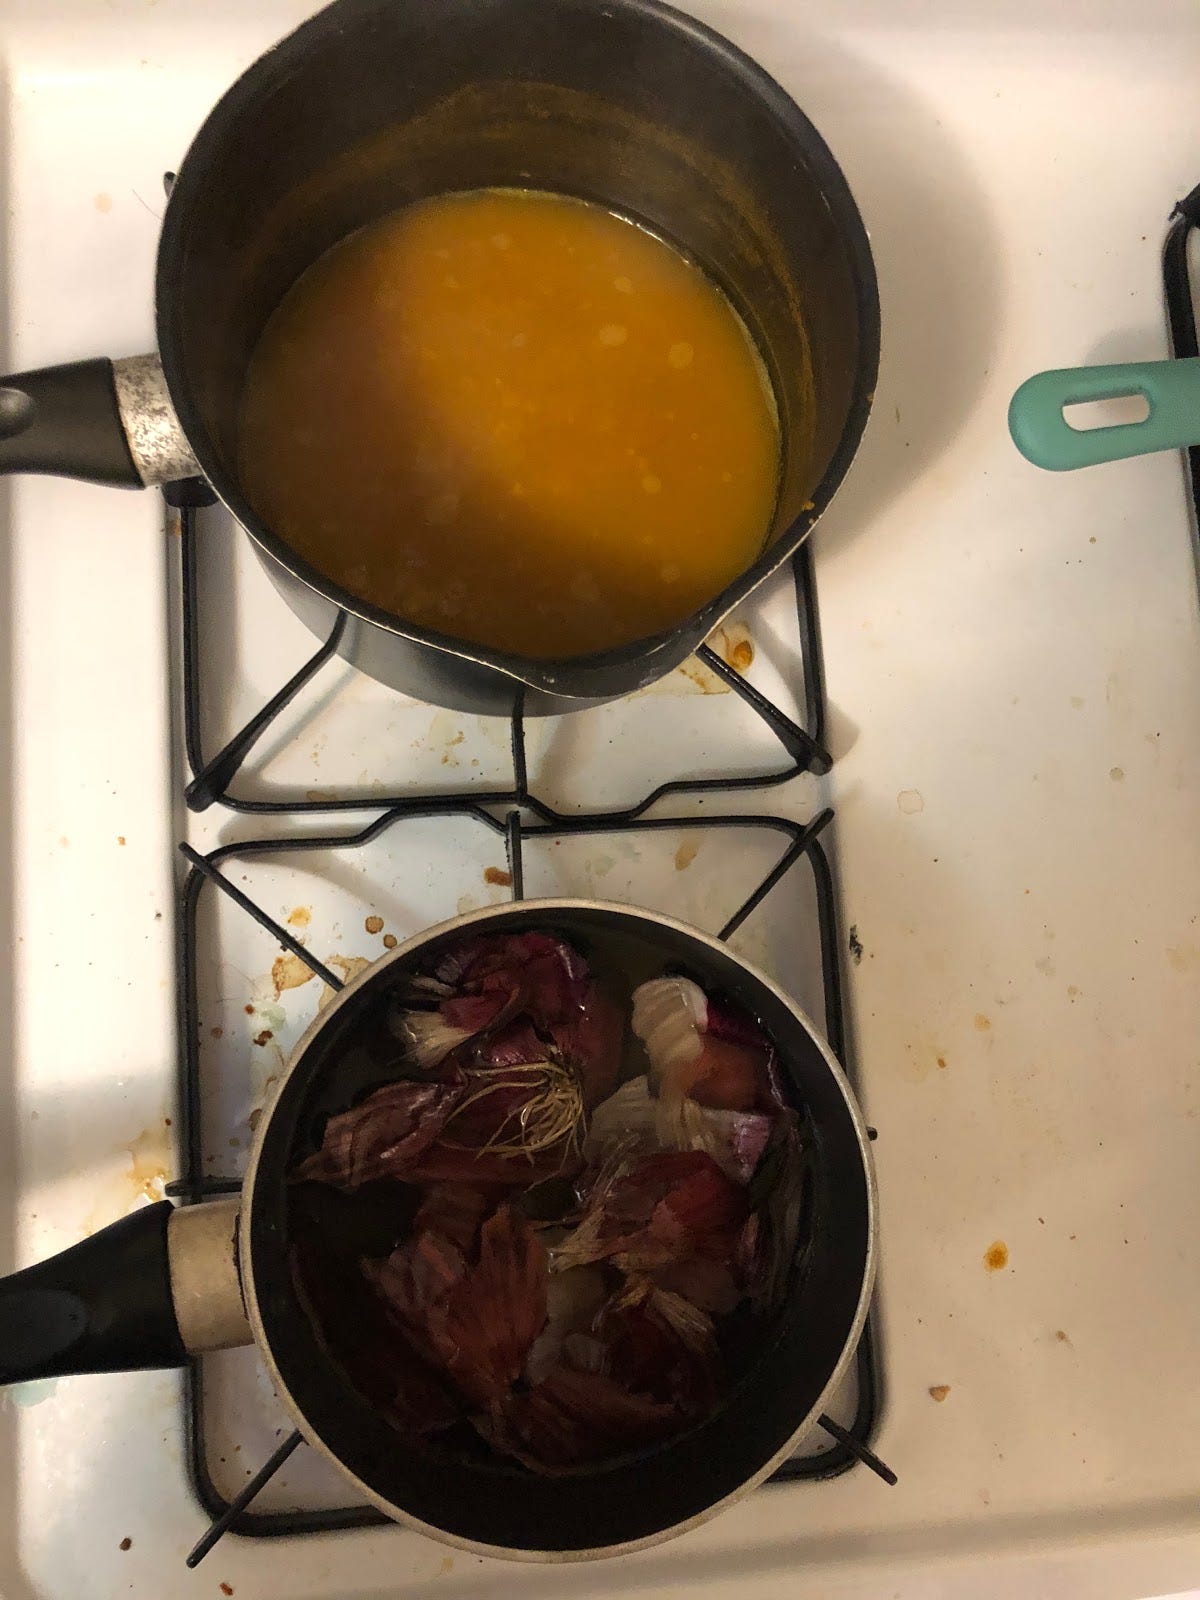
To start your dyes, get out two pots. For the Turmeric dye, add about 2 tablespoons of Turmeric to 3 cups of water. Stir in the turmeric well and then bring to a boil and reduce to a simmer. For the red onion, take the skins of at least 1 red onion; the more red onion skins you have the better this dye will come out. I only had 1, so I only used about a cup of water. Bring to a boil and reduce to a simmer with the onion skin still in the water. Let both of them simmer for about an hour.
While your dye is simmering, let’s get the fabric prepped. Get some white shirts. I famously look terrible in white (I know I am cutting myself off for a lot of colors), so the only white shirts I had were promotional (Craft Cult does not endorse Bohemian Rhapsody.)
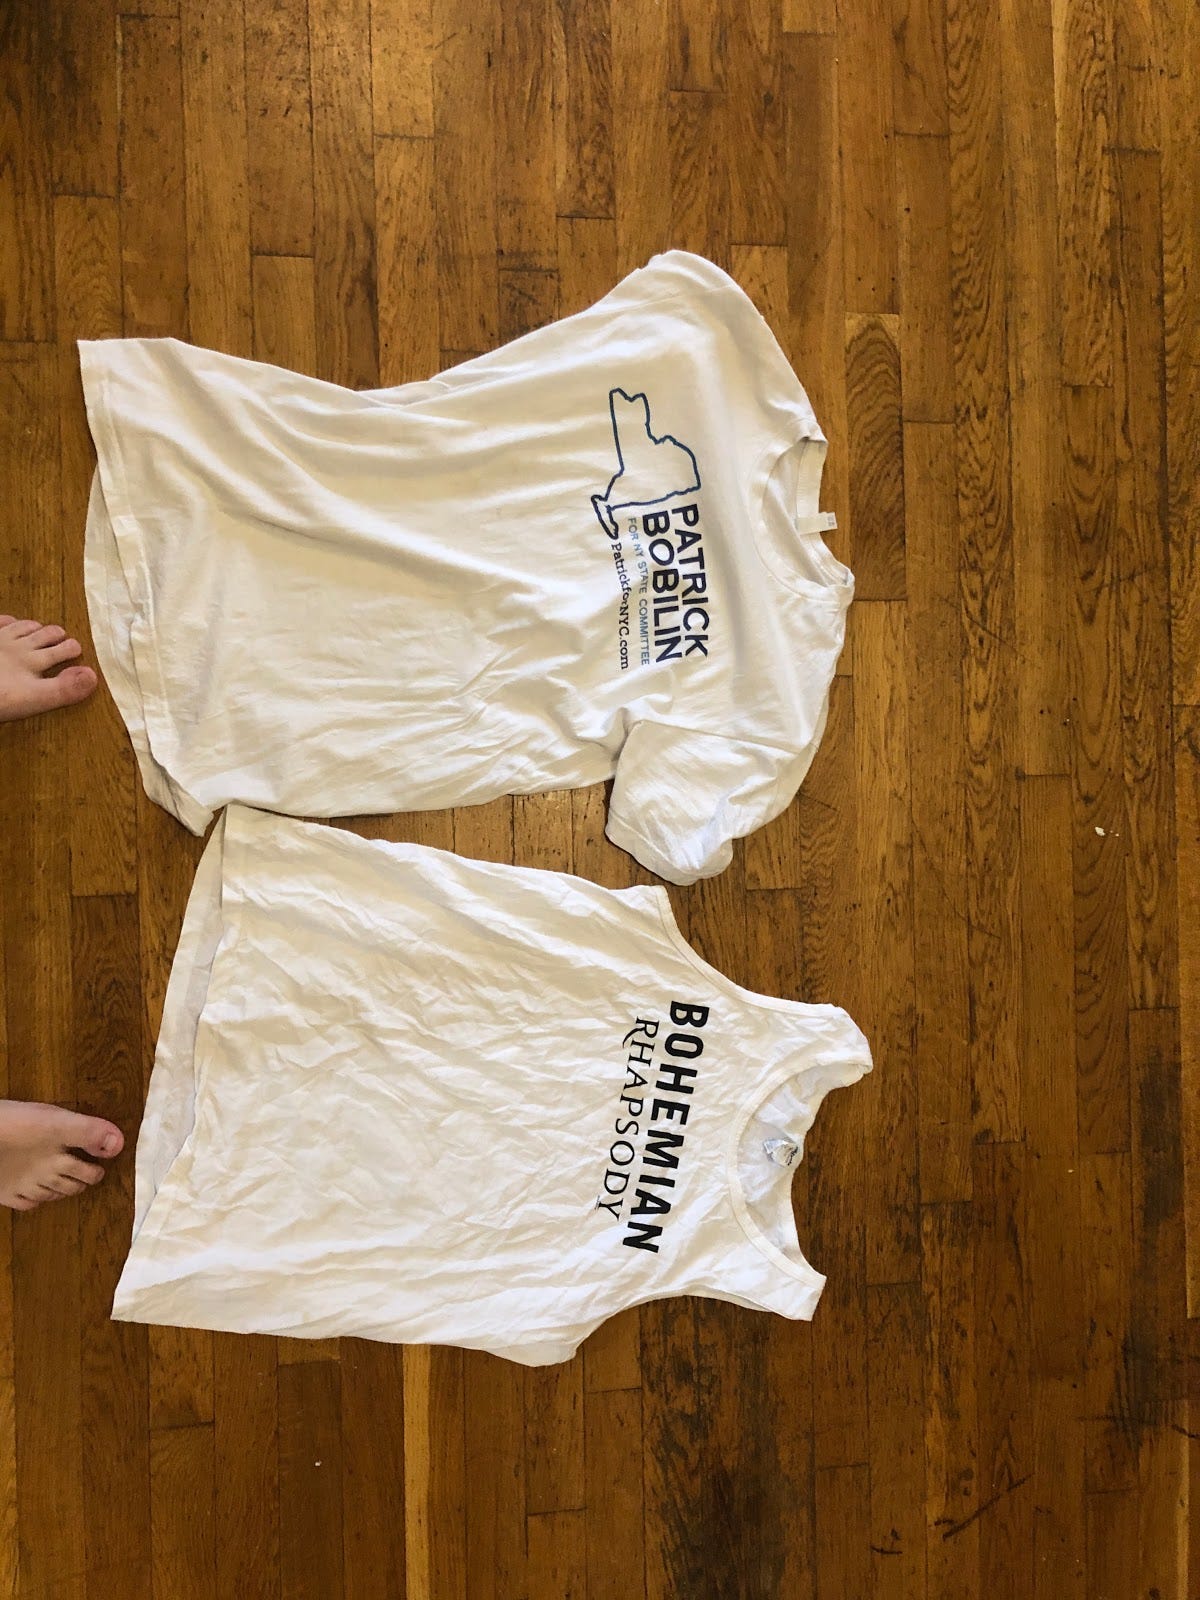
But they will do! For the first one, I am doing a swirl technique. Start by pinching your shirt and then spinning that pinch so the fabric gathers around it.

When the fabric has all been gathered into the spiral, place rubber bands around it so the shape holds. I used 3 bands to make 6 sections.
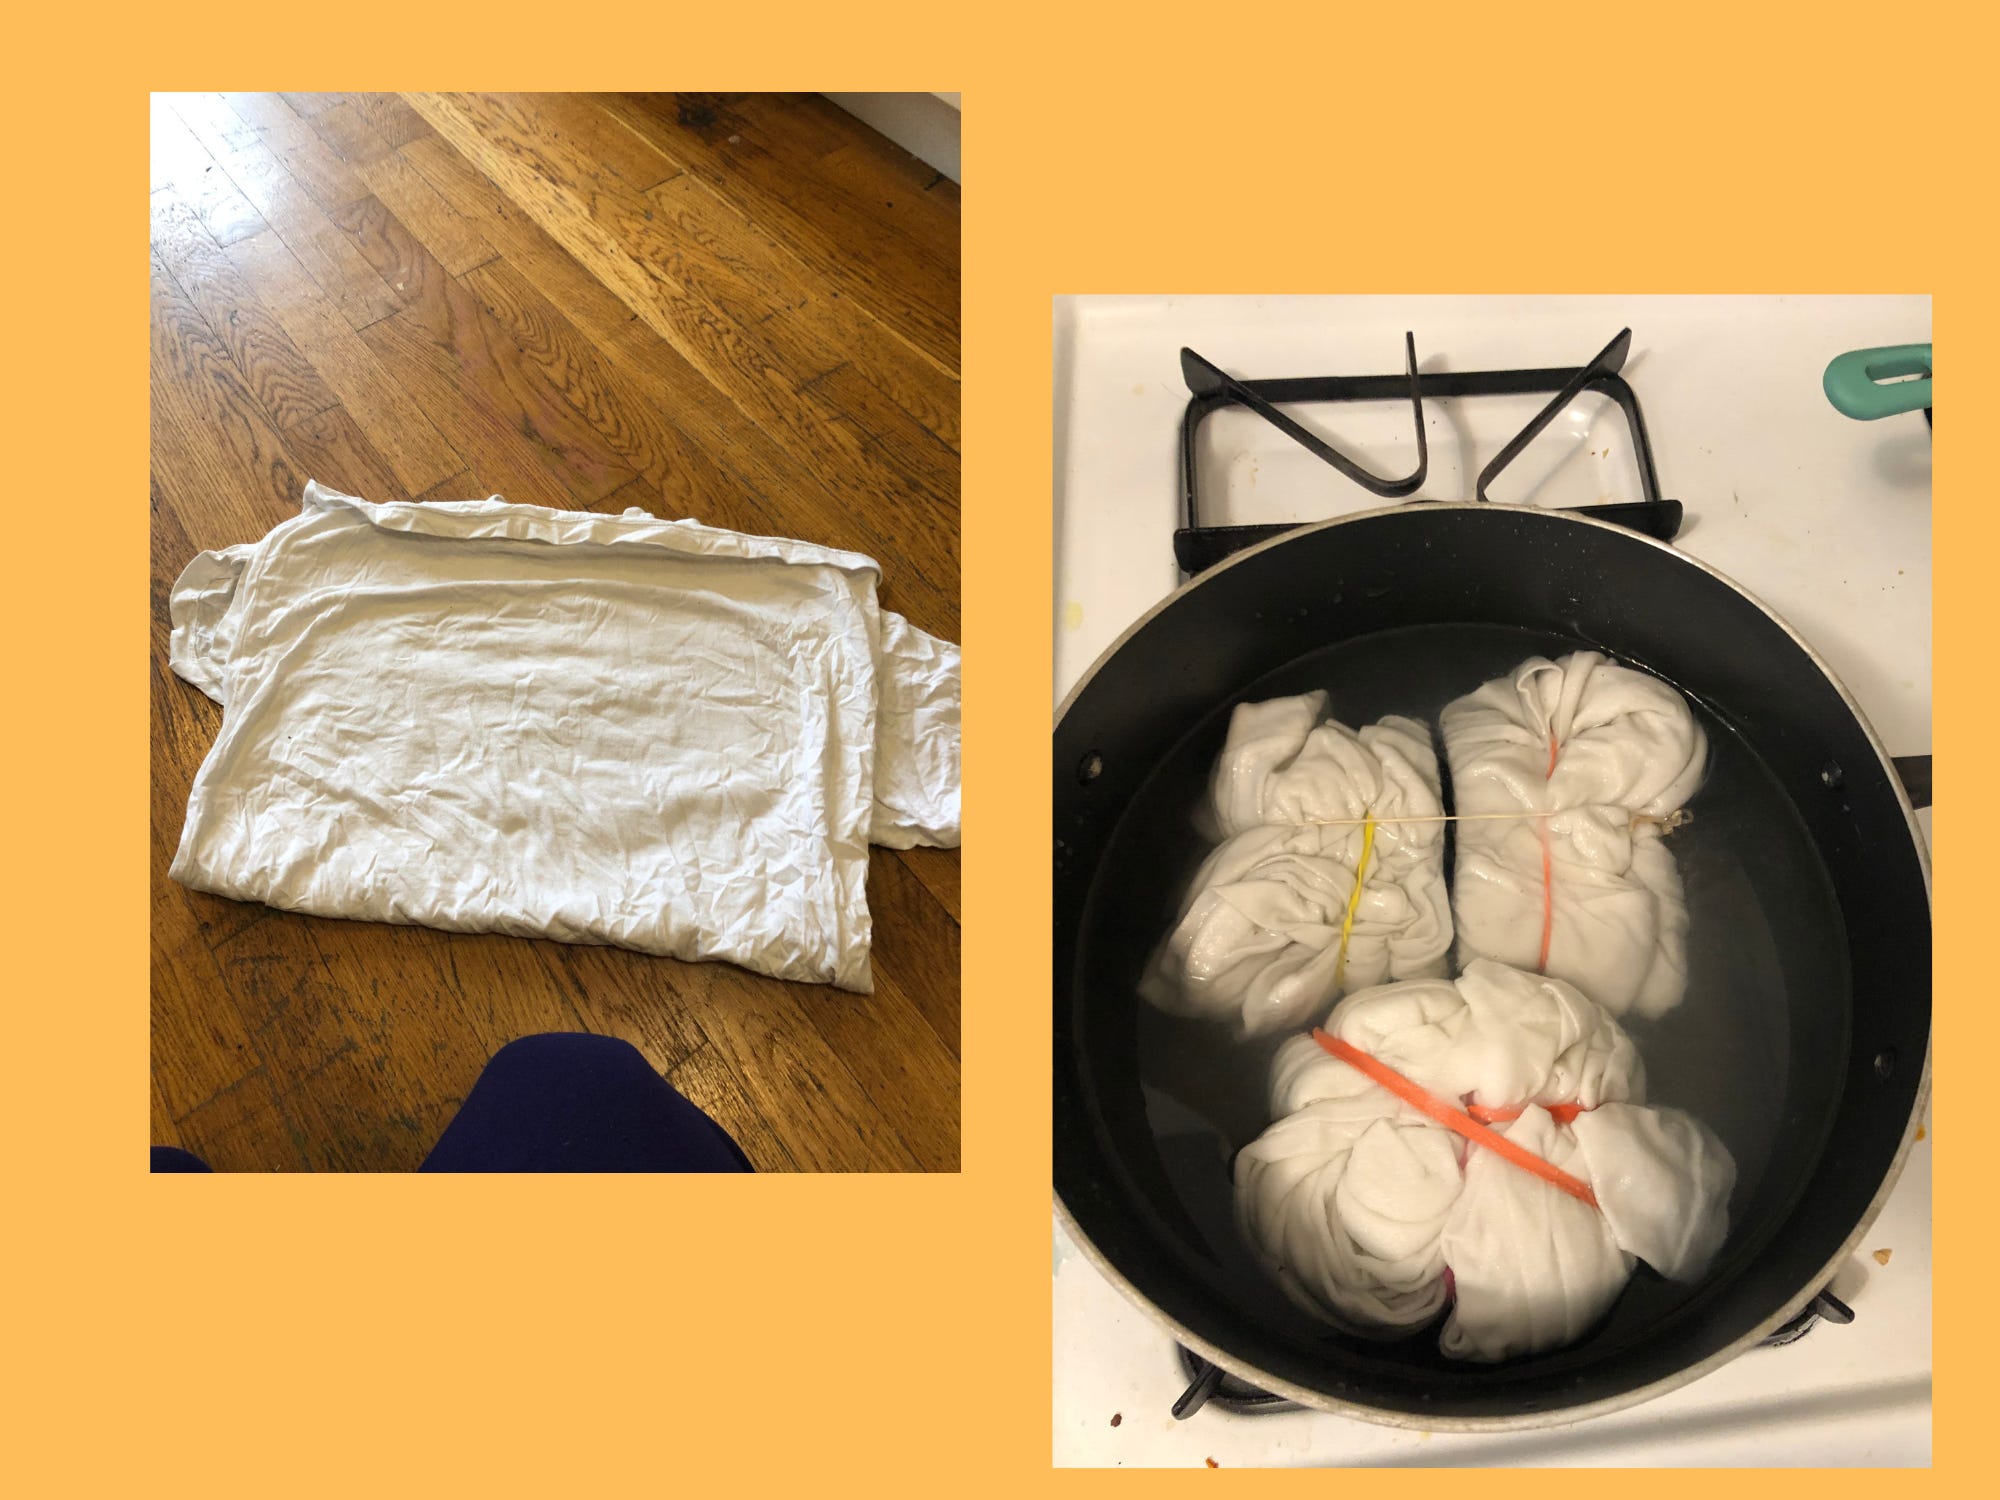
For the second shirt, I simply folded it. I started by folding it in half and then folding it in half again and again. When I could not fold it more. I placed a couple of rubber bands around it to hold the shape. I used 4 rubber bands to get it into 8 sections. When my shirts were rubber-banded up, I added them to a pot of a solution of 4 parts water to 1 part vinegar. Let the shirts simmer in the vinegar for 1 hour. This will make your house smell wild. So you might want to open a window.
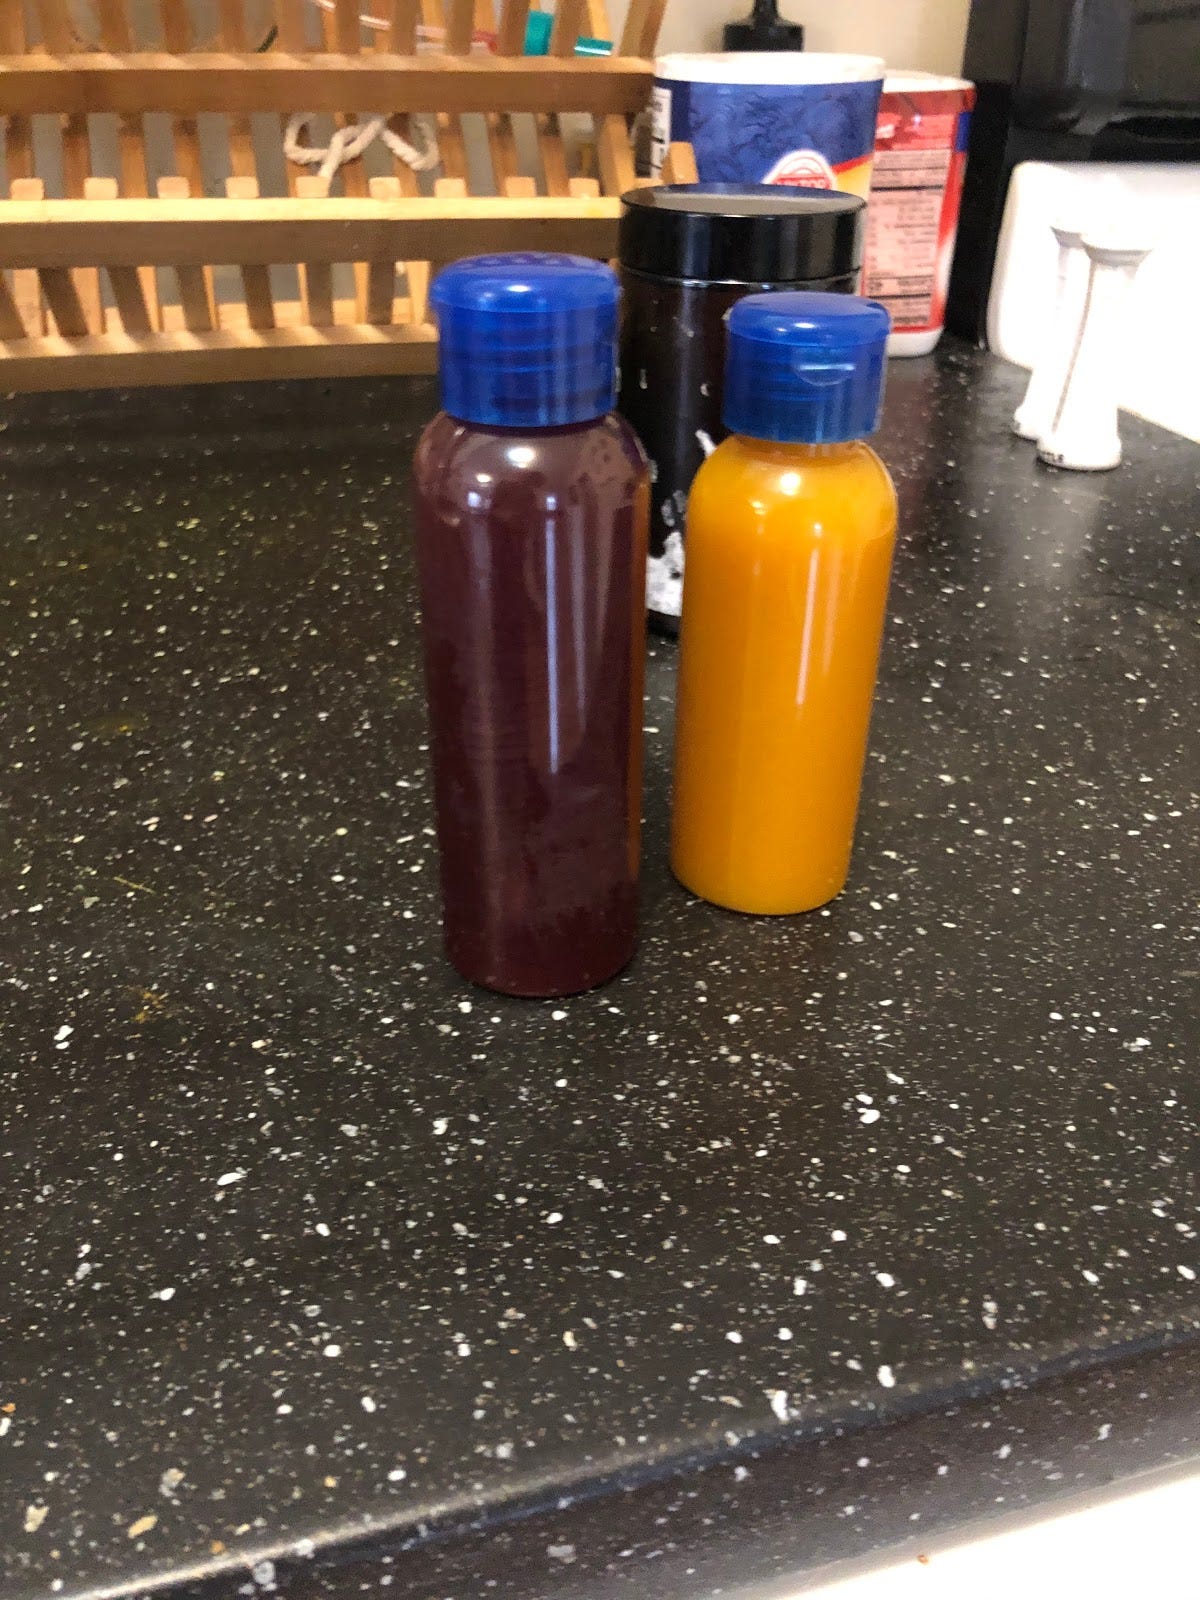
When the dye is ready, take it off the heat and let it cool. When it is cool pour it into bottles. I used airline shampoo bottles. Set these aside, for now, we will get back to them.
After your shirts are good and simmered out, run them under cold water. They should be cool to the touch when you are done. The next step can get a little messy. You want to put your shirts somewhere that won’t get stained. I chose to put them into the pots.
Spray/drip on your dies. I did it by section.
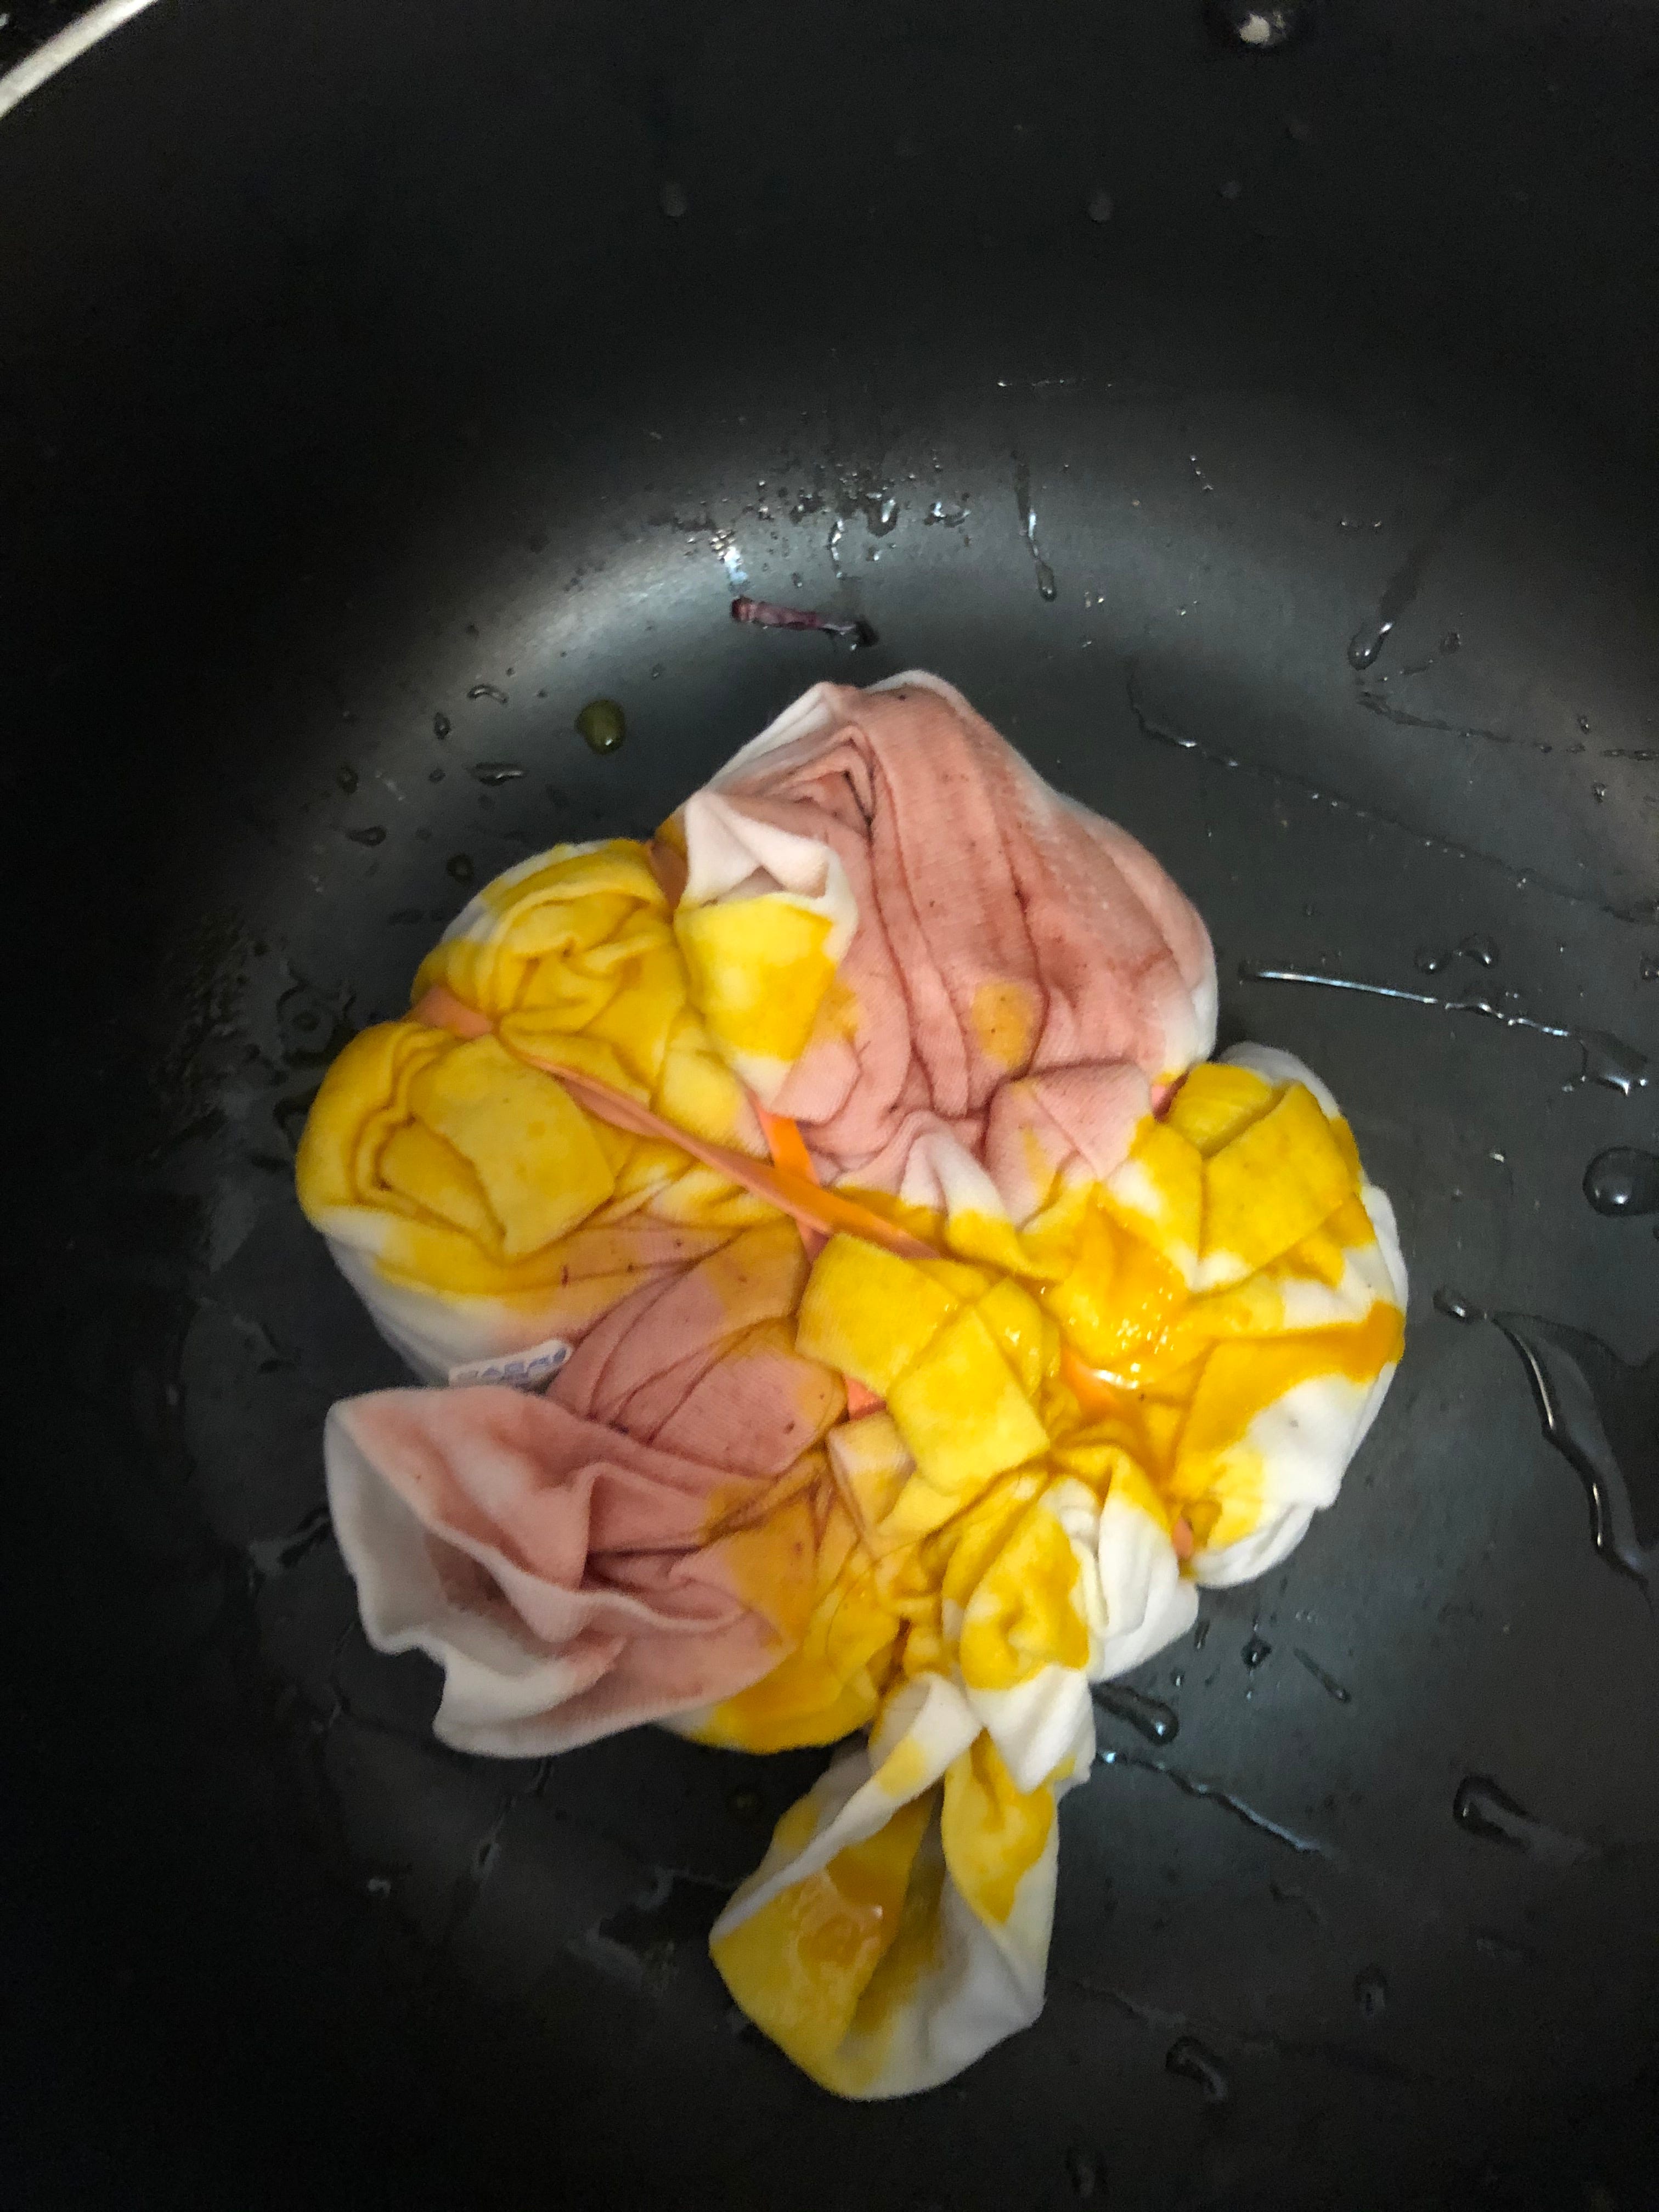
Get enough dye onto your shirts so you can’t see the white peeking through. I then added them to ziplock bags to sit.
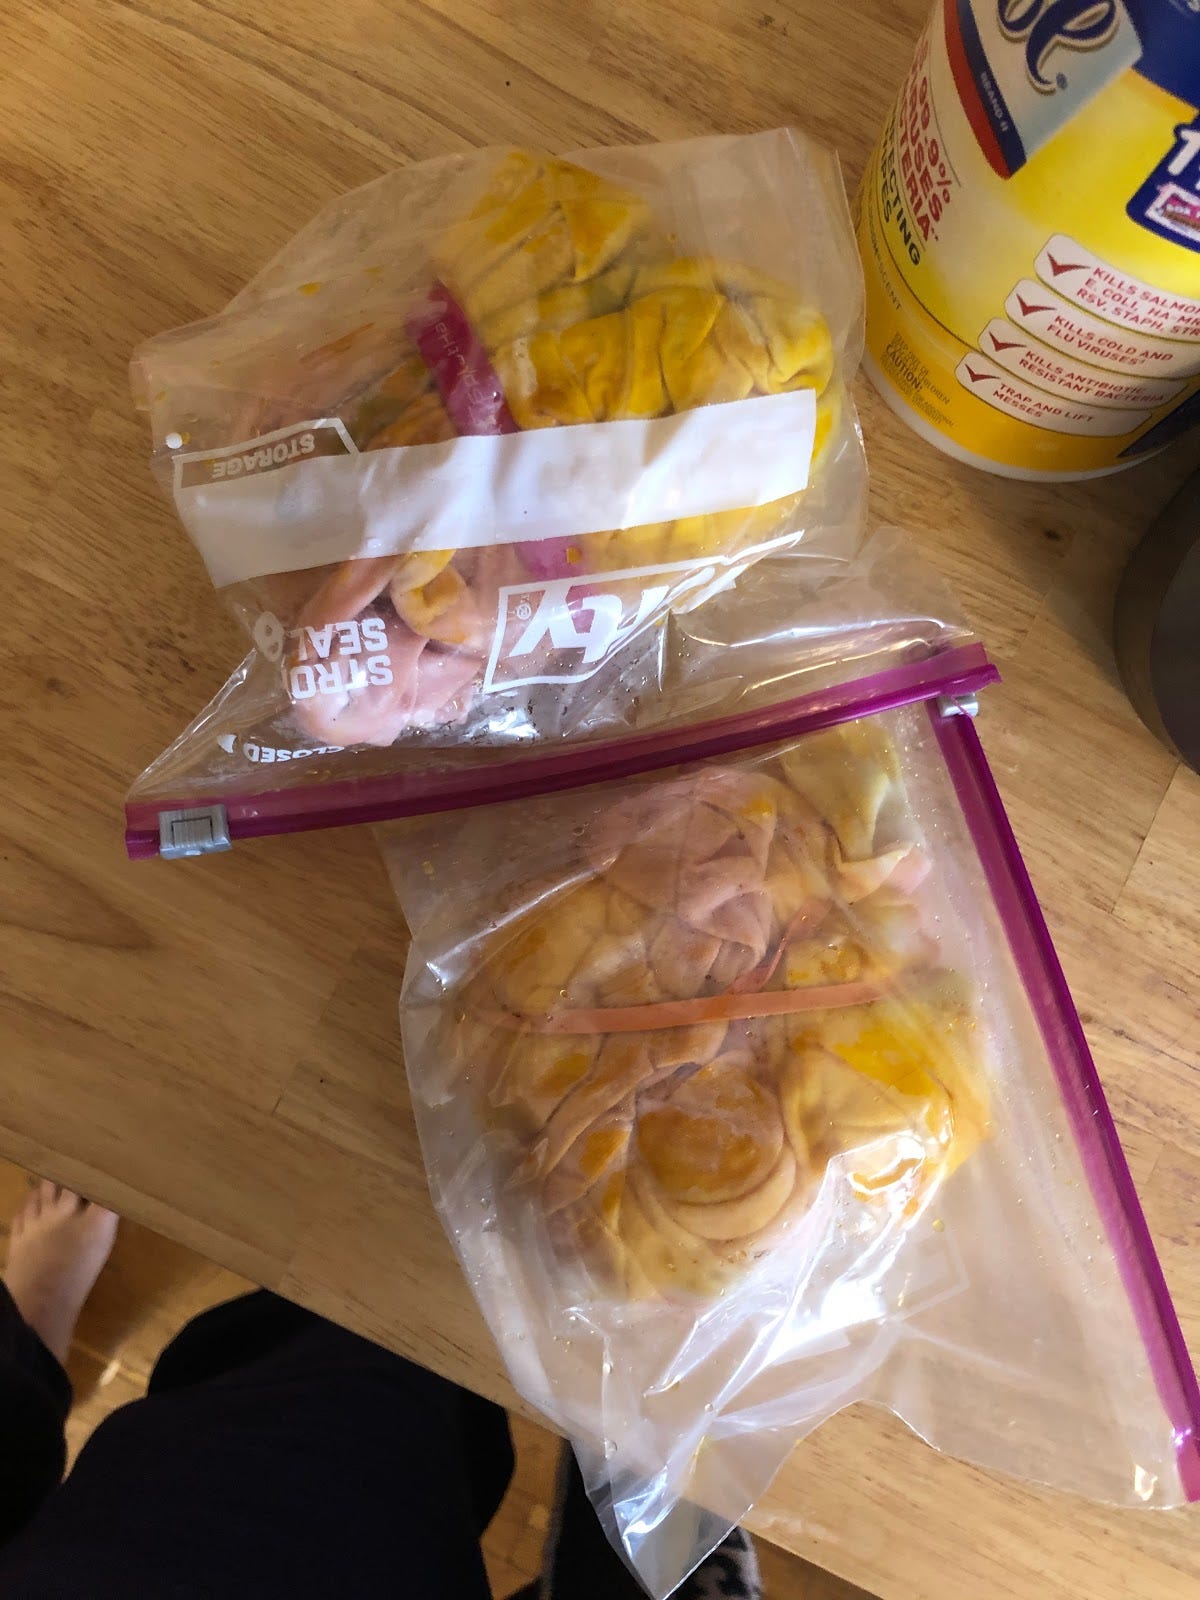
I wanted to get this newsletter out, so I arguably didn’t let them sit long enough. I did about 4 hours but for best results/less white spots you should leave them at least overnight. The longer you can let them sit, the more vibrant your colors will be. After they sit, rinse them out. I don’t have a washing machine in my NYC hovel, so I also washed them by hand after, but even if you have a washing machine, I would suggest rinsing out excess dye first even if you plan to through them in a washer later. After you rinsed them, let them hang dry. You can also dry them in a dryer, but at least the first time, I think hang drying helps the dye soak in more.

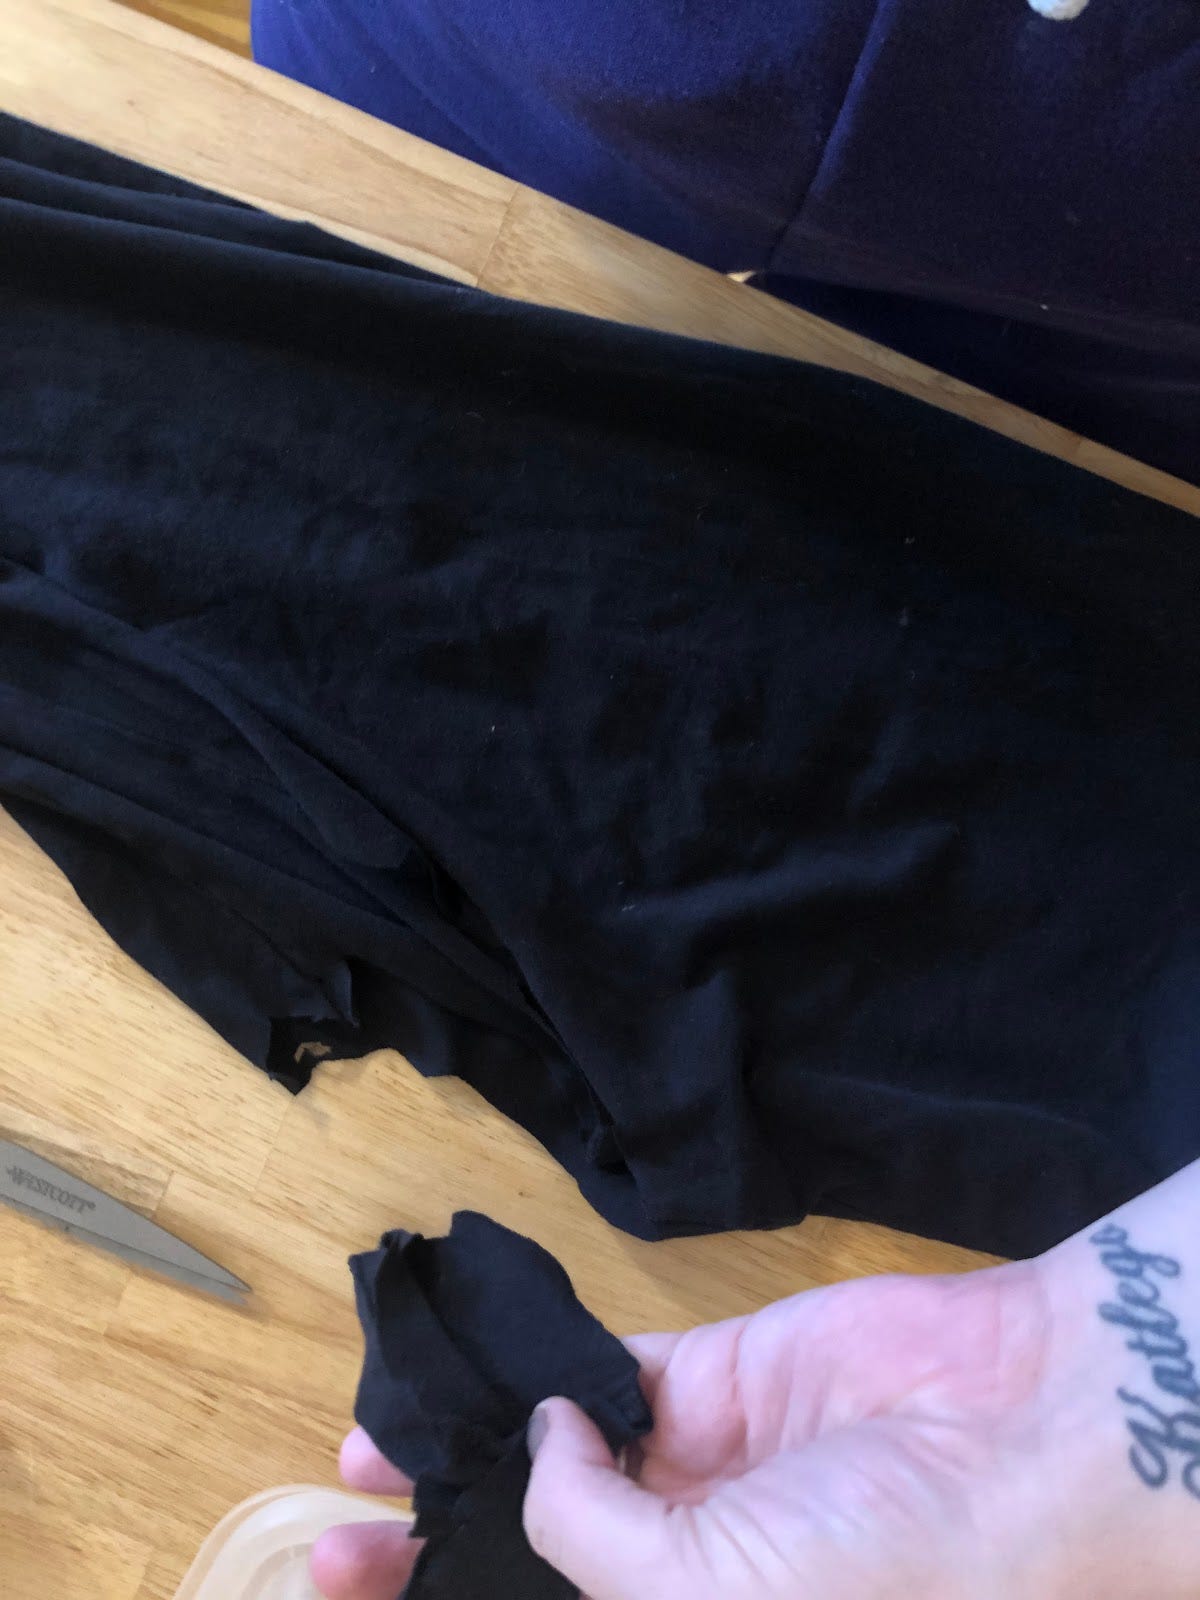
Now, I told you I was doing two ways to dye in this letter, but the second is less of a dye and more of an undying. As a New Yorker, I only wear black like I am a wannabe goth teen. This craft uses bleach to take the color out of the fabric. Make sure you do this craft in a well-ventilated area and be careful when using bleach. I used household bathroom bleach. It’s the same I use to clean the tub, but don’t let “household” fool you any bleach can give off dangerous fumes. To start this process, get a dark-colored item of clothing. For mine, I started with a pair of cotton leggings that never fit me right.
I decided to turn them into a crop-top by folding the leggings in half so that the legs mirrored each other and then cutting a small hole in the crotch of the leggings. The hole can be very small as it will be doubled when you separate the legs.
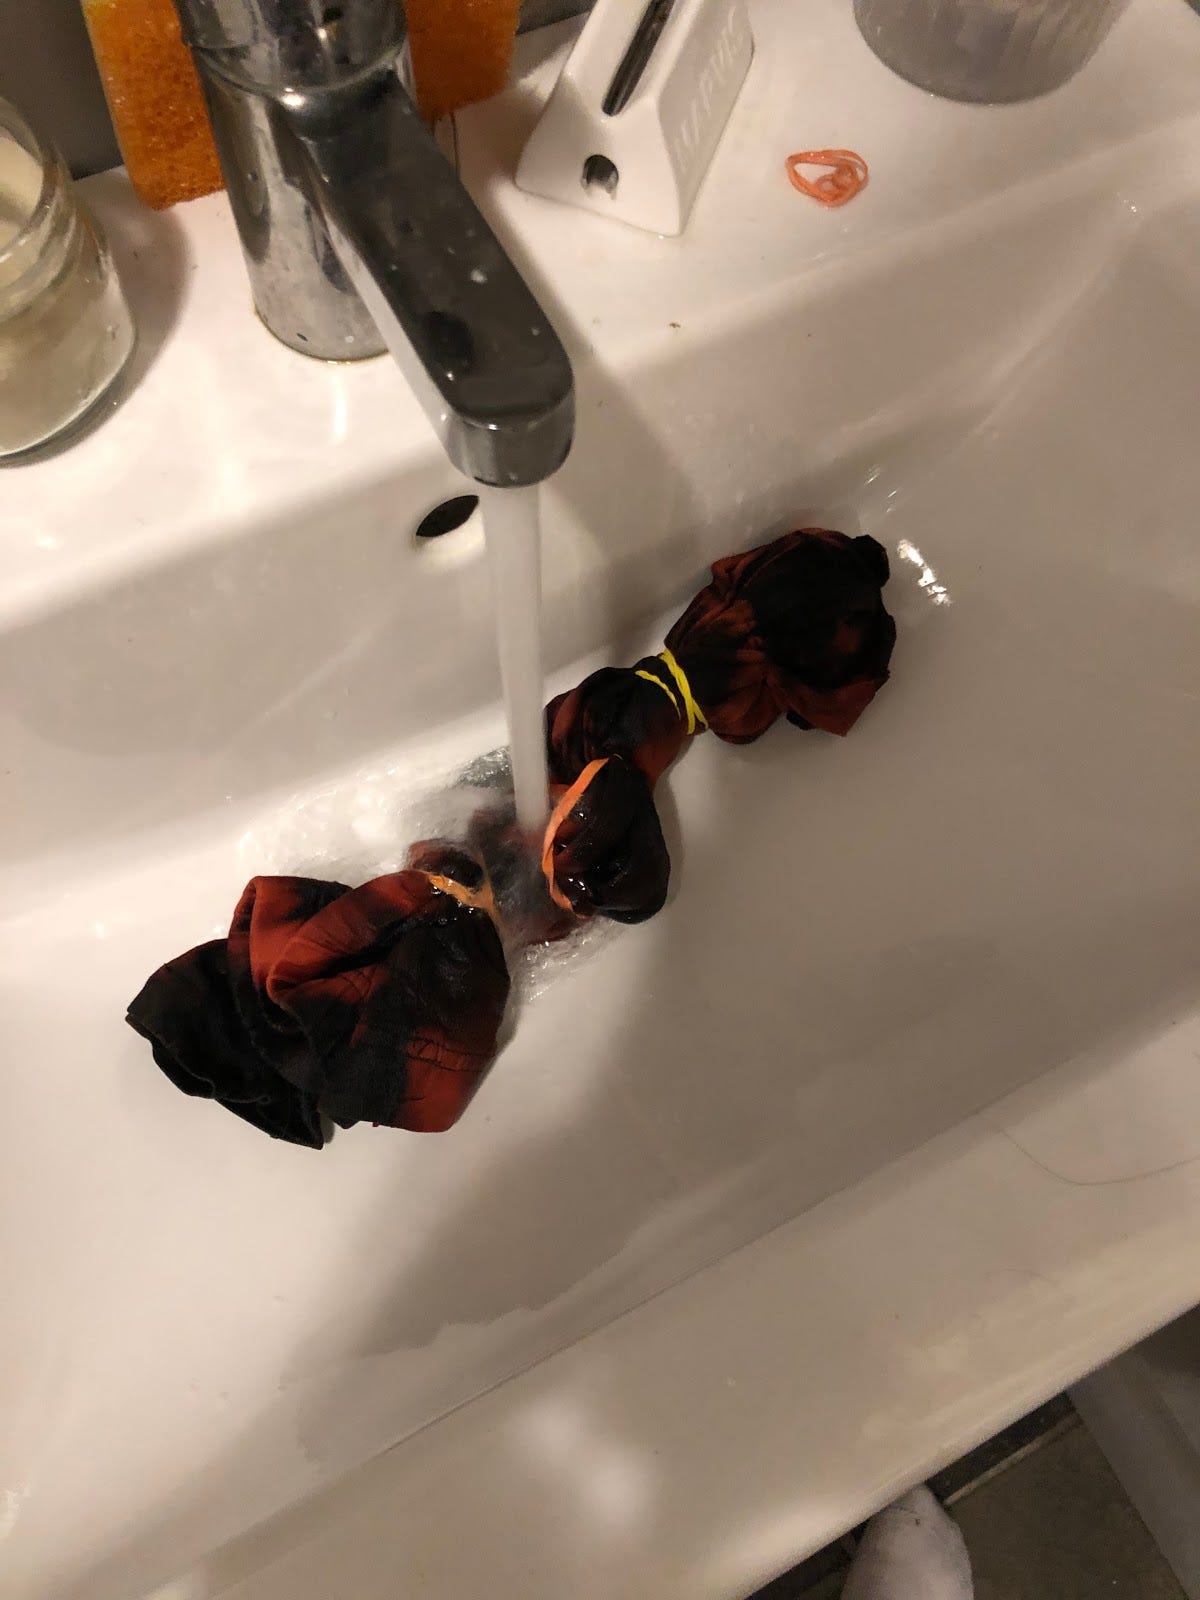
I then rolled up the leggings and added a couple of rubber bands to add sections. I then folded the roll in half and added rubber bands on top of that. I then got the fabric wet. Make sure it is wet all the way through. Next, get a small bottle that you will most likely not be used after this and fill it with a solution that is one part bleach and one part water.
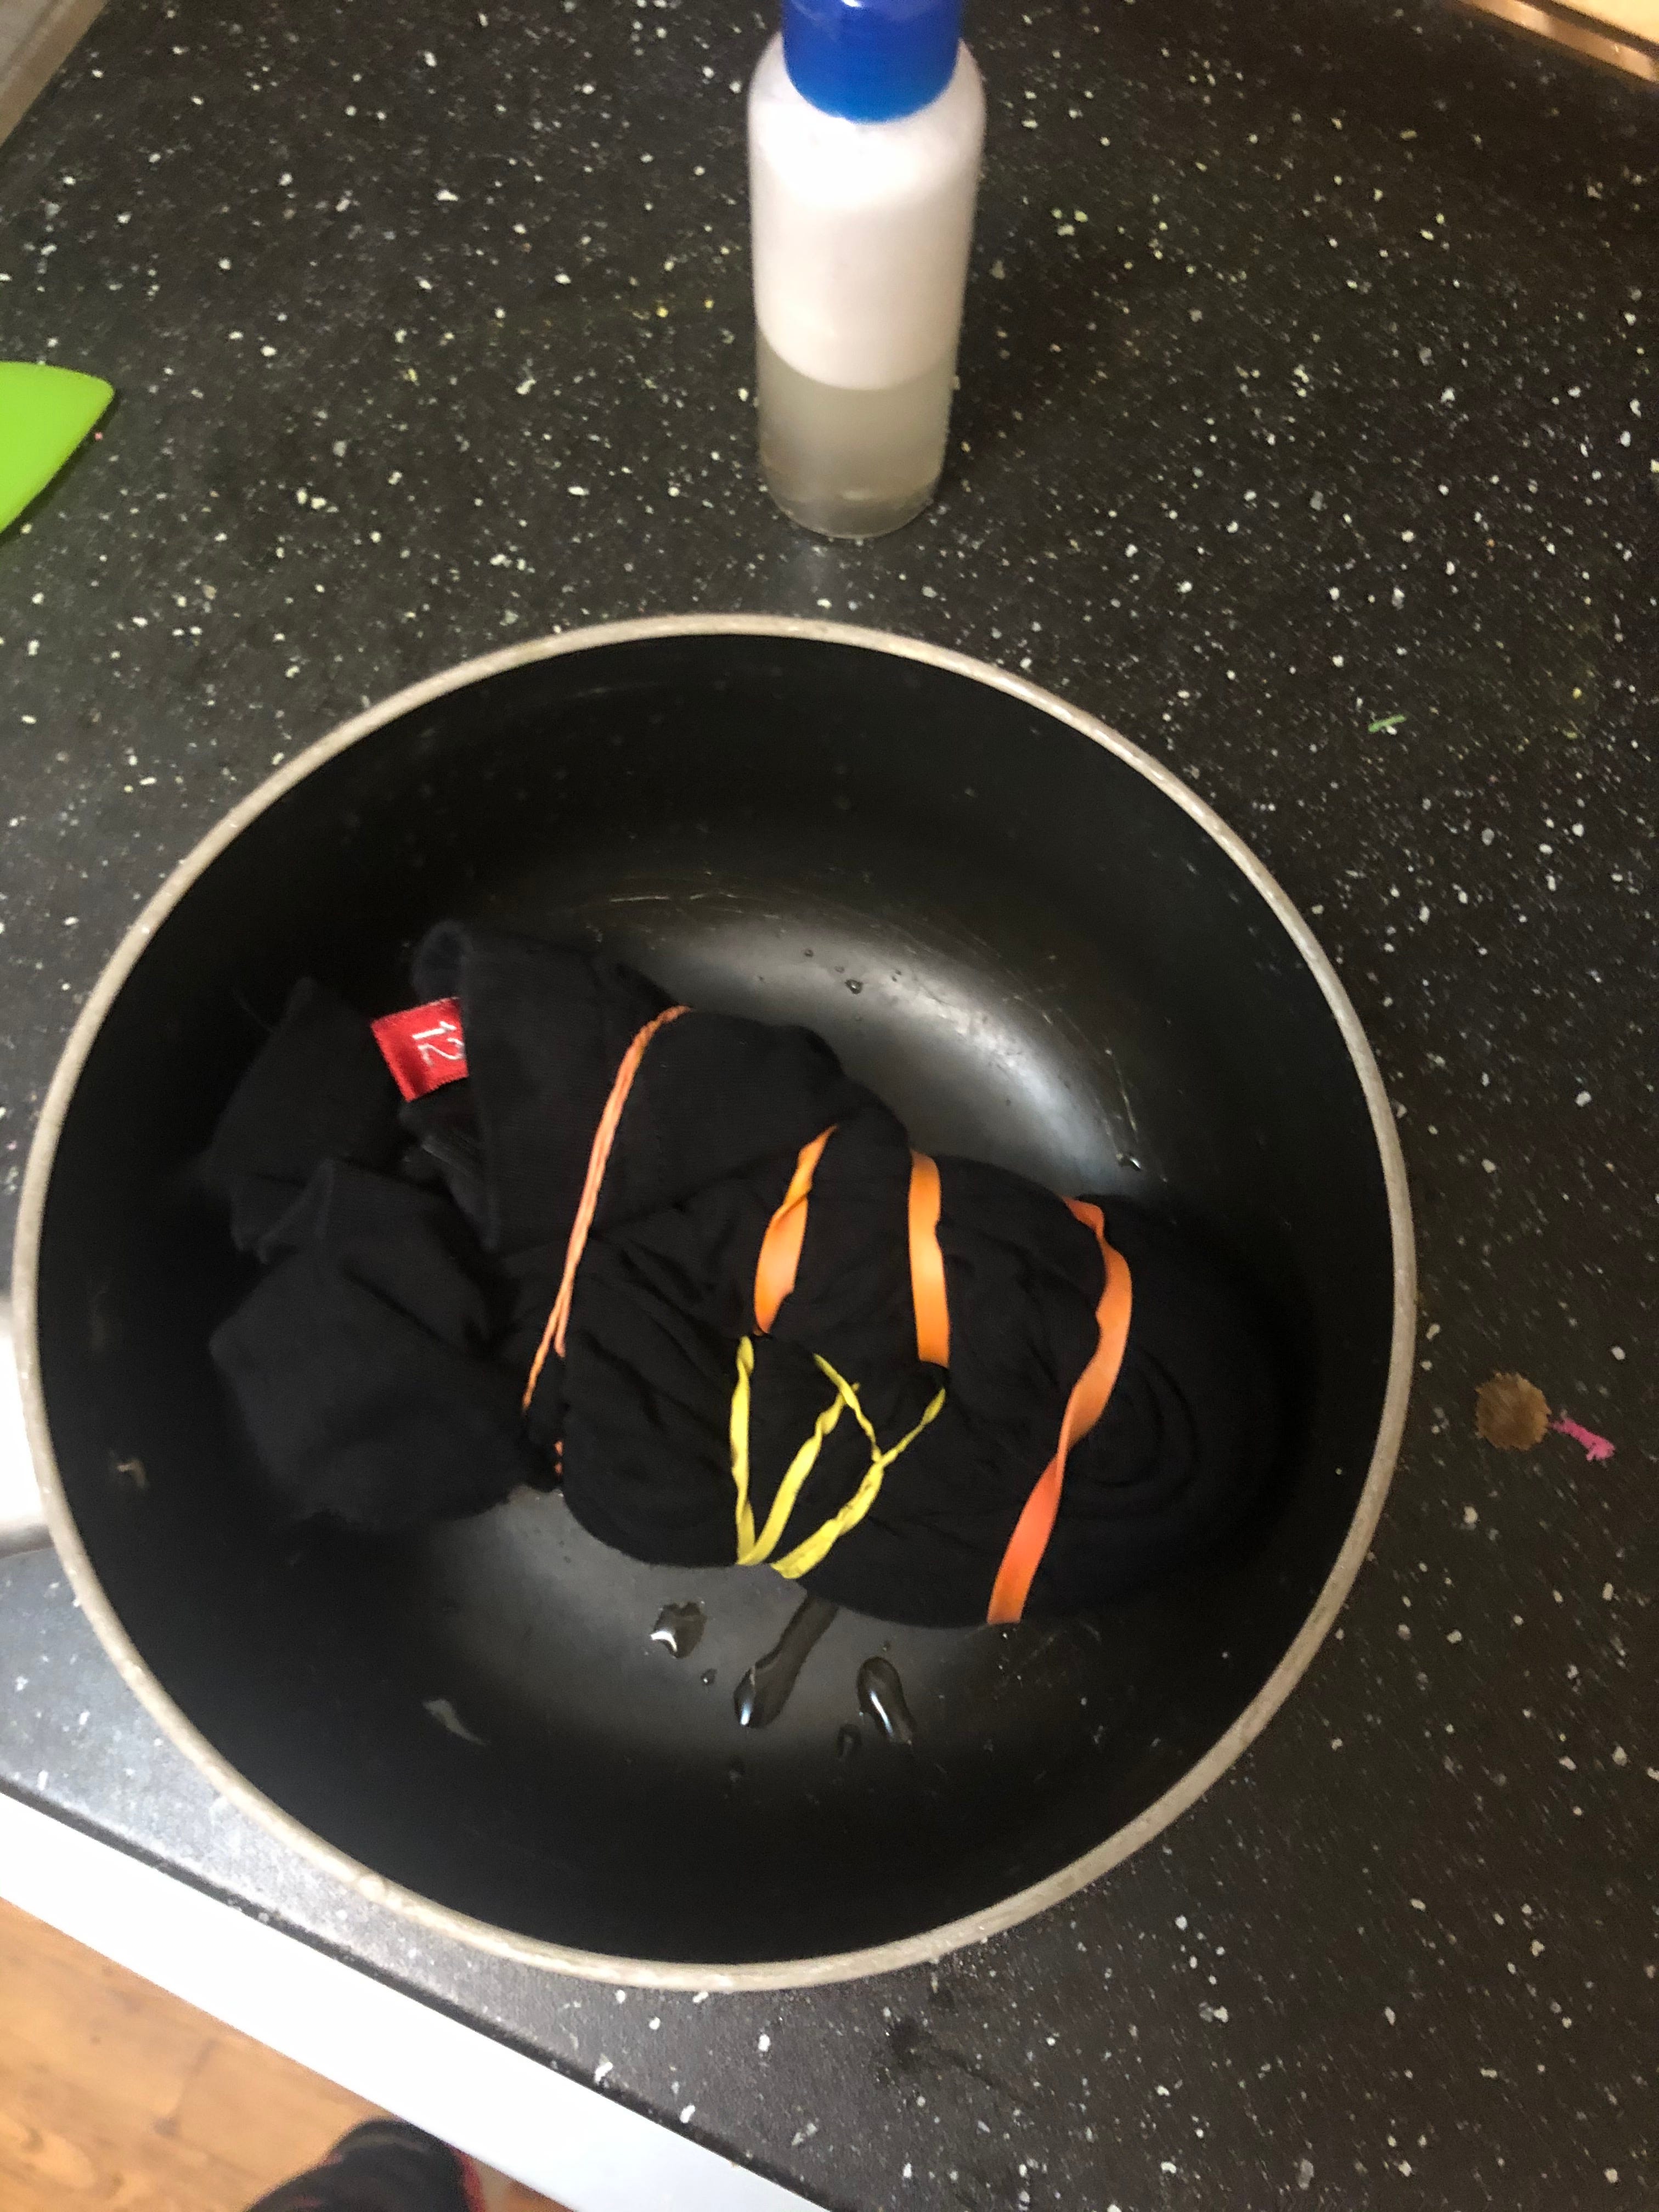
Find a place where you can now add the beach to the wrapped fabric. Many people use gloves for all tie-dying. I didn’t for the natural dyes, the turmeric can make your fingertips a little orange, but it fades. This one you should use gloves for. I used a pot that I DO NOT use for food at all. You can do this on plastic or in a disposable container or even directly into a bathtub. You don’t want to do it in anything that you plan on later using for food or cosmetics. TLDR bleach is dangerous and don’t get it into your mouth or eyes or onto things that are going to be in your mouth or eyes later.
Take your bleach solution and add it to each section and make sure it gets in there. Let the fabric sit. I let mine sit for about 4 or 5 hours, but I probably should have let it sit a little longer as well.
When you like the color peeking through, wash your garment out well. If you want to stick it in the washer, do it alone. I washed mine out in the sink. I am going to give it another wash in a washer before I wear it. Let it dry after or stick it in the dryer (it shouldn’t have to be alone, but wouldn’t hurt.)
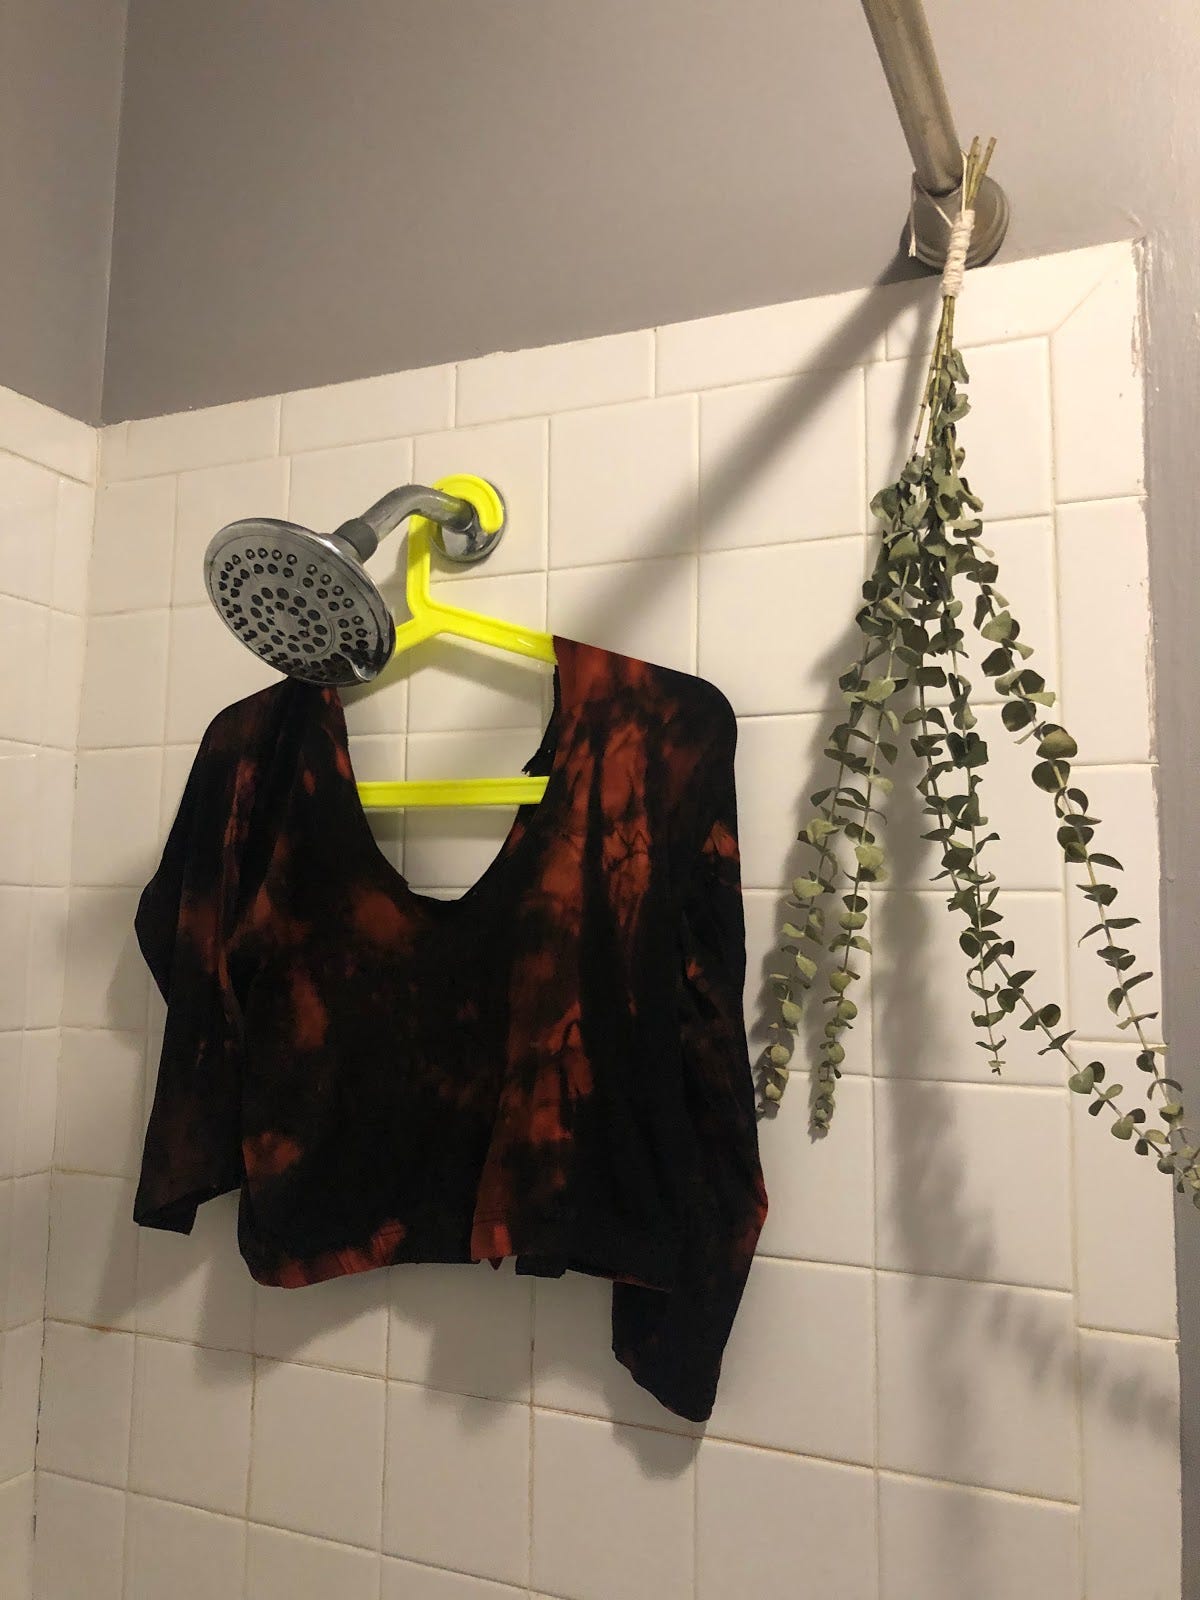
Here’s them dry and a photo of me in the black shirt since some of you might be “does it still look like leggings?”

Well, this was a fun one. Before I get into plugs (I still have some, I know). I wanted to give some craft updates. Long time readers will know I am a TikTok teen ™ now. I posted a tutorial of the reused Shrinky Dinks we did a while back. This time I made Danny DeVito earrings and a lot of TikTokers wanted their own. Long story short, I made a little Etsy store to sell a couple of the funky earrings I have been making in quarantine. There isn’t much on it right now (someone already bought my Dolly Parton earrings) but, if you want to check it out, it’s called With a Little Charm and I’ll be adding some more stuff this week.
Okay, enough about me. Let’s talk about podcasts. I know I already gave you podcast recs, but that was a while ago and there truly are a million podcasts out there. Unnecessary Sequels is another movie podcast (you can probably tell I love a movie podcast). If you are less of a movie and more of a play person, Broadway Baby is for you. It’s not out yet, but my friends are also doing another theater podcast so I will probably plug that one when it drops. Between Awesome and Disaster is also worth a listen. Or you could always listen to mine (oh no I made it about me again!)
I hope everyone is keeping sane and as always, stay inside, stay crafting.