


Say Hello With Resin and Sanitizer
Welcome to Craft Cult. Let's Get Crafting.

Hi Welcome to Craft Cult,
So happy that you signed up for my first ever newsletter. My name is Rosa. Usually, I’m a comedian, writer, substitute teacher, after school worker, and entertainment journalist (I know, we get it you live in New York), but I have been quarantined for the last two weeks, (stay inside, stay healthy, especially if you have asthma like me!) and a lot of my jobs are simply not happening.
I’ve had a lot of time. I cut my own bangs, I fixed my leaky sink, I started painting portraits of my friends and posting about it all on twitter. My friend Amy (@h0rcrx) suggested I make a crafting newsletter and well here we are.

Me before this whole thing started. Outdoors, wearing dresses, being within 6ft of the talented Mindy Tucker outside a crowded venue.

Me now, sports bra as a shirt and crisis bangs. (My grandfather responded to a post of my bangs and said “stick to plumbing,” so I have already been read to filth on this one)
I don’t want to make this too long, but if you stay subscribed, I wanted to tell you what you are in store for. I am going to send out about 2-3 of these a week. Each one will have at least one craft and probably some updates to crafts that take longer/multiple sessions. But don’t worry, I want these to be easy and doable.
I know a lot of people are not like me and don’t already have a mountain of craft supplies in their homes so I am also going to make sure at least 1 craft a week is from things most people should already have around the house and 1 craft a week is going to be kid-friendly (If you don’t have kids, kids crafts rock anyways.) If you want to stick around after the craft, in future newsletters (this one was already too long) I am going to be sharing some random recommendations and thoughts (honestly you can skip if you want, but who are you kidding you have plenty of time.)
All this being said, I am going to start with a project that isn’t really kid-friendly and you probably don’t have already at home, but a friend asked me to teach them before this whole mess started, so we are going to start with resin pouring. (If you read until the end I added a second way easier craft if this is too much.)
So what is resin? It’s basically liquid plastic. There are two types and it is important to know which one you are using. There is UV resin which cures under a UV light (I use one that is supposed to be for manicures). It’s popular in Asia and is best for small projects. I have made jewelry, tiny keepsakes, figurines and more with it. It’s pretty expensive and the piece you are making can’t be so big that the UV light can’t hit all of it. The second type is epoxy resin (sometimes just called resin). It’s cheaper by volume, you don’t need any additional equipment, but it can be a little harder to work with, in my experience.
I am going to teach you how to do a simple project in both.
IMPORTANT SAFETY NOTE: wear gloves when you are working with resin and make sure to do it in a well-ventilated space. Also if you have more than 5 loose gloves (like me) think about donating them to medical professionals here’s a link.
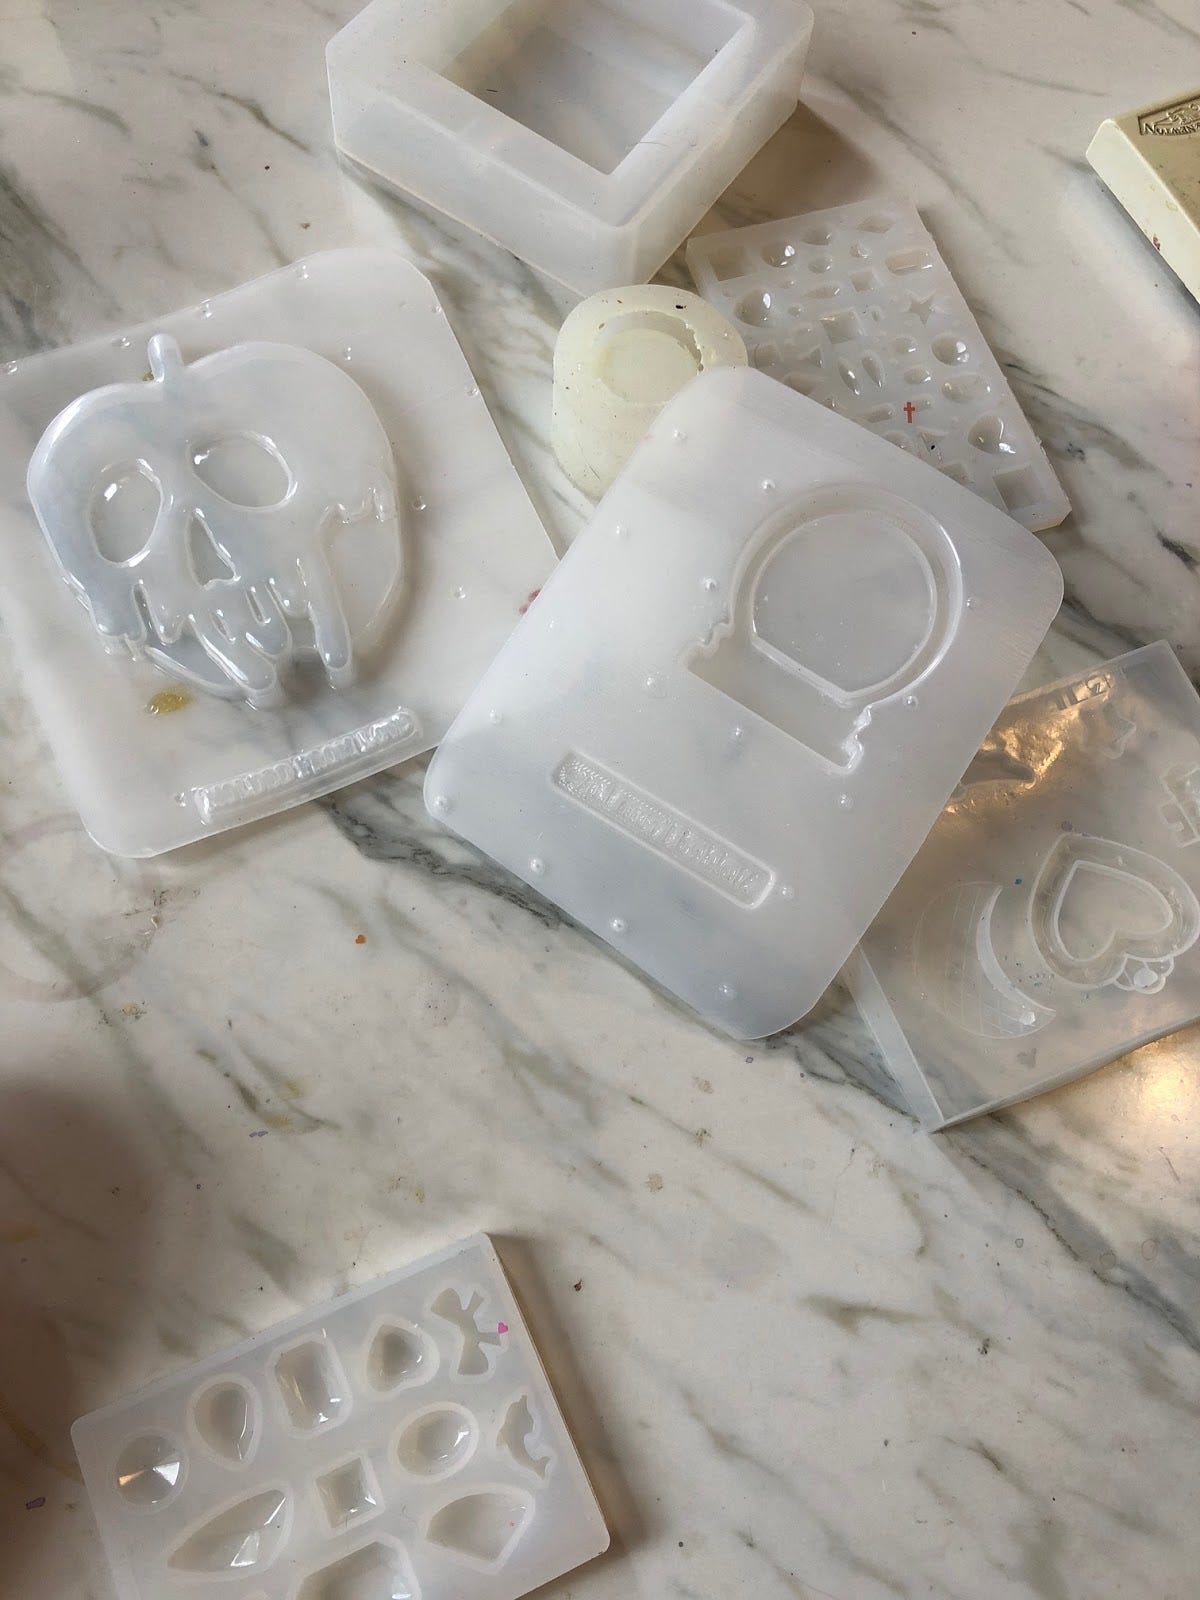
Both types of resin are poured, so you usually have to start with a mold. Molds can be made out of plastic, silicone or even DIYed ( I will get into this in the sound project.) The easiest ones to use are made of silicone. Once you have a mold, it’s time to prepare the silicone. I am going to start with my UV resin project. We are going to make a little heart pendant together.
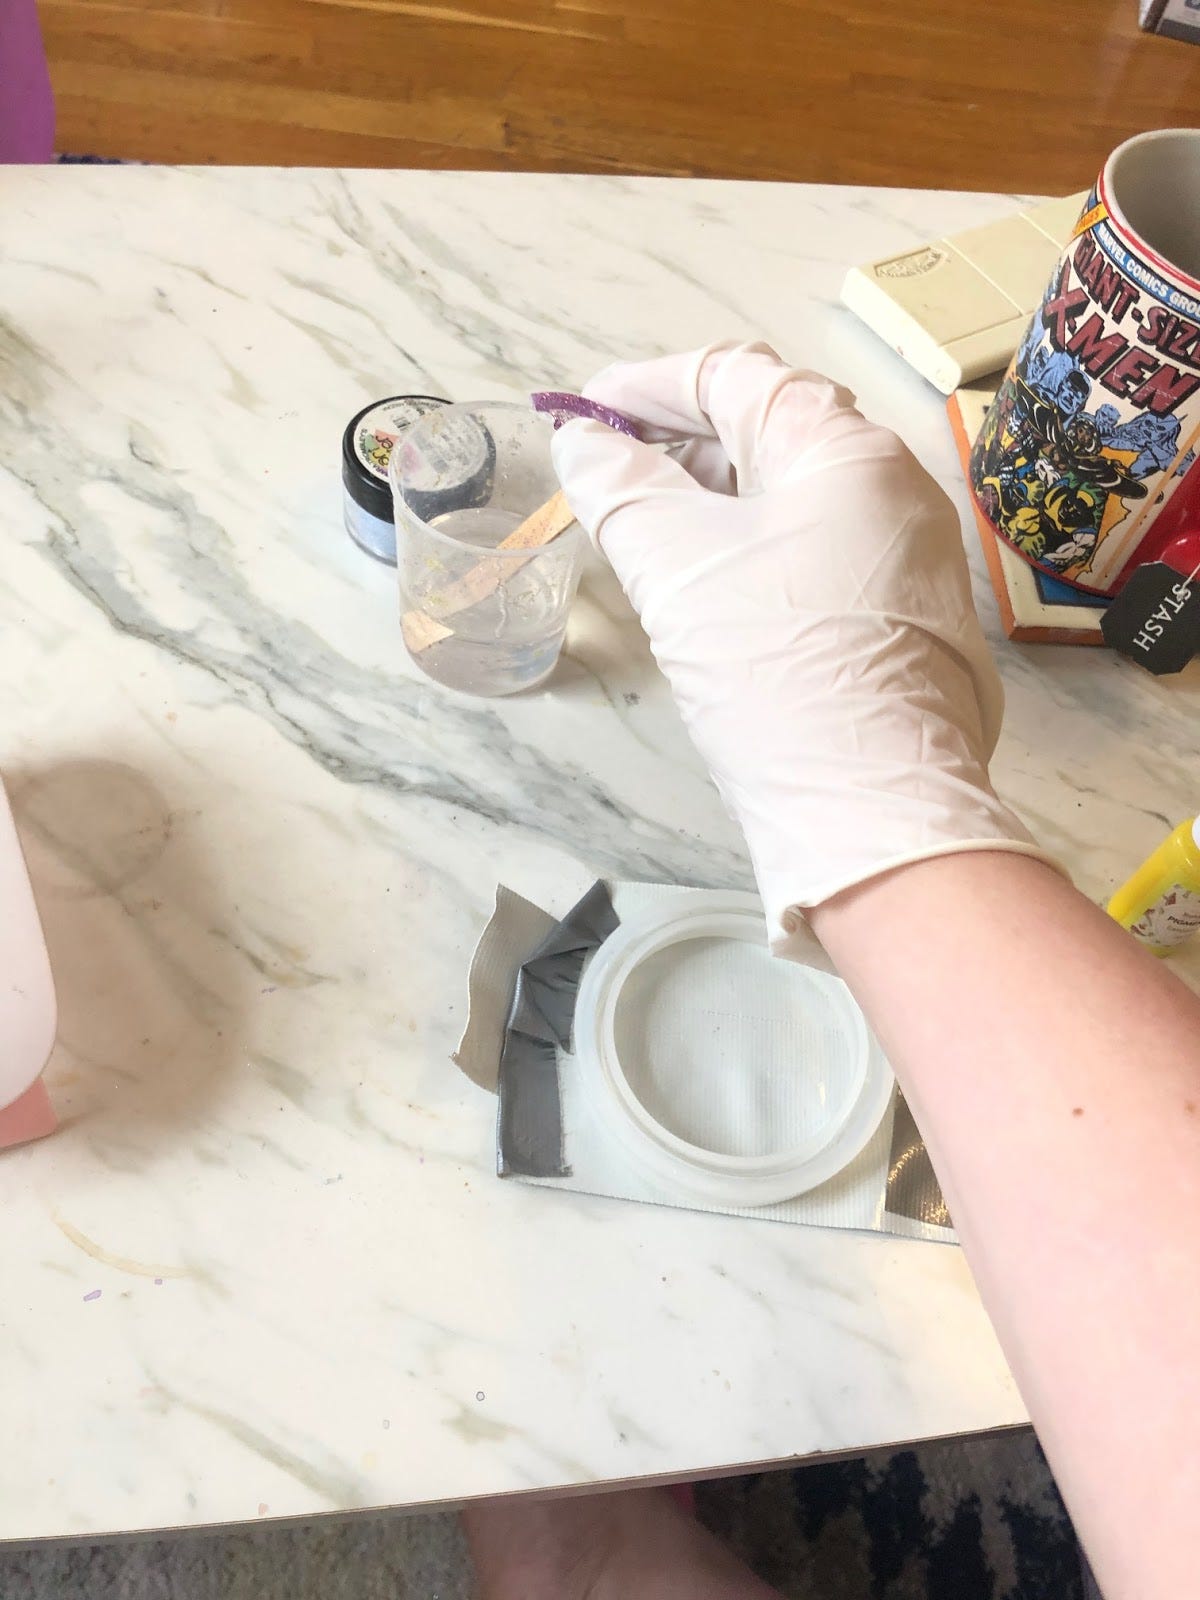
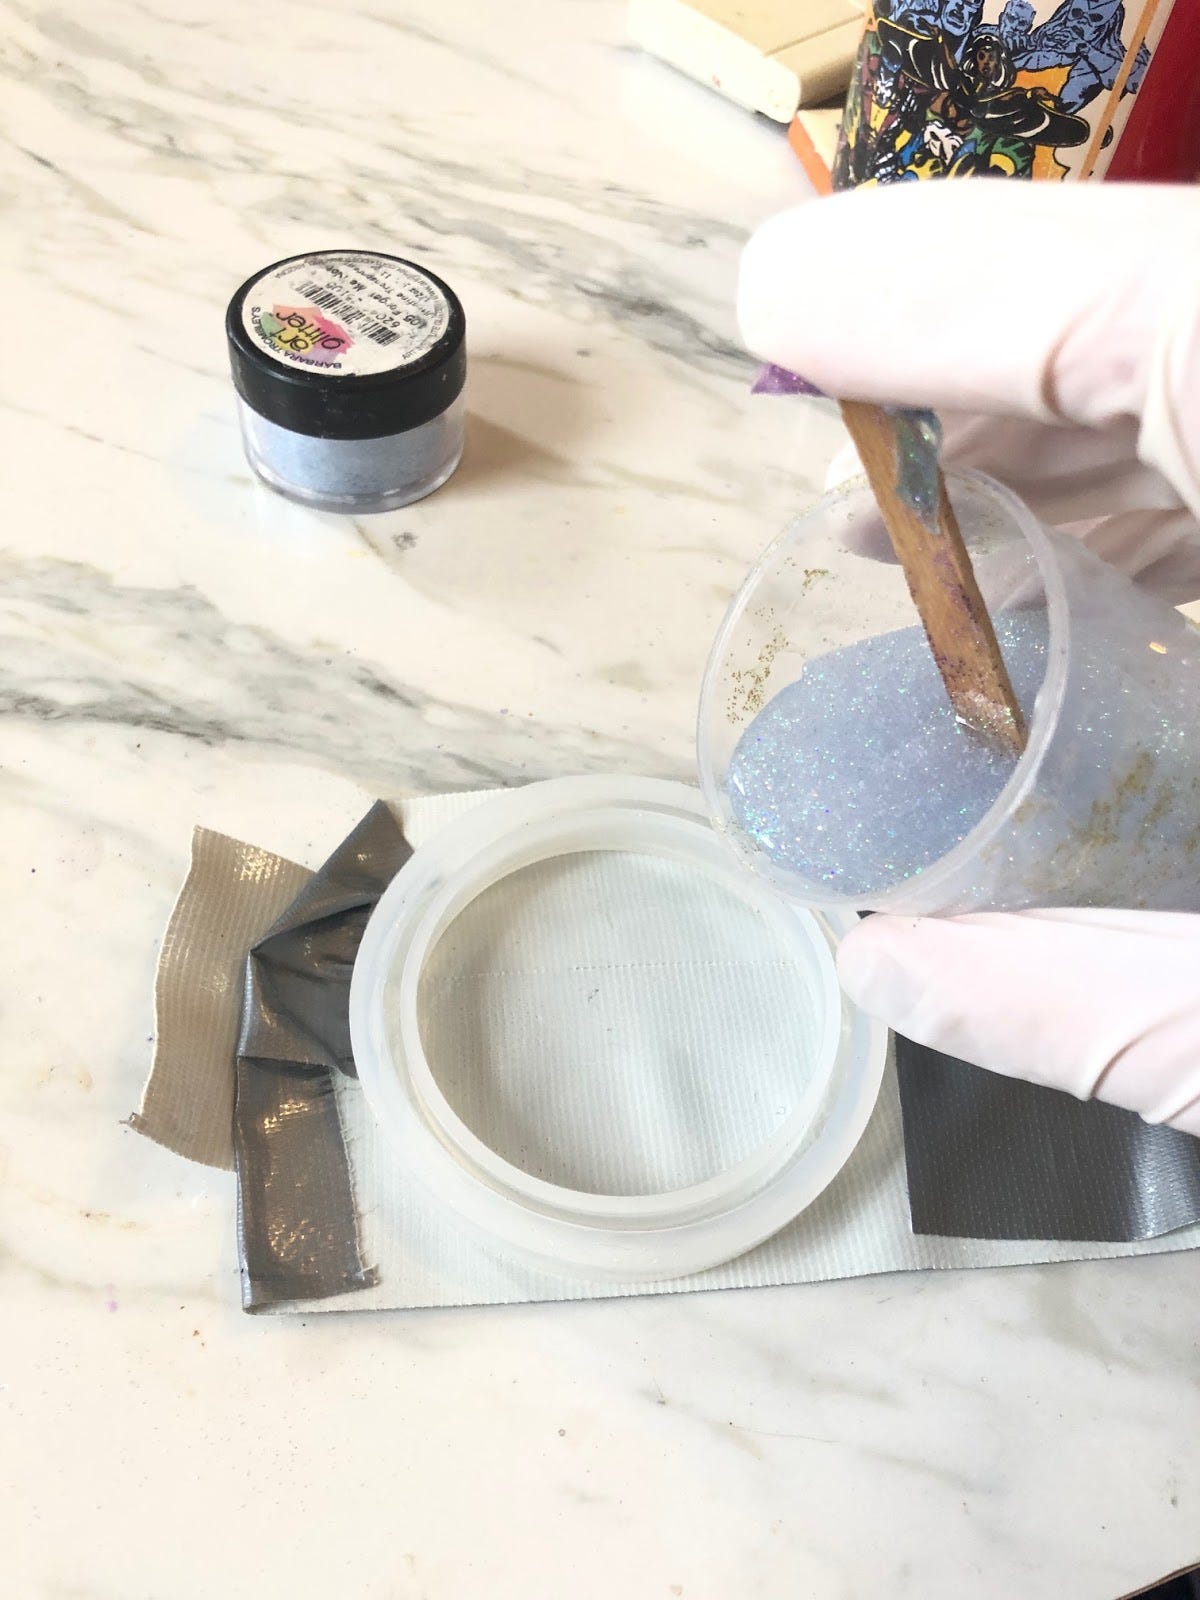
Start by adding some of the resin to a small cup or mixing bowl preferably not one that you will use for food after (don’t let this stuff get in your mouth; mine is nice because its made of silicone as well and has a spout. Then it is time to add your mixins.
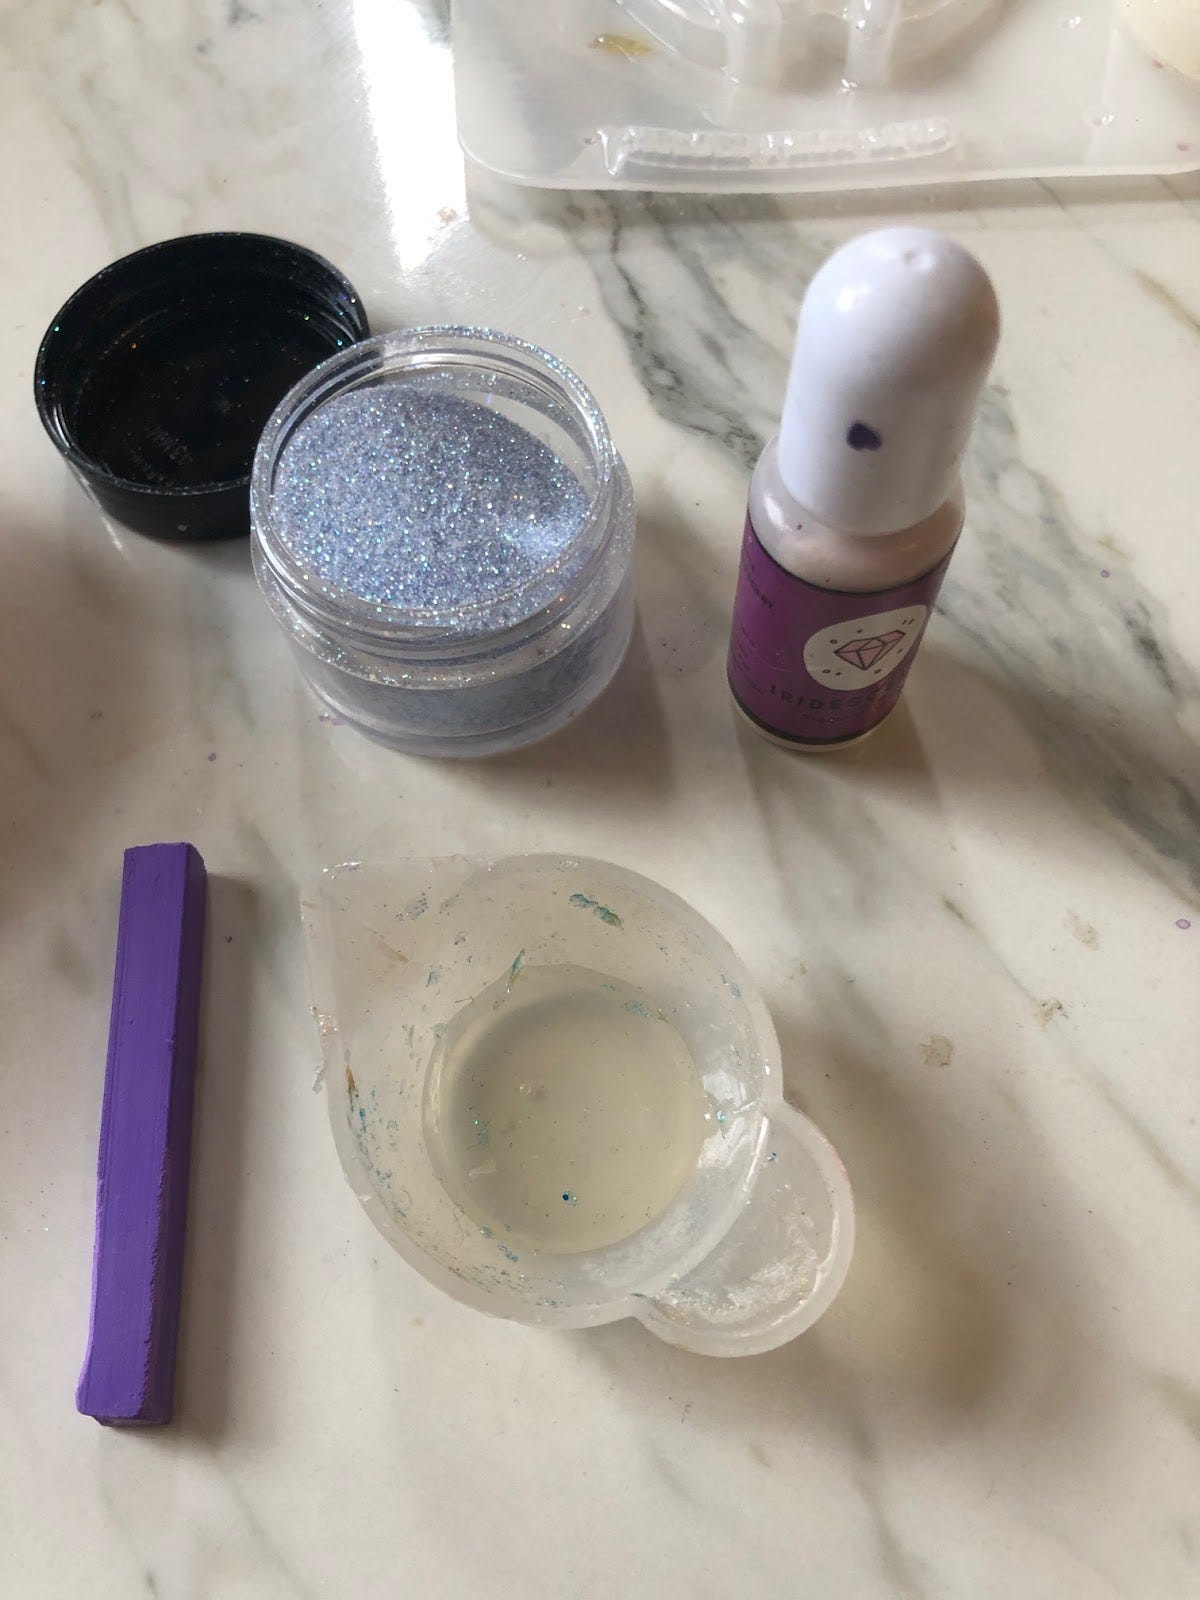
Most resins come out of the container clear, so if you want color in your piece you have to add it. I added a couple of things to mine. The first is GLITTER. I love glitter. Some call it the herpes of crafts, I call it the Taylor Swift of crafts because it has a reputation but is it really crafting without glitter? On top of that, I added liquid pigment and some shavings off of a chalk pastel. Chalk pastel is my favorite way to color resin. All you need to do is scape it over the resin and then stir it in.
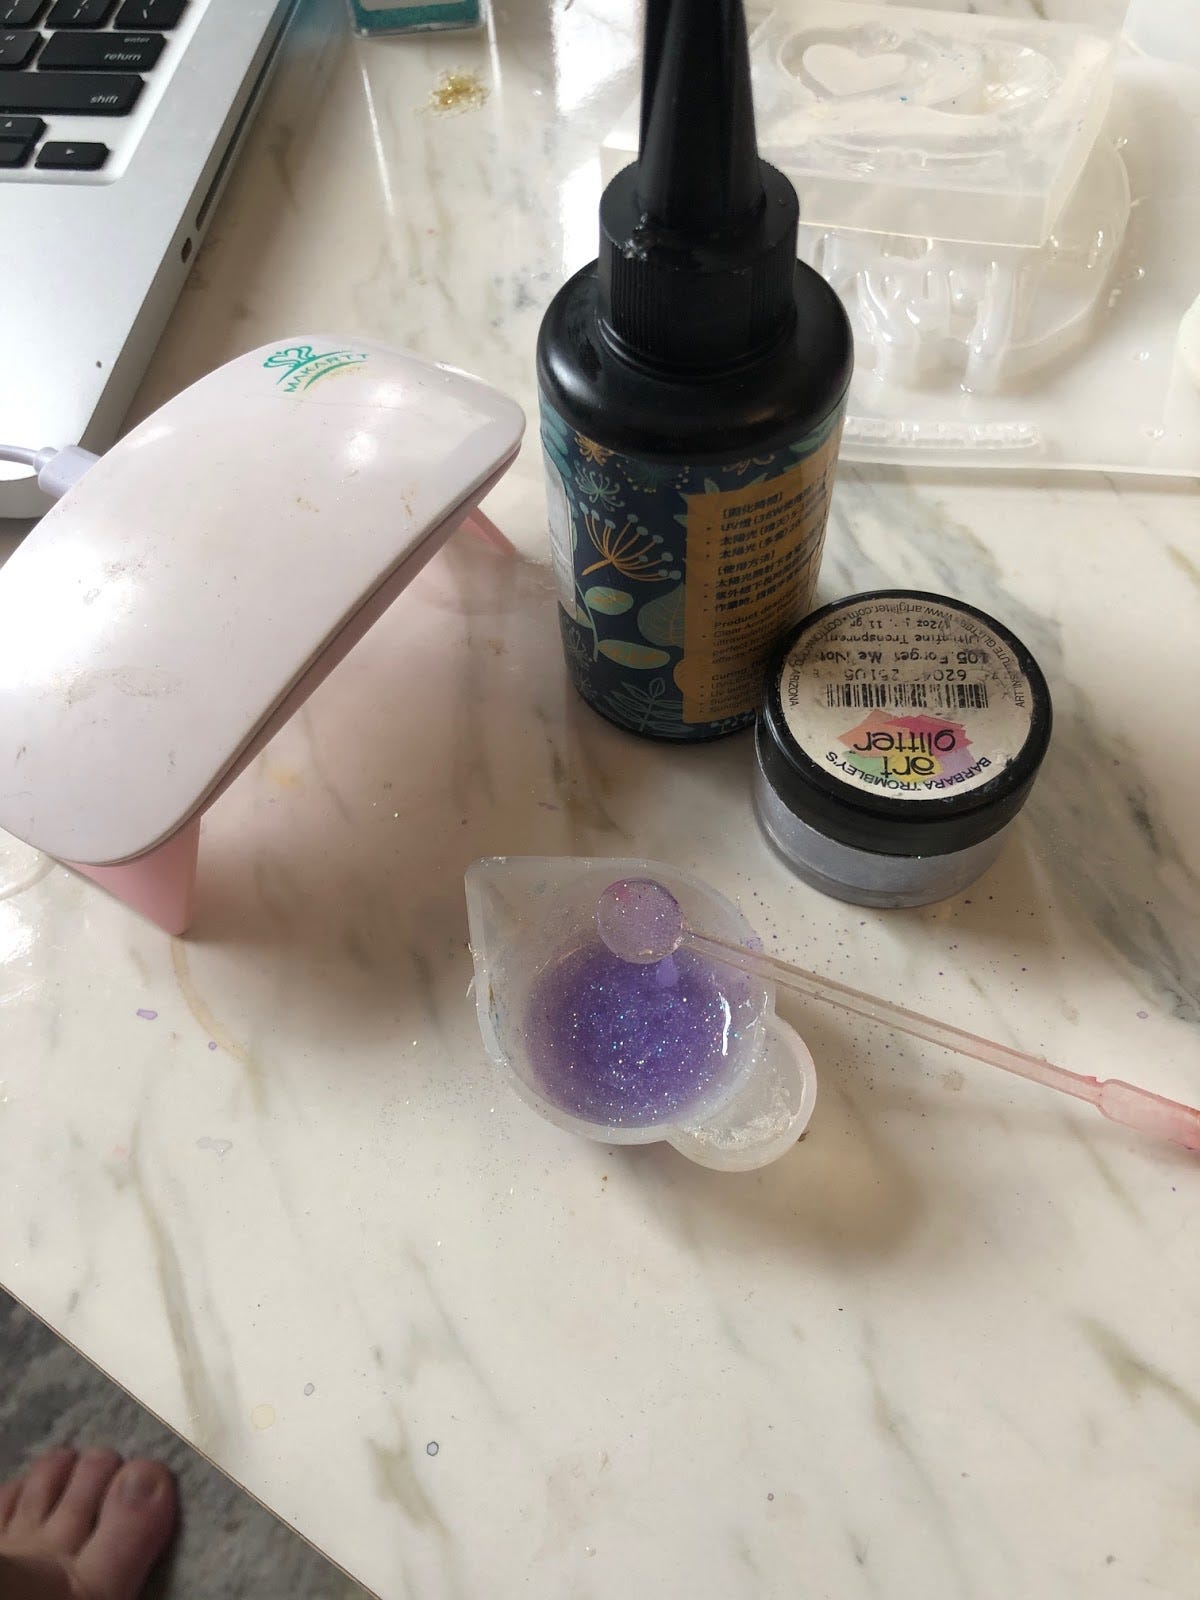
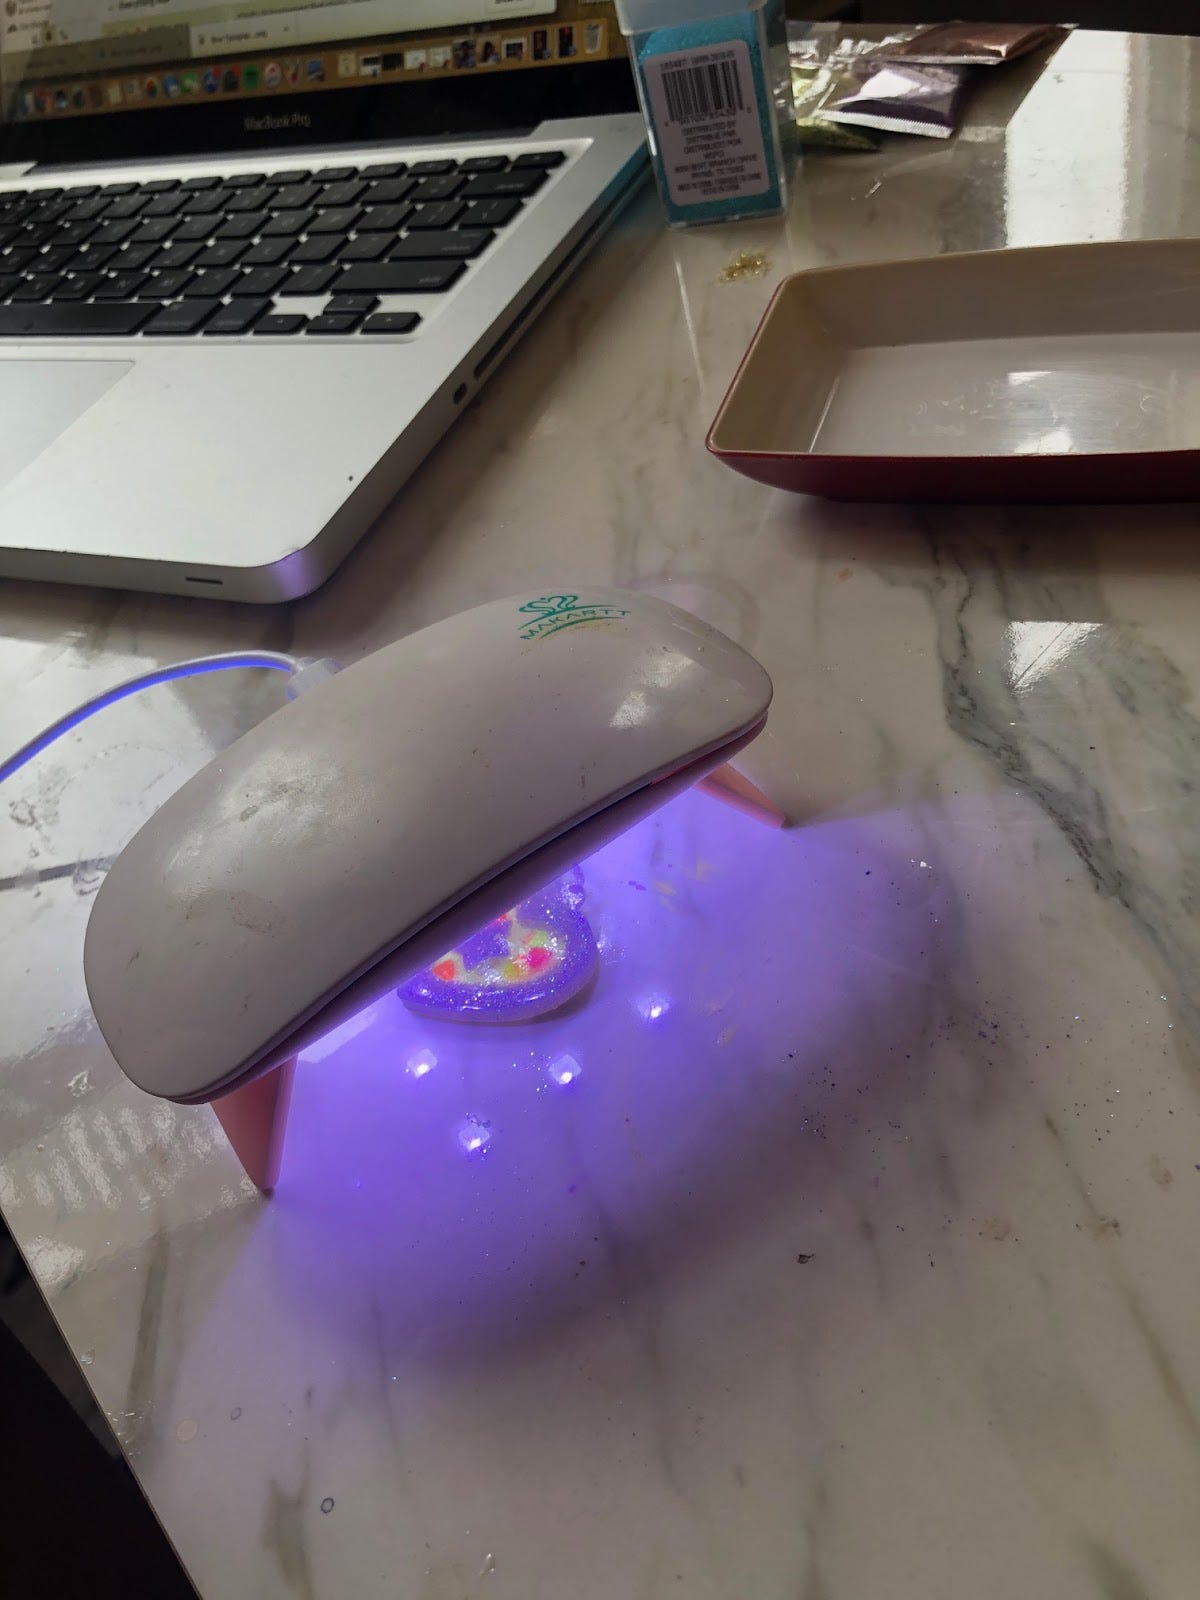
When you are happy with your resin mixture, pour it into the mold and cure it under the UV light. Sometimes it takes more than 1 round under the light especially if like me, you use a UV light designed to set gel manicures. When it’s done it shouldn’t be sticky to the touch and come easily out of the mold (if you are using silicone. Plastic molds can be hard to get out).
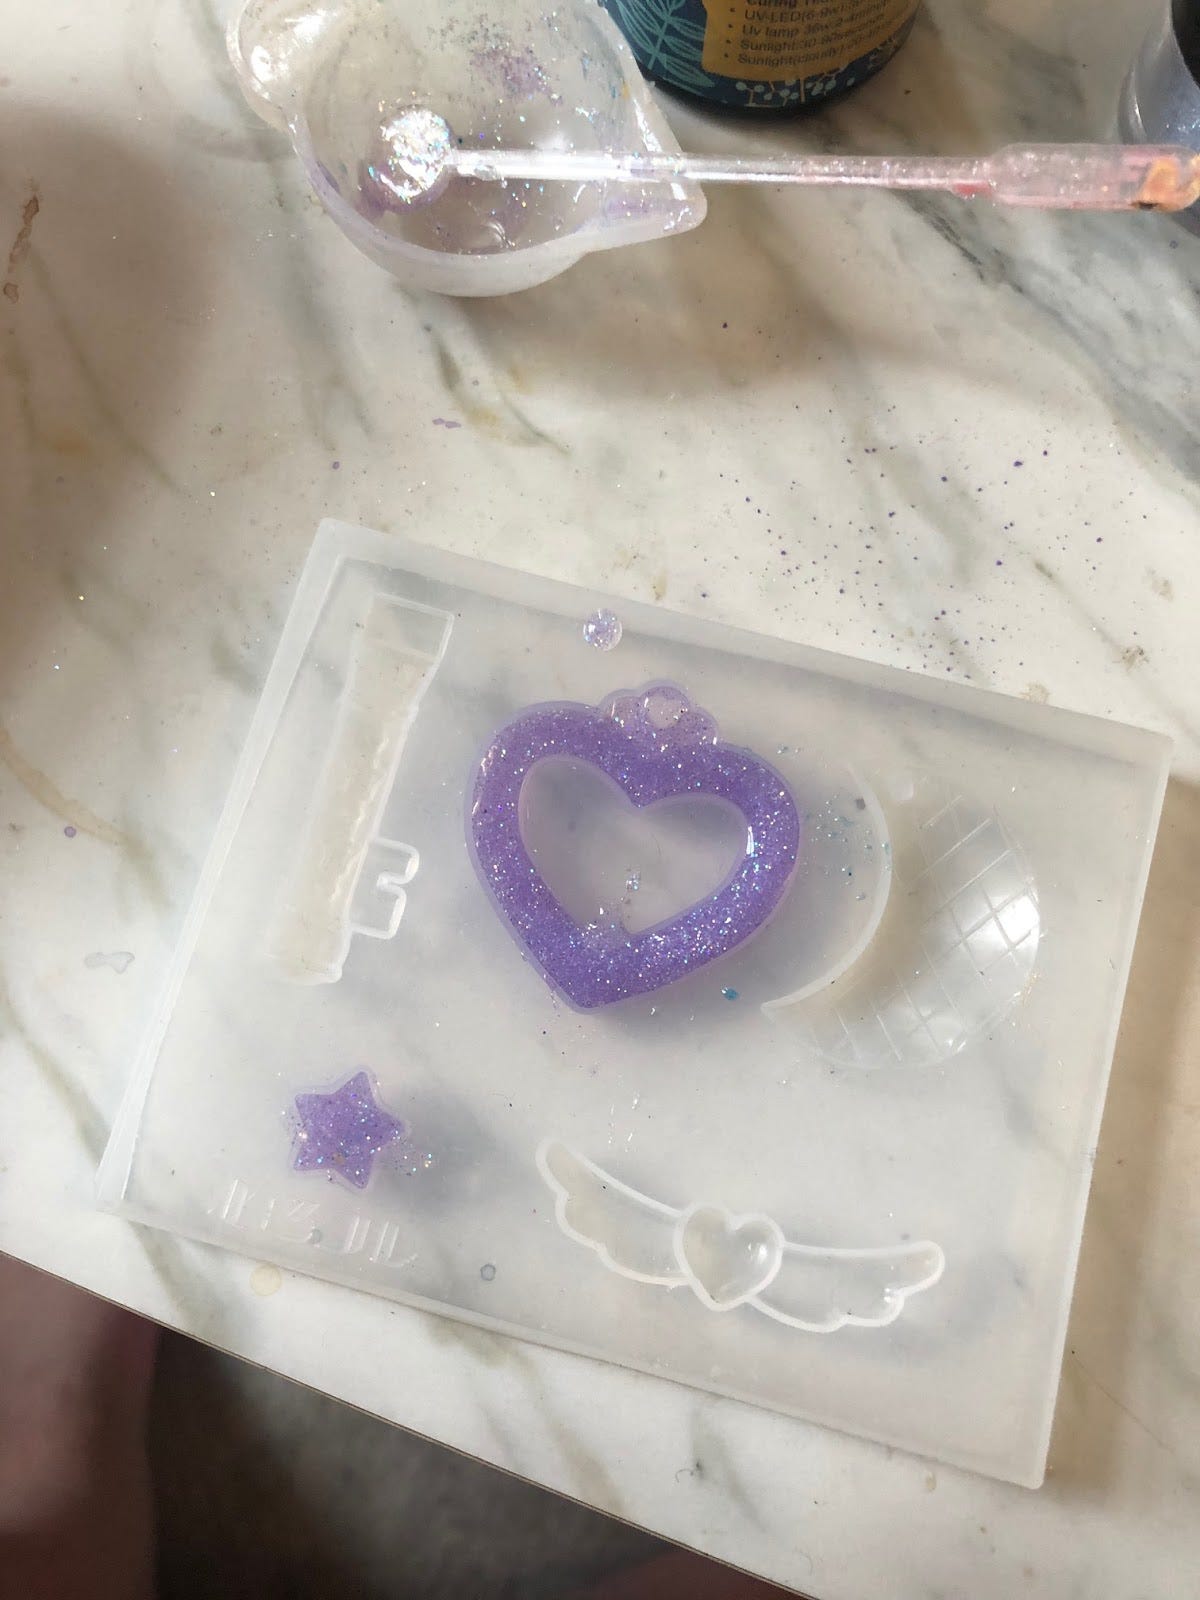
This can be where you are done if you want. But it’s not where I stopped. I decided I wanted my star to be inside my heart. So I added some duct tape to the back of my heart and stuck the star in the middle. And poured in clear resin that I had added some plastic confetti hearts into after it was poured.

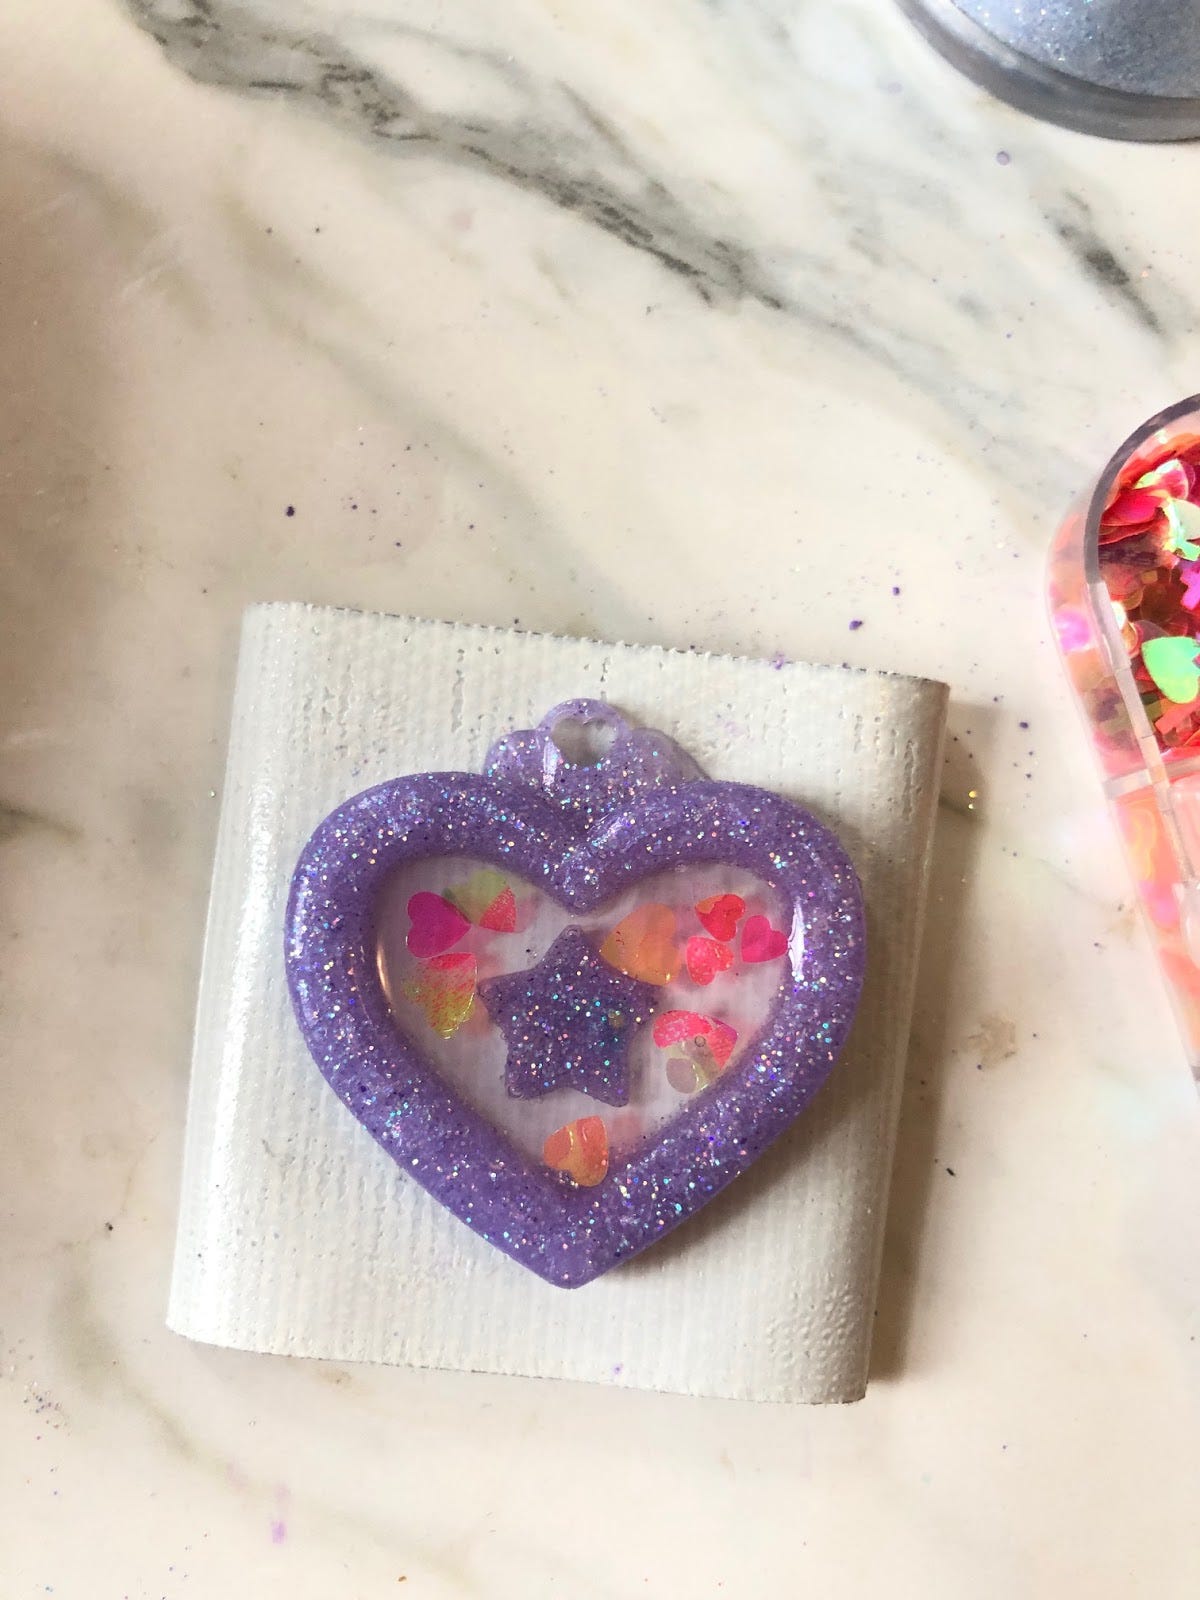
When I took off the tape I had to cure the backside under the light because the tape had blocked some of the rays. I also had to wash it after because it had some residue. But if you use electrical tape, that is less of an issue (I just didn’t have any in the house.)
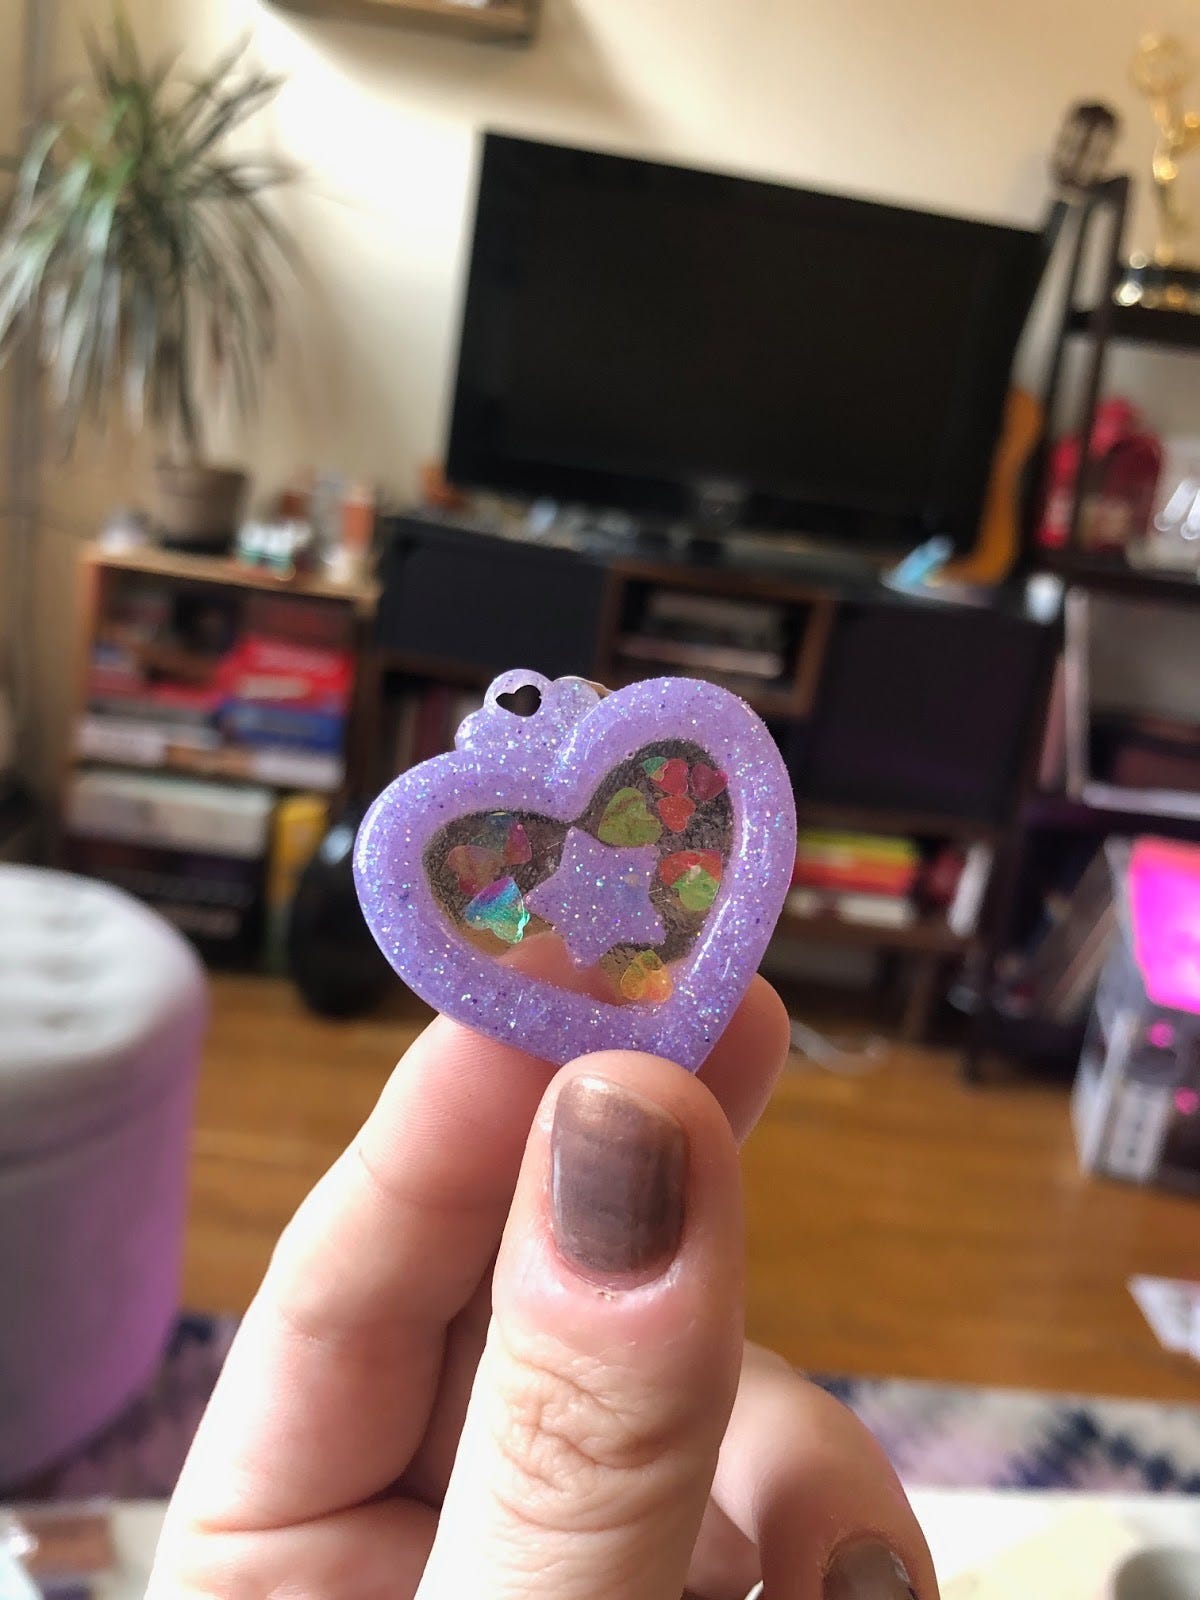
In the end, you will have a cute little heart pendant. I am going to send this one to one of my subscribers or if no one wants it, one of my nieces when I can go to the post office again.
So that was UV resin. So now let’s talk about epoxy resin. Epoxy resin is a lot more versatile, you can do a ton of stuff with it. You can pour it over canvases, tables, you can cut into it once it is hardened and sculpt it. I am going to only show you a pretty easy molded project, but as a twist, I am going to make my own mold.
If you don’t have molds there are a lot of ways to make your own. The simplest has to do with our good friend duct tape.
Much like the last step in our heart pendant, I am going to affix a 3D object to duct tape to be the sides of my mold and let the duct tape be the base of it. I was going to use a rubber band, which works great, but I didn’t have one (how? right!) So I am cheating a little and using a silicone mold that is for a bracelet instead.
I stuck the mold down to multiple layers of tape (we really don’t want this to be able to leak.) When I was happy with my mold, I started on my resin.
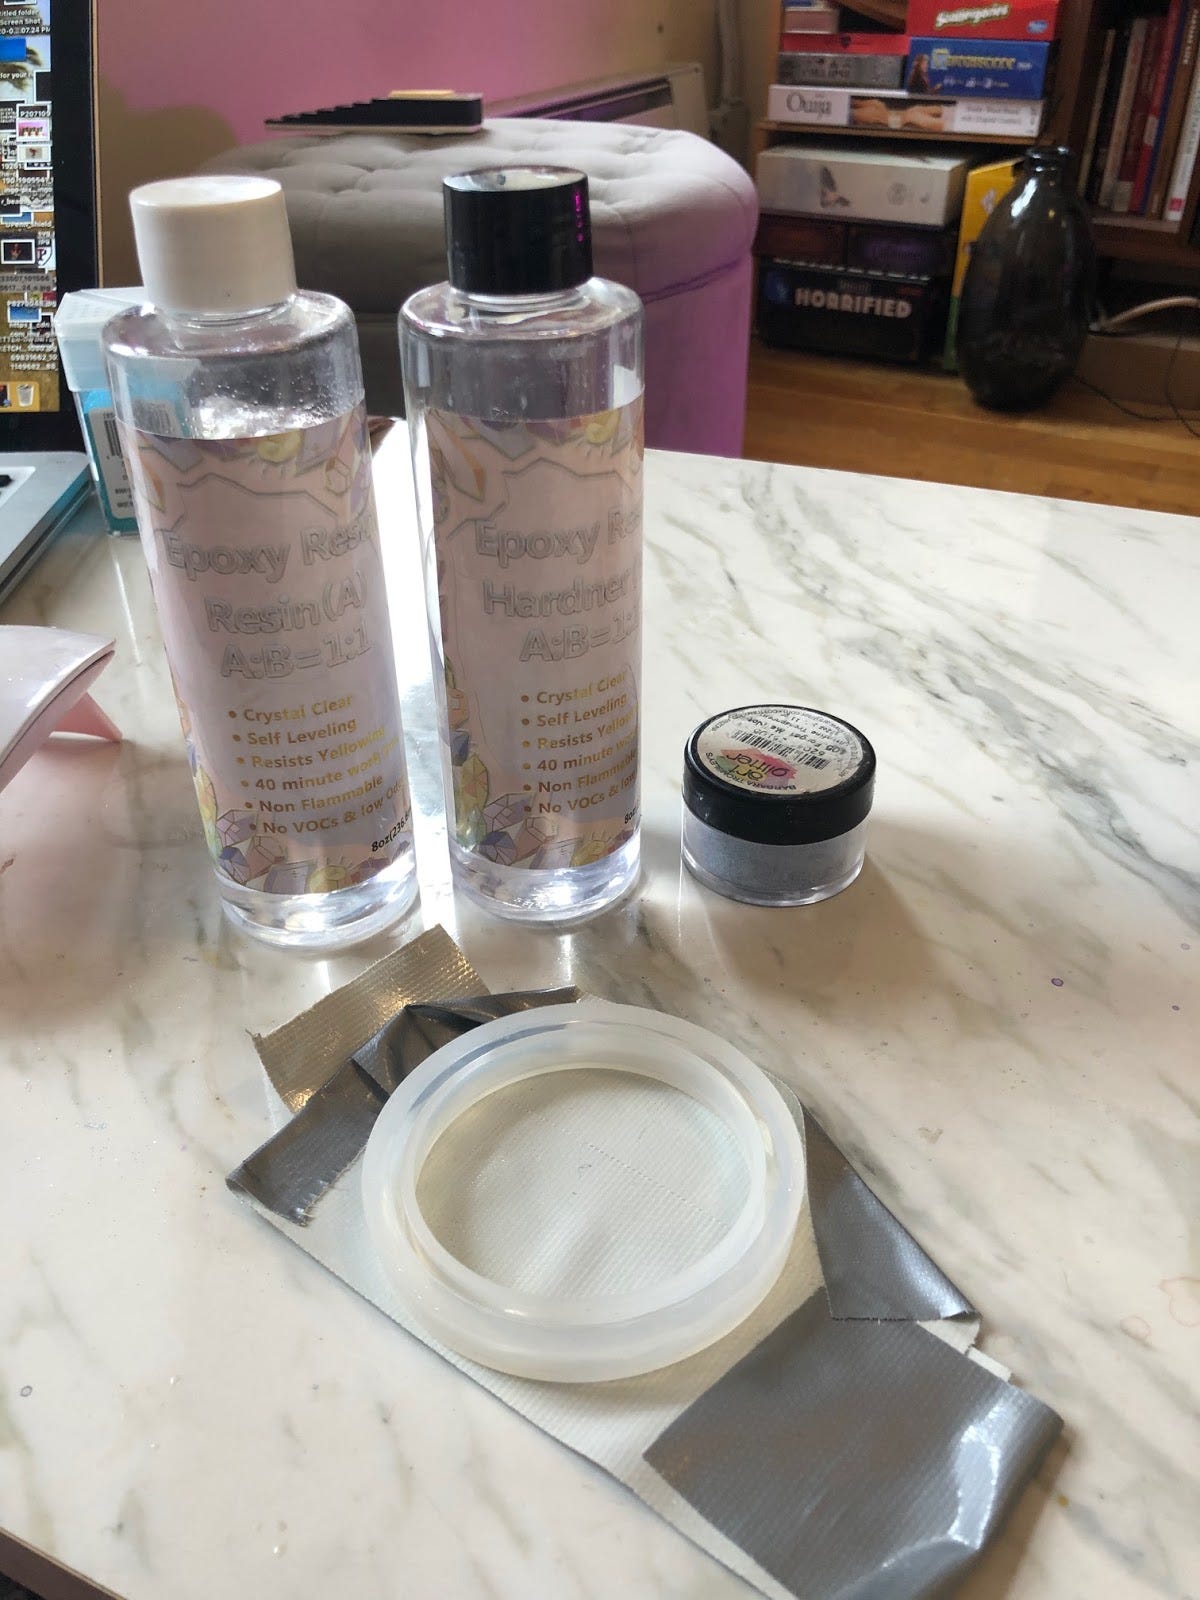
Epoxy resin cures over time. When you buy it, it comes in 2 parts. Often they are called A and B and packaged separately. A is usually called the resin and B the hardener.
The resin is pretty gloopy for lack of a better term and the hardener is a liquid. You have the mix them together before you do anything else. They need to be mixed really well if they aren’t your resin will not set and be a gloopy, sticky mess for all time. So take your time on this step.
Most epoxy resins call for a 1:1 ratio of A and B but make sure to check the box and measure carefully.
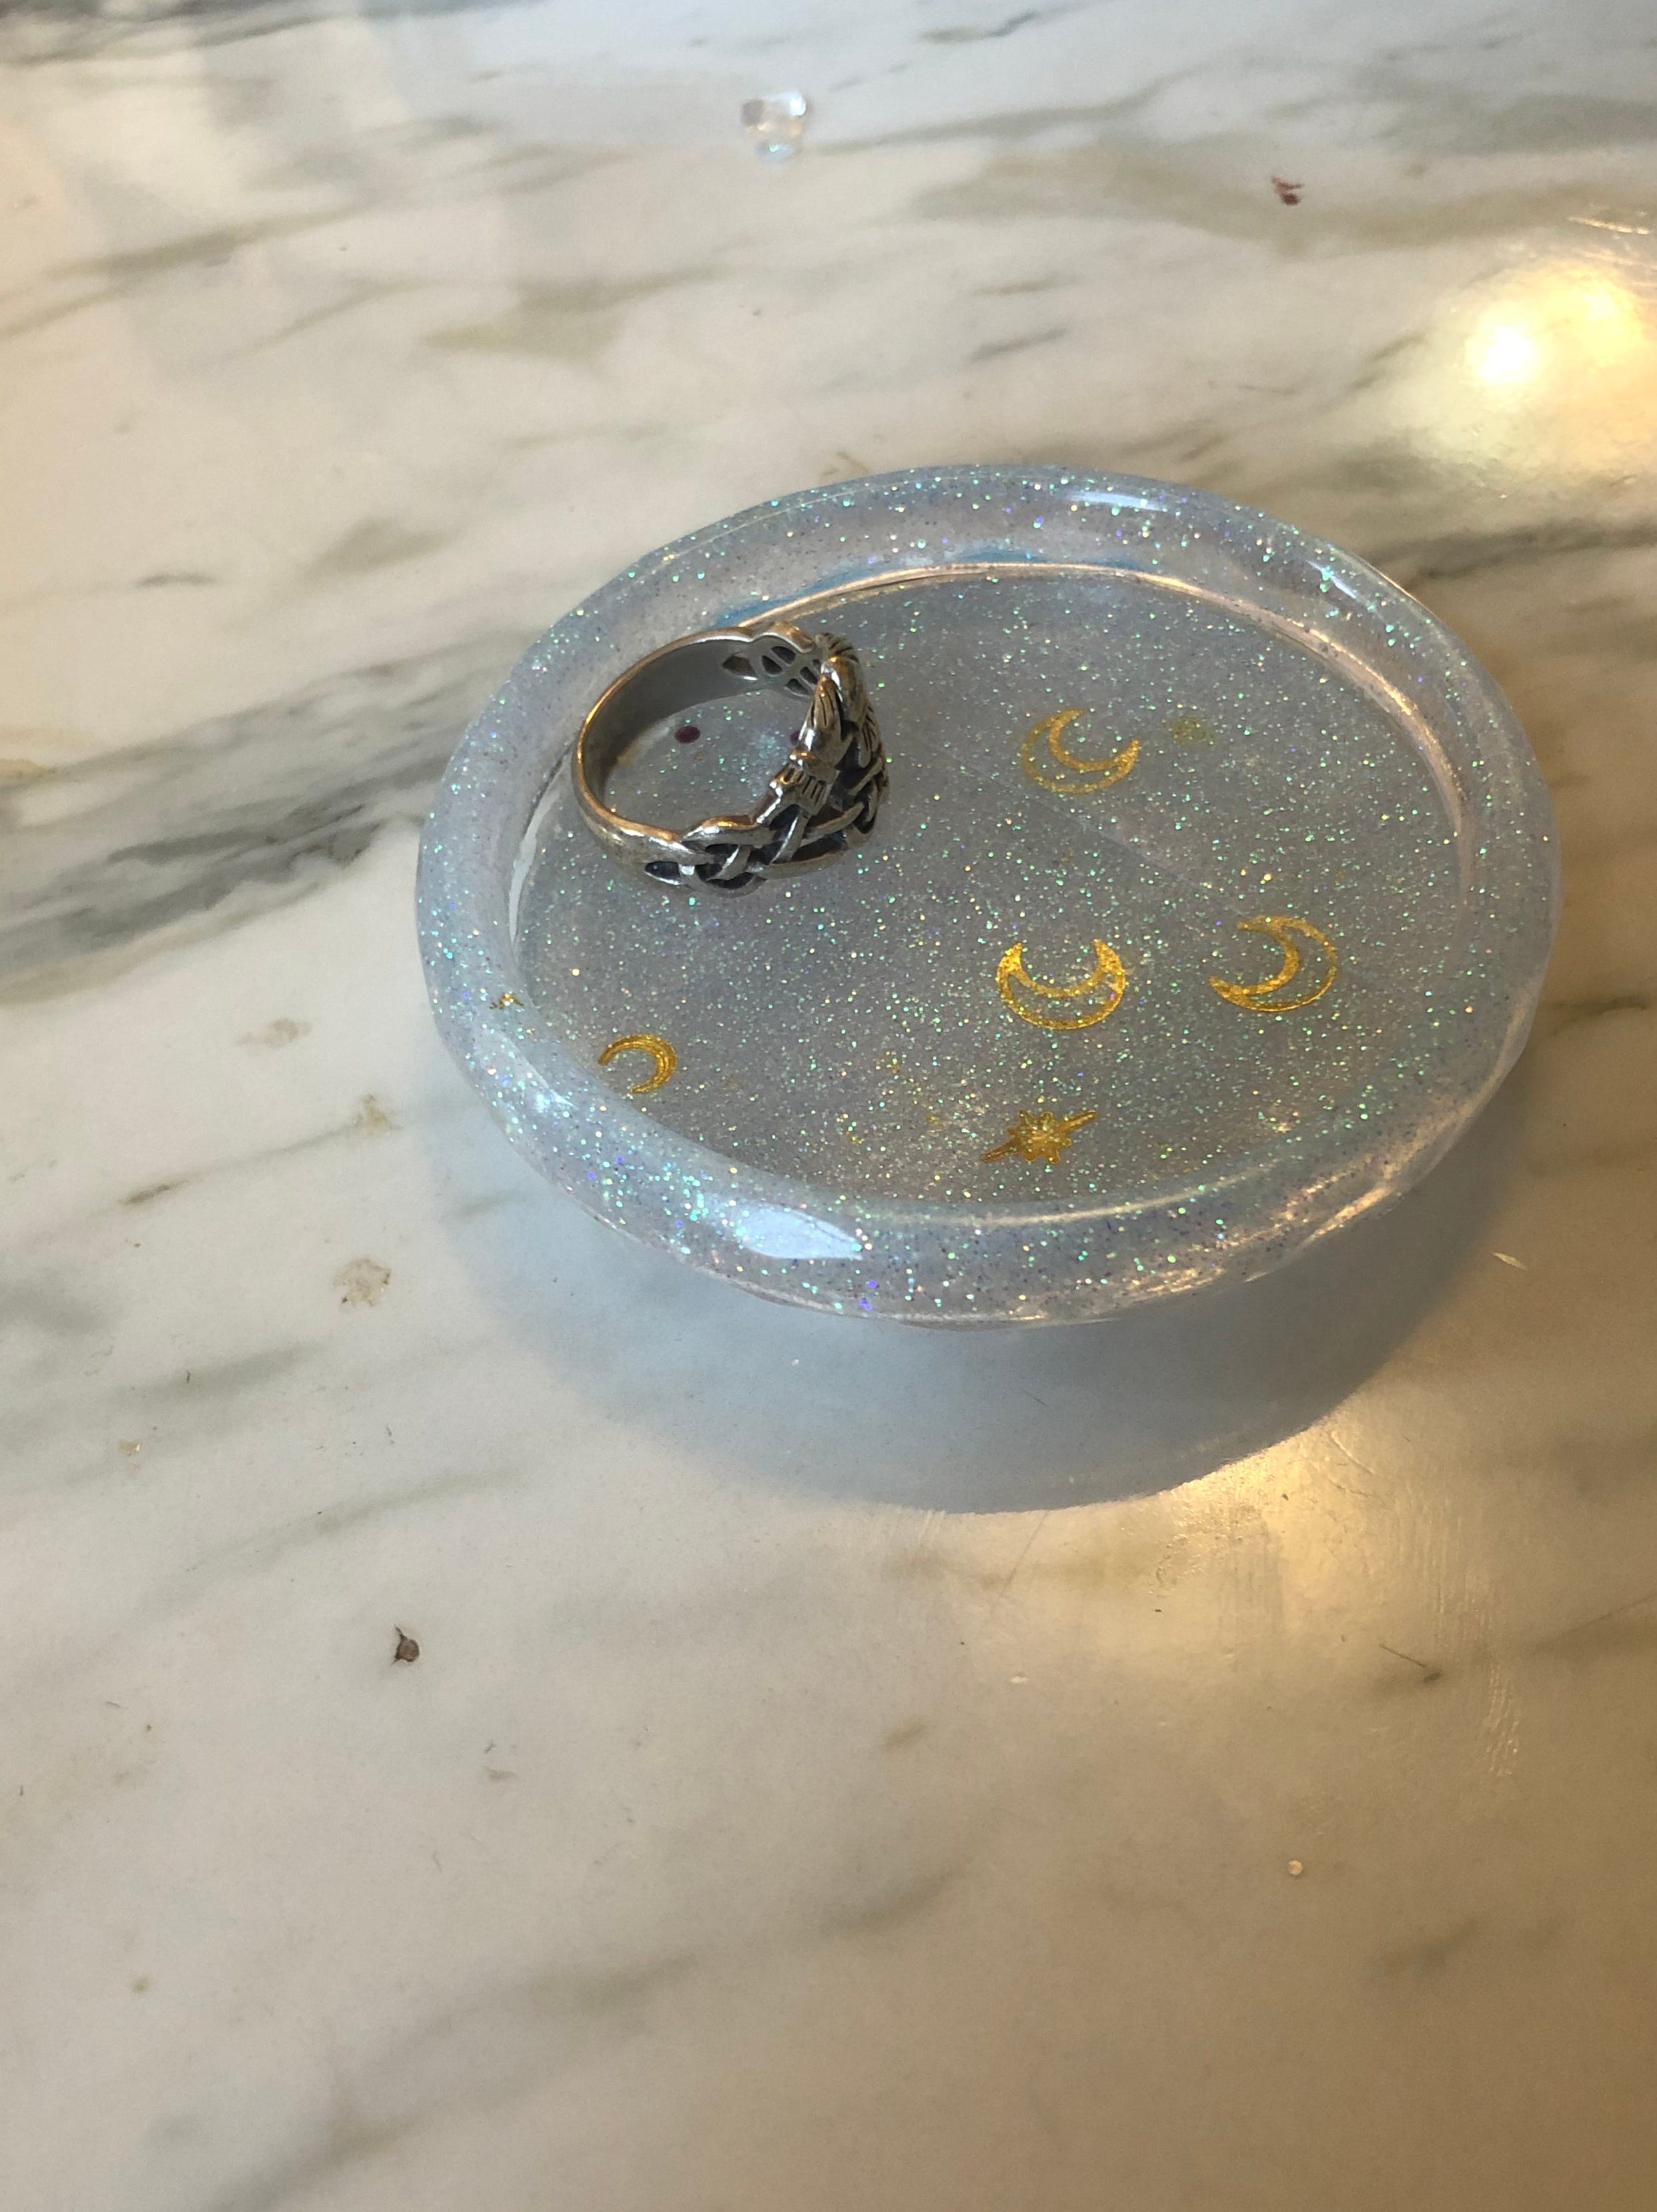
After you mix the resin well, you can mix in your add-ins. I just did glitter in this one and added some metal moon charms and nail art diamonds after I already poured the resin.
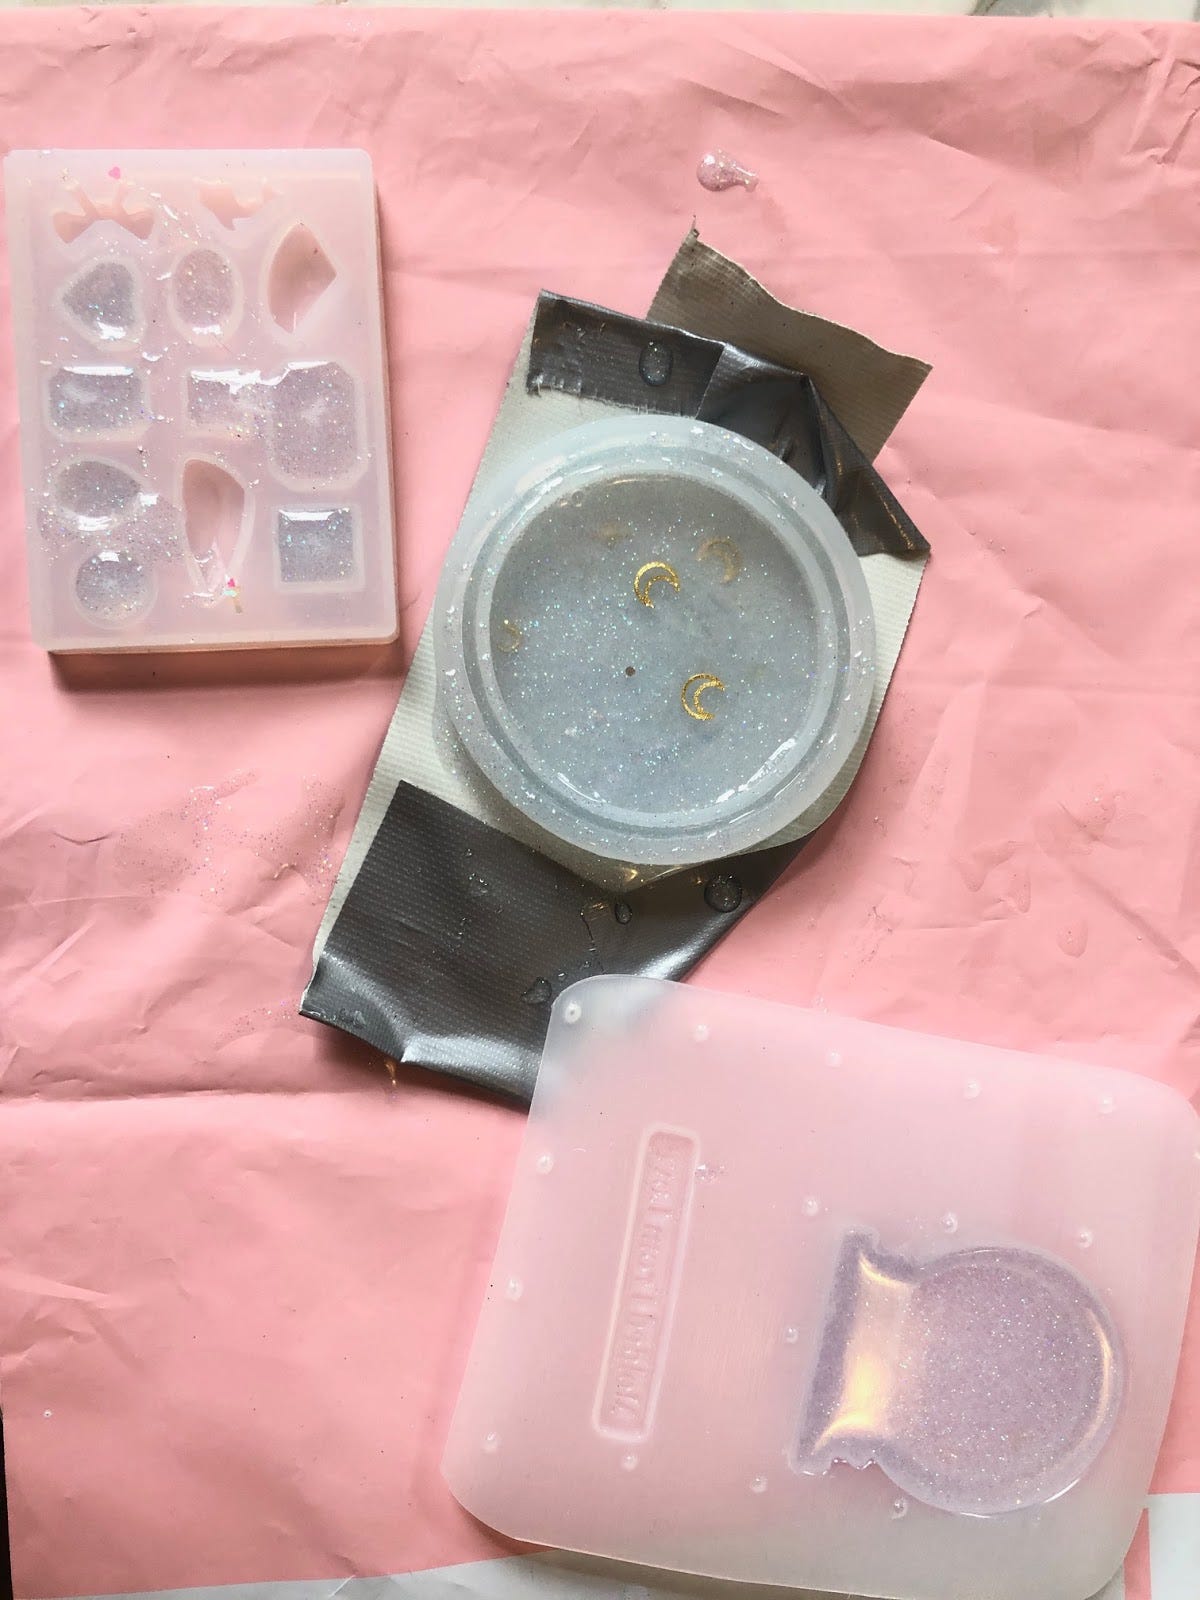
I realized after I poured the first mold that I had made way too much resin. So I filled the bracelet mold I used as my rubber band as well as a couple of other molds I had on hand. One of the molds probably looks a little different because it’s a plastic mold and the others I have been using are silicone.
You don’t want extra resin sitting out because it starts to harden after about 30-45 minutes and once it’s hard it’s not moving. If you have extra, just fill some other molds, you can always use what you make for later crafts (see my above resin jewels.)
You have to let the epoxy resin cure for at least 24 hours before you take it out of the mold. I usually leave mine in a corner on top of a plastic sheet as they cure because they are sticky until the end. Honestly having a plastic sheet under this whole project is a really good idea. I have spilled resin on our coffee table before and it’s my boyfriend’s least favorite thing (we are getting a new coffee table soon so that’s part of the reason, I was being haphazard).
After it was fully cured (24 hours!) I took it out of the mold and affixed the bracelet to the base with UV resin which made it into a little lip for my tray. You can use both types of resin in a project, but make sure the epoxy is fully hardened before you start mixing mediums.
Resin is easily purchased off Amazon, epoxy or UV. They also have it at craft stores but please don’t go to Michaels in a Pandemic. Art stores will also have resin but usually only the epoxy. I don’t think you can buy the resin from many local artists, but you can certainly by the molds from them. I have gotten some from Molded from Love and they are great (but they do have more plastic options than silicone). Esty also has a ton.
Ok, so resin is not an easy or beginner craft, so I thought I would give you one that’s much simpler and useful in these the end times (just kidding.) I recently found a bottle of hand sanitizer while cleaning out the junk drawer. I’m glad to have it, but it is half used and “ocean breeze” scented which means it smells terrible.
Thankfully, I don’t have to use it, because it’s really easy to make your own hand sanitizer at home. Everything to make this, I already had in my medicine cabinet and by that I mean my boyfriend’s side of the medicine cabinet, because mine is 100% full of lipstick. Washing your hands is better than hand sanitizer and store-bought is more accurately produced than your own, but this is better than nothing.
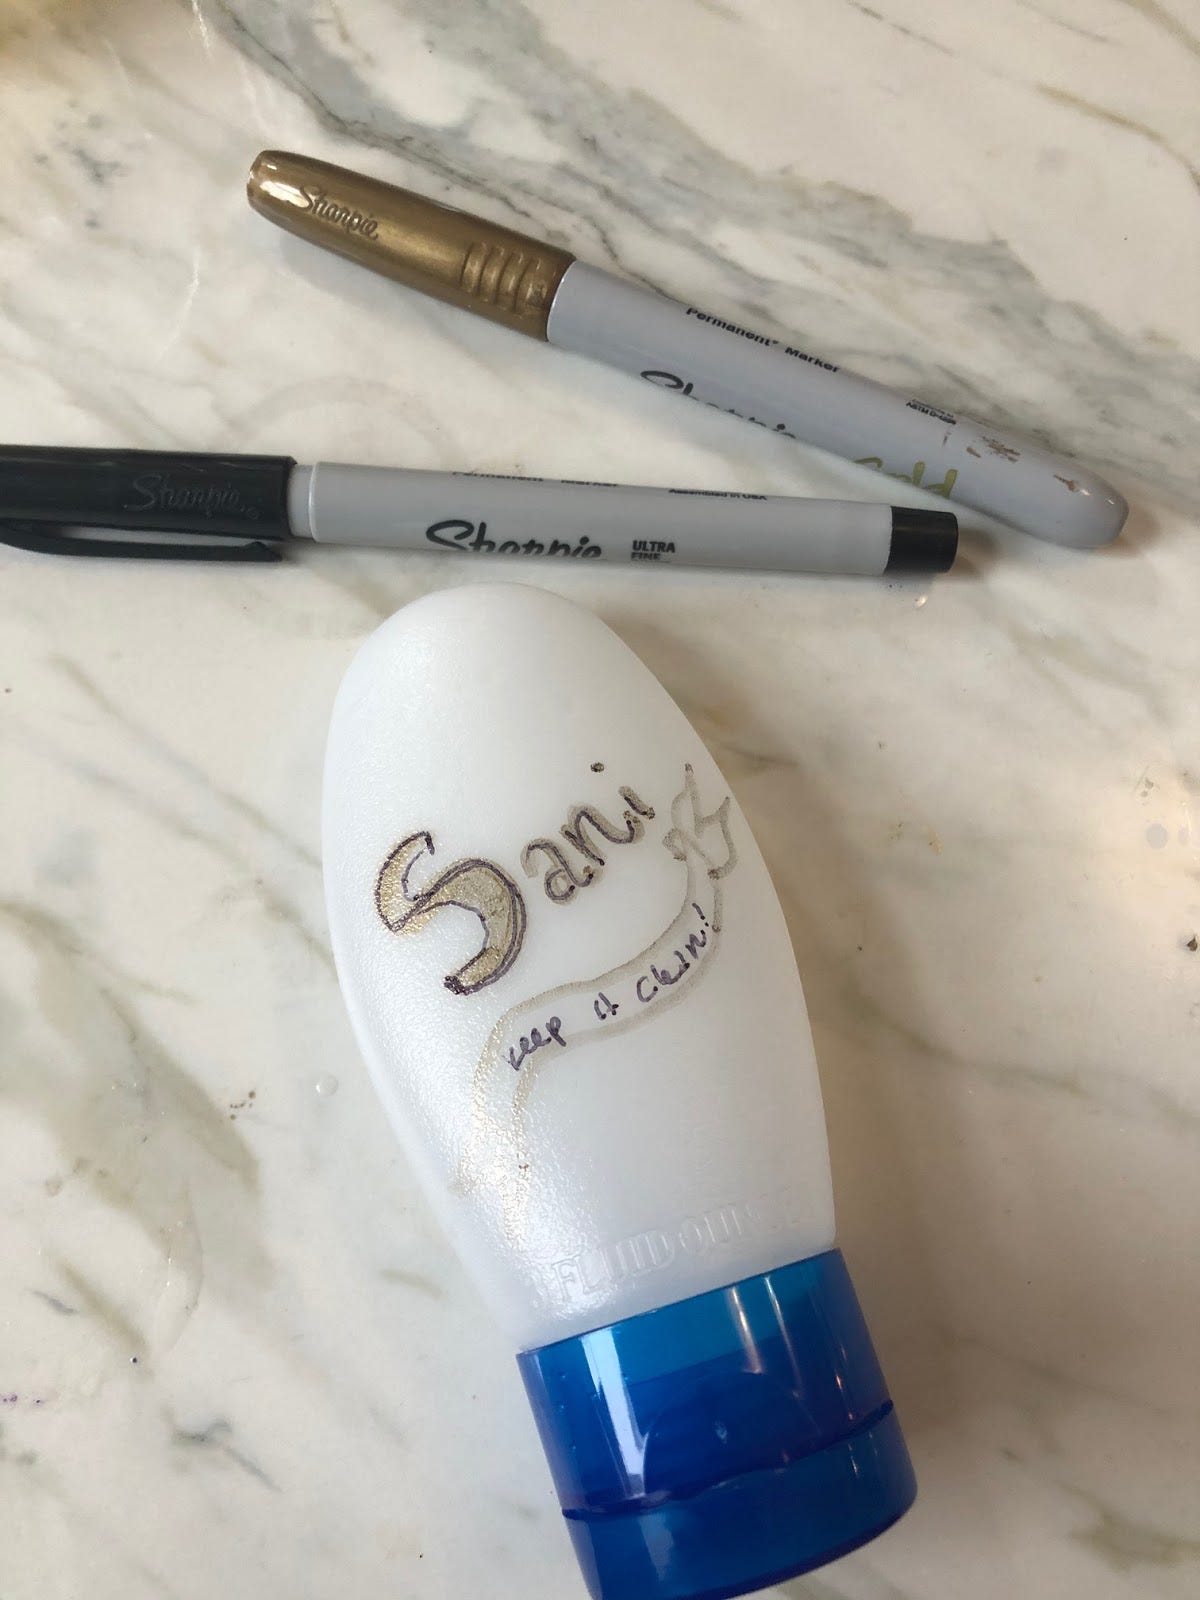
What you will need is 99% rubbing alcohol (My boyfriend uses this to clean small electronics and cuts), aloe vera gel (I got this in Thailand after I got a very bad sunburn on a beach in Hua Hin), a small bowl, essential oils (I think my mom’s friend is in a pyramid scheme involving these but I love them), and a small bottle. I had this bottle from smuggling back Hennsey that we didn’t finish from a friend’s funeral in the South on a plane. I say this to remind you, just because I craft does not mean I am more on top of anything than anyone else. Optional something to decorate the bottle. If you want to involve kids, the decoration is a great time to do it.
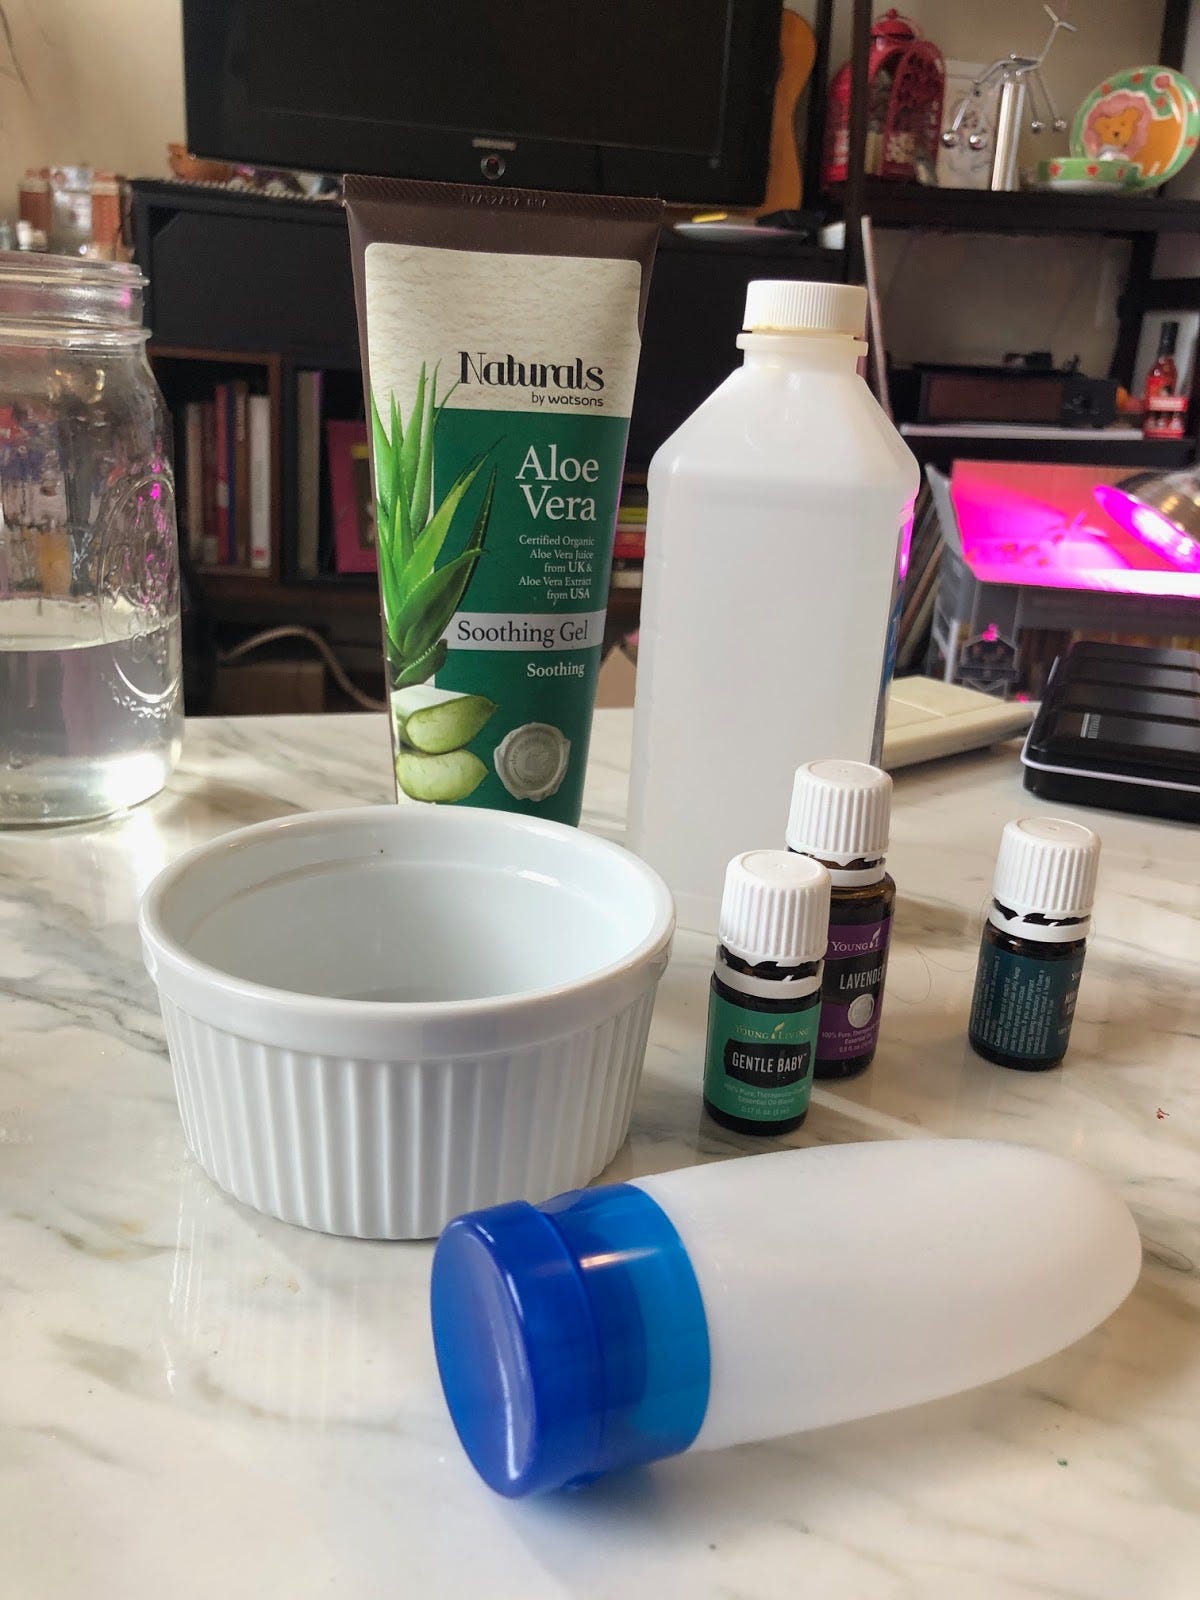
The basic recipe for hand sanitizer is 2 parts rubbing alcohol to 1 part aloe. You need this because you want the alcohol by volume to be over 60% to best kill germs. Combine the alcohol and the aloe in a small bowl and add in a couple of drops of essential oil. The rubbing alcohol is extremely smelly, so I ended up using 3 kinds of oils to mask it; lavender, northern spruce, and one that they call gentle baby which I have some questions about. Stir the mixture until it starts to seem gel-like (using a whisk helped me,) then carefully add it into the container. This is the hard part, I spilled some myself. I would do it over a sink if you can or use a bowl with a spout.
I hope you liked the first-ever Craft Cult! You can always reach out through my website or on Instagram or Twitter to leave your feedback or make requests. Share with your friends. I am going to send out another one over the weekend which you won’t want to miss (and it’s an easier, shorter one, I promise.)