


Dwayne the Candy Johnson
Yes, rock candy is a craft! Cause I say so.

Can you smell what the rock is crafting?!
Today, we have to ask ourselves what is a craft? How do you define the act of crafting? Why must we ask this? Because we have to figure out for ourselves, is rock candy a craft? I would argue yes, but many would say, “no, rock candy is food so that is actually cooking.” To those people, I say, “my newsletter/my rules. It’s a craft.”
I love rock candy. It’s delicious. If you have kids around, it’s a science project. If you are a 27-year-old woman with a live-in boyfriend, it is a small nuance to him on your kitchen island for a week. When I was young we would visit my abuela in San Louis Obispo, California and the fanciest place I had ever seen in my life was the Madonna Inn. In their dining room, they would serve their sodas with a rock candy of the same color on the side. I mean the pinnacle of class for a 7-year-old. And with that air of class and sophistication, I am going to teach you how to make your own.
Ah yes, glamour.
Fun aside: On a call with a friend, I brought up the Madonna Inn and their very good mid-2000s rock candy policy, and she said, “Isn’t that where podcaster Georgia Hardstark was married?” and I said, “what?” Turns out, yes.

Again, have to call glamour when I see it.
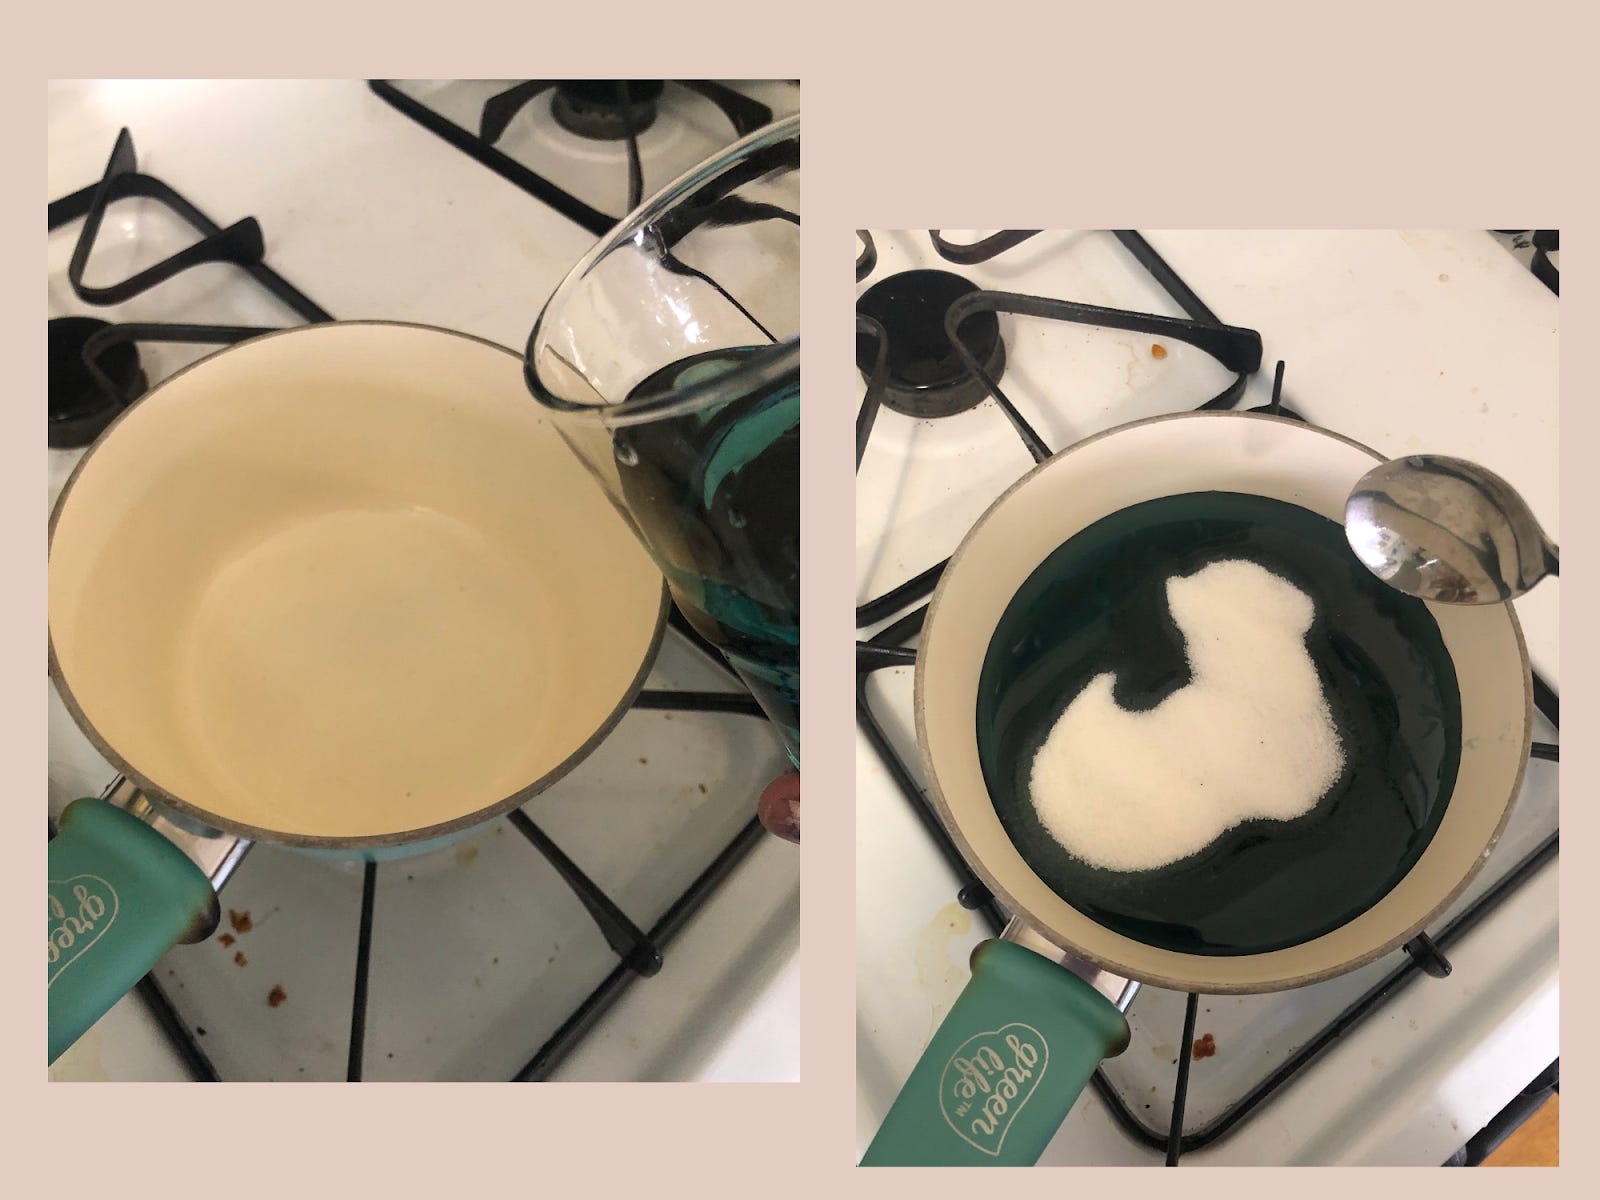
Back on track, to start making your rock candy you must first make some hot sugar water. Start by combining 4 cups of sugar (yes that much sugar) and 2 cups of water in a pot. It’s important to get it hot enough for the sugar to completely dissolve. Stir it and make sure it doesn’t burn.

While your sugar is dissolving, get a couple of jars or glasses and thoroughly clean them with hot water. Having any dust or particles in them will affect your crystal formation. Also, get a couple of cotton strings for the crystals to grow on (the string I used was a little too thick, if you do this craft, use some thinner string, I promise it will come out better). Tie the string to a stick pencil or butter knife that will be able to sit on the top of your jar. Make sure your string hangs about an inch above the bottom of your glass, it shouldn’t drag on the bottom.
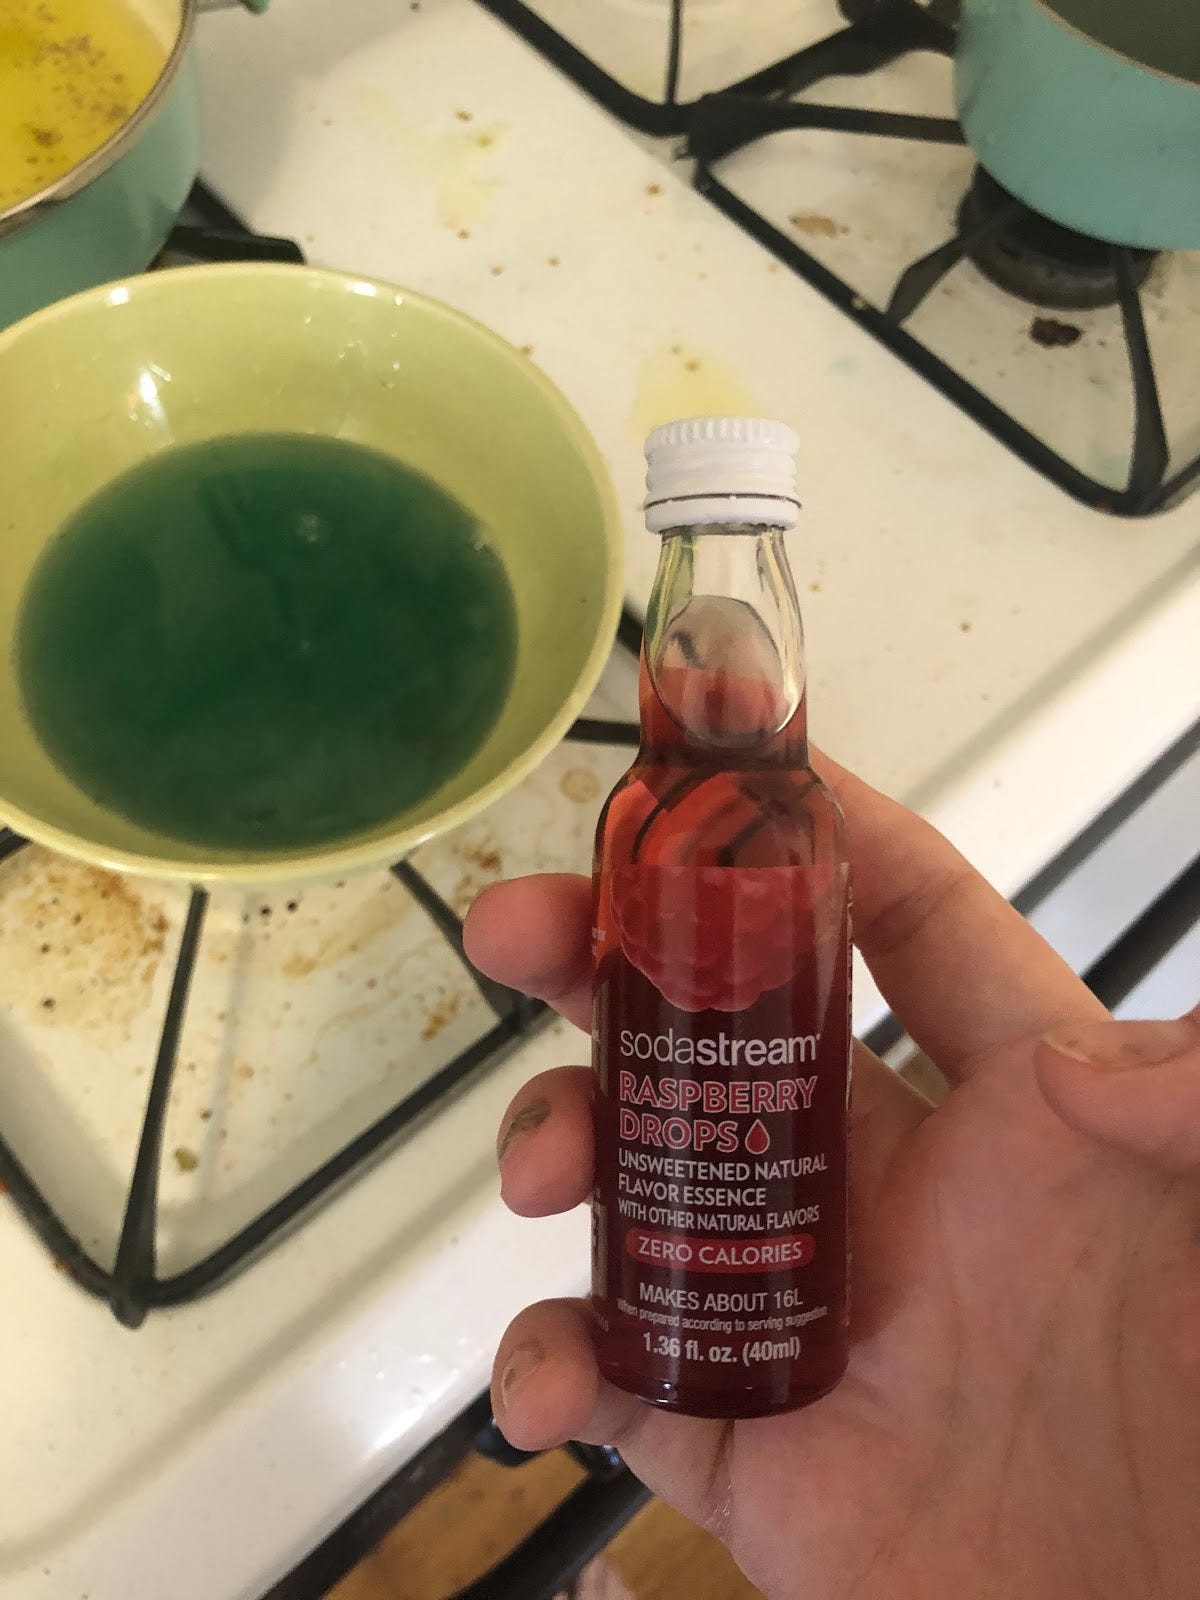
The best way to get your crystals started is to dip the strings in the sugar mixture and let them dry out a bit before adding them back into the jars. When your sugar is completely dissolved and your sugar water starts to feel slightly thick, you can remove it from the heat. It is now the time to add any food coloring or flavors you want. I added blue food coloring and a couple of drops of raspberry flavoring. (Please excuse my dirty oven, I had made soup stock earlier that day and hadn’t cleaned it yet.)
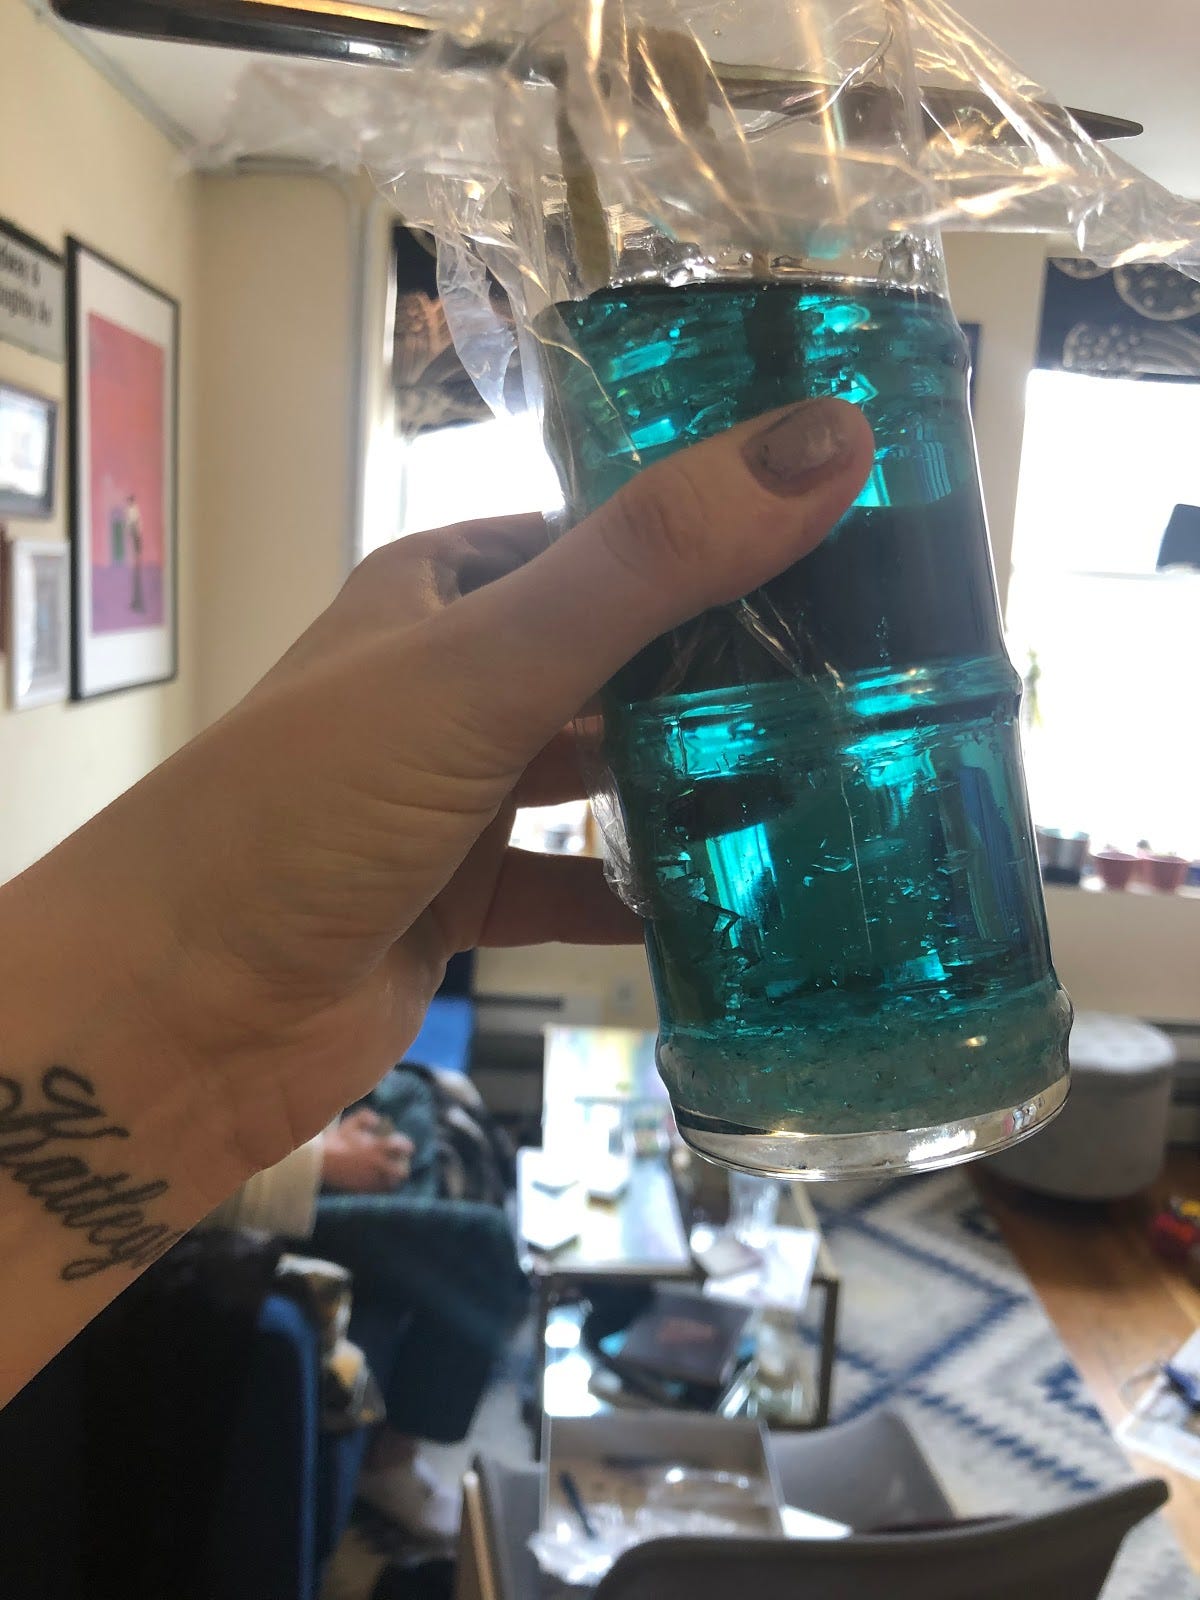
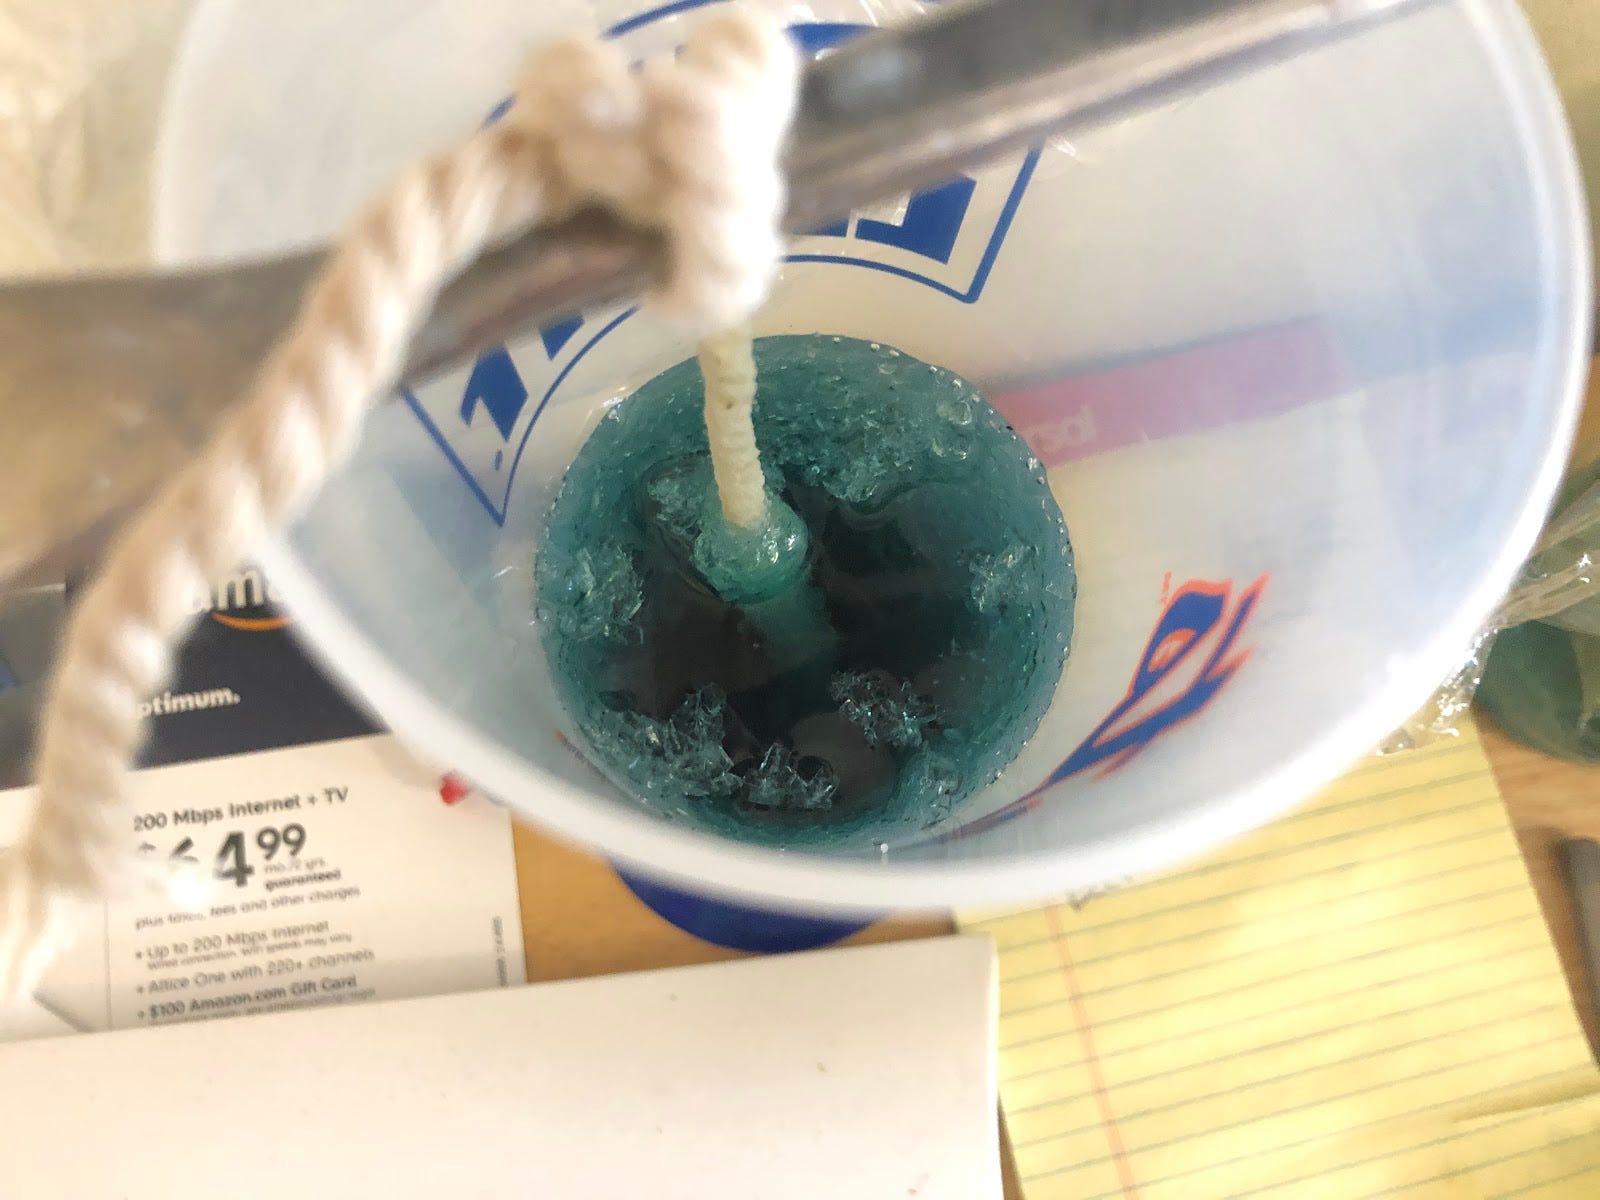
Let the liquid cool for about 20 minutes and then add it to the “jars” (I think it’s pretty obvious that I used a Mets cup and a tiki cocktail glass) with the strings in them. Cover your jars/glasses up and let sit in a cool, unsunny place.

Full disclosure, I actually tried this craft twice. The first time my rock candy didn’t set. I looked at some blogs and this seems to happen a lot. Don’t worry if it doesn’t set your first time. It can happen for a variety of reasons, but the most common has to do with the sugar content. There is a lot of sugar in the recipe, but if not enough of the water cooks off it can be hard for the crystals to grow right. I dumped my liquid back into my pot and tried again. I added a little more sugar and let it cook longer. I also redried out my strings and the second time it worked. Don’t get discouraged, especially if this is your first time doing this.
Let your candy sit for about 5-10 days. Around day 3, you should start seeing some crystals forming. I disturbed mine to take this photo but if you can, you shouldn’t move your candy while it is forming.
Sometimes the top of the sugar will become completely crystallized, it means you had a lot of sugar and it’s growing fast. You can gentle break them off when you are ready to take your string out. Sometimes crystals will form on the bottom, it usually means some sugar particles dropped to the bottom and started growing on their own.
When it’s done, take your candy strings out. They will be wet so try to dab them off or dry before you eat.
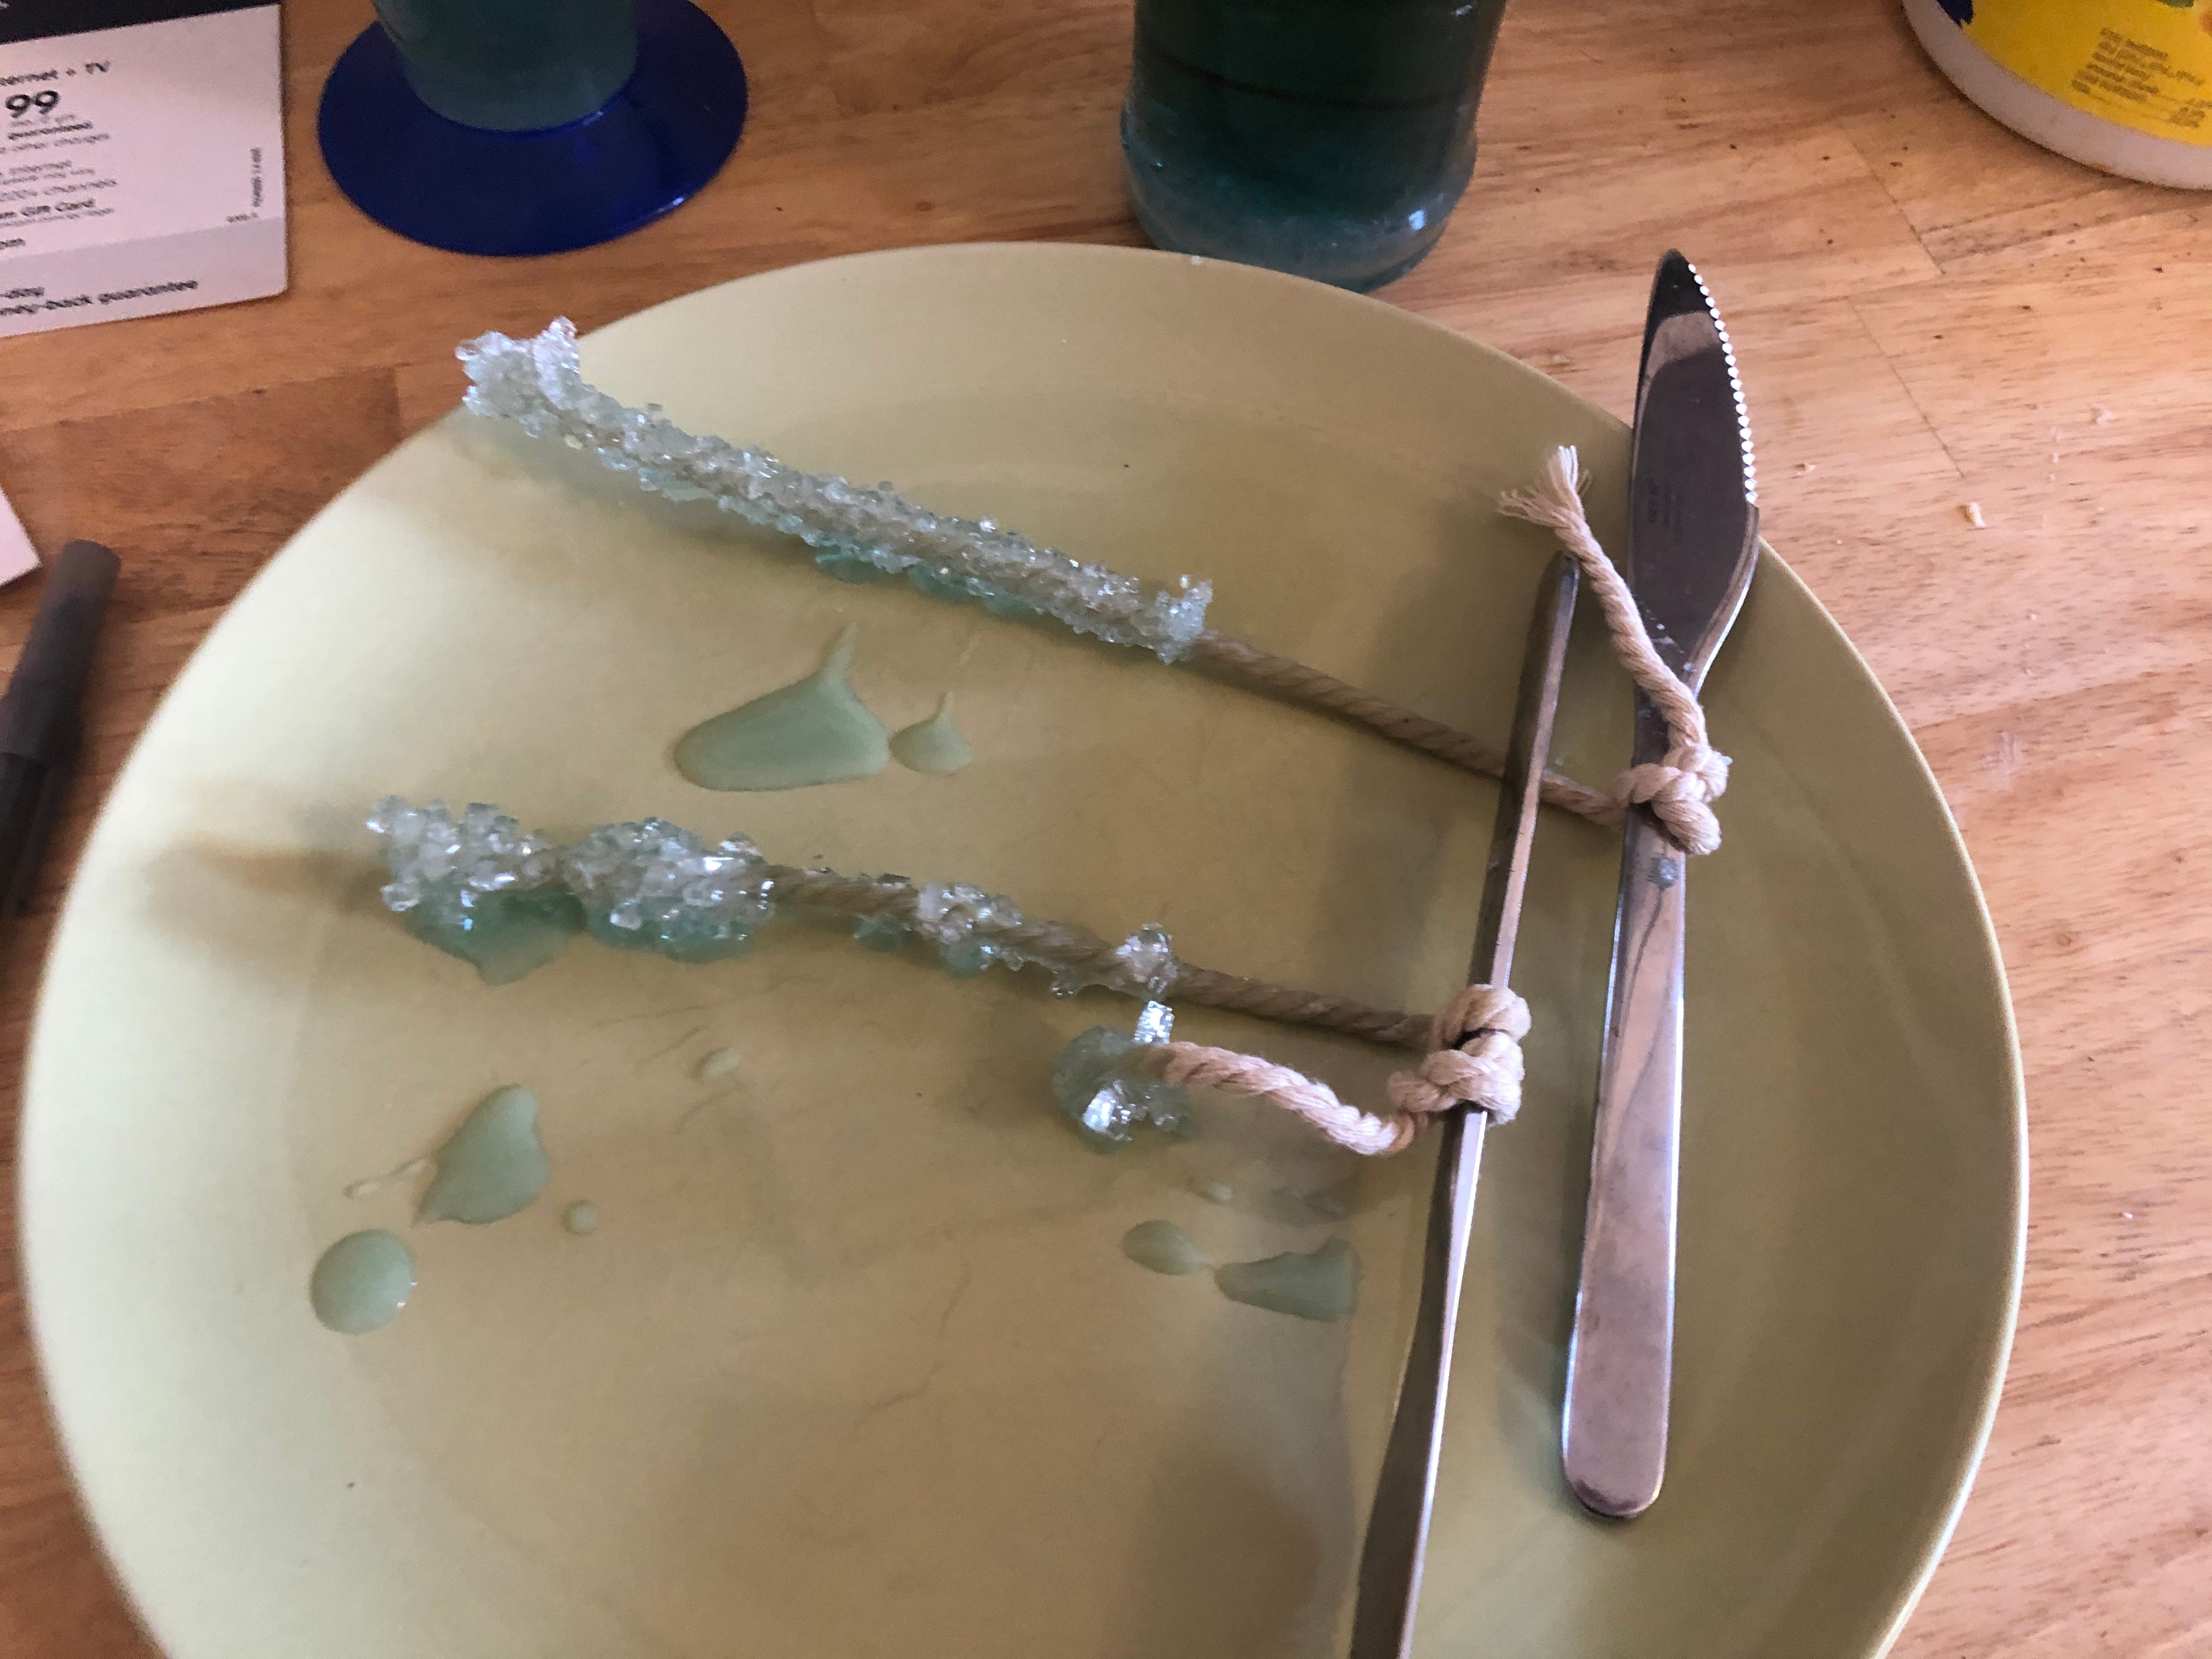

Again, glamour.
If you are like me, you now have a bunch of unused sugar water with a raspberry hint. That bugged me about this craft, I hate to waste food even if it’s just sugar water. You can just get rid of it or you can turn it into more candy.
First, empty your liquid into a pot. You will then most likely have to add a little more sugar.
I know what you are thinking, a much cleaner stove.
You will also need to add cream of tartar. Now the original recipe for this type of candy is 2 cups sugar, 2/3 cup water, and 1/4 teaspoon cream of tartar. You have to get a little creative here to try to get as close to the right ratios as you can. For me, that meant cooking off a lot of the water. The more water you can cook off the better this recipe works. As the water cooks off it gets syrupy. Once it is thick, add the tartar. I estimated based on the total amount of liquid. I ended up using about a teaspoon.
Now you have to get it hot. If you have a candy thermometer, get it to about 300. If you don’t have one, I feel you. Instead, get a cup of really cold water. Drop a tiny bit of the candy liquid in. If it turns into a hardball, then your candy is hot enough.

When it’s good and hot you can pour it out into molds or onto something silicone (I used a baking sheet.)

Let it cool for at least 30 minutes (mine took more like an hour). It should be fully cool to the touch. You can then break it with a knife cut. Break it up into bite-sized pieces. Yes, I know the blue also made mine look like the meth from Breaking Bad, however, the actual prop they used on the TV show was also blue glass candy (so, science bitch.)
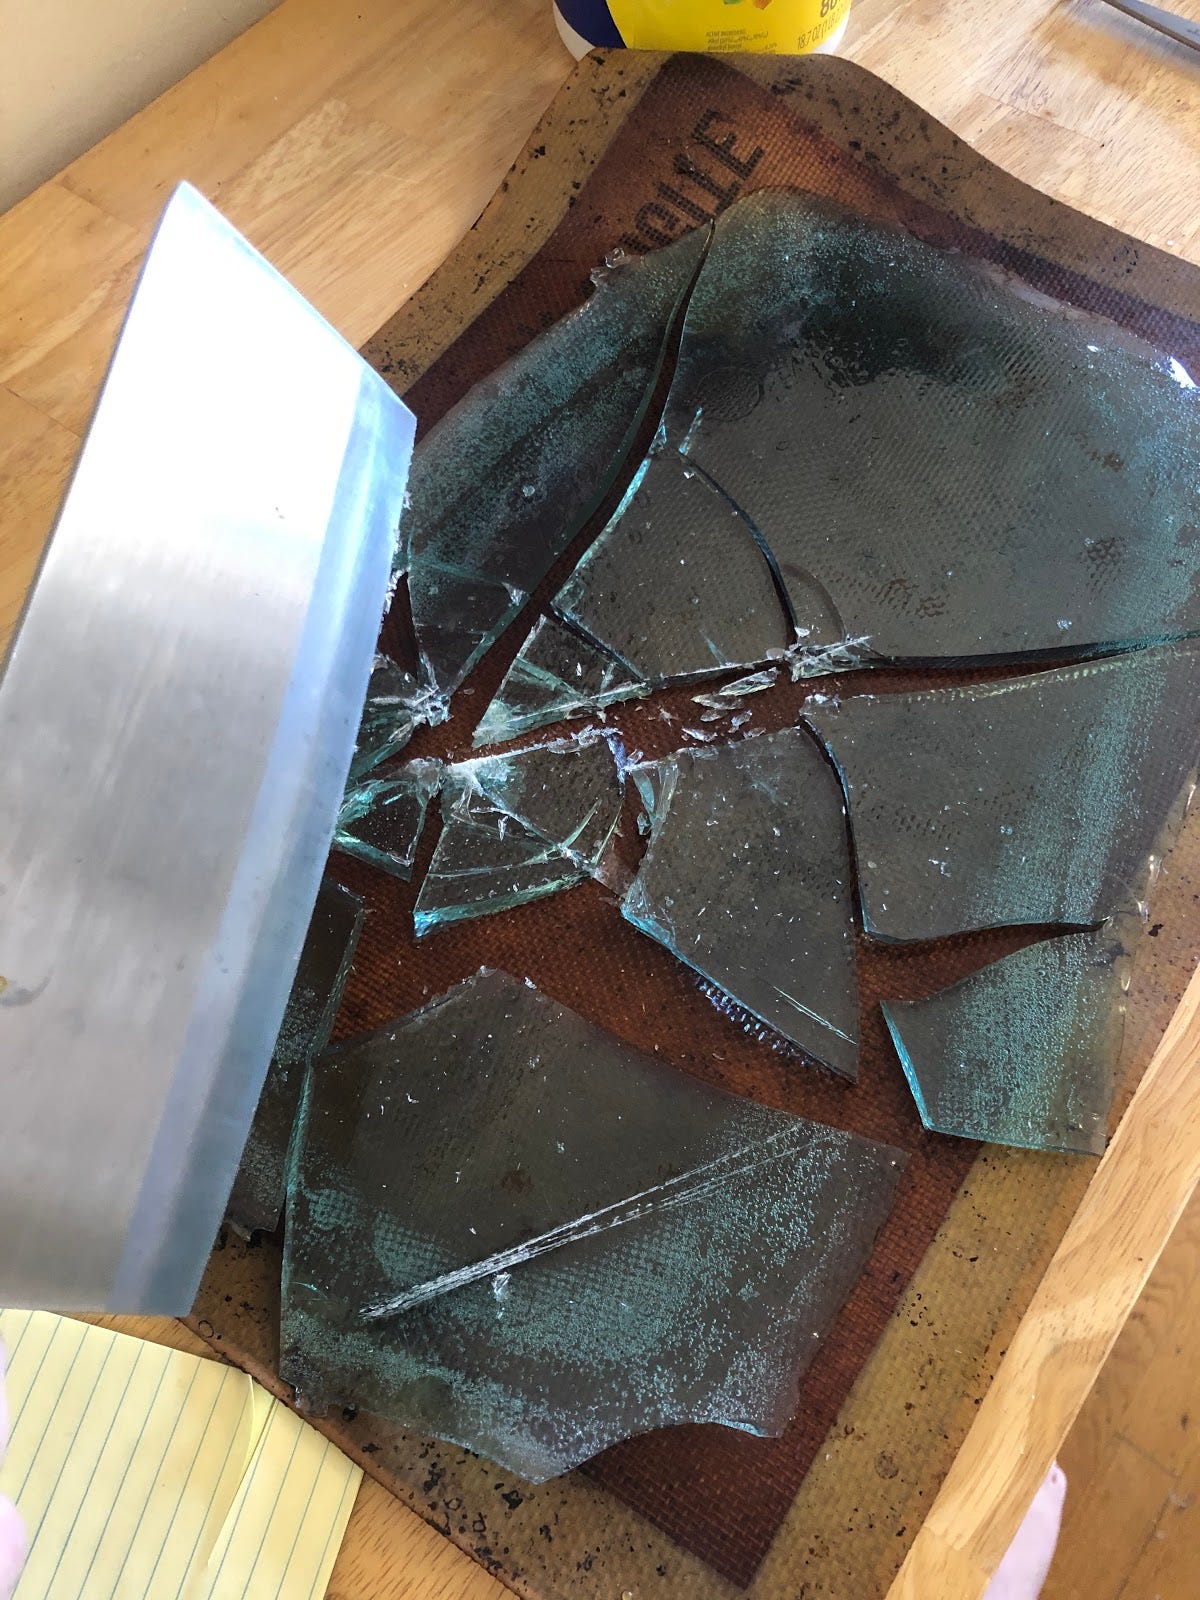
My candy came out on the stickier side (probably needed to cook a tiny bit more water out,) but if that happens you can dust it with a little powdered sugar. Keep it individually wrapped or in a cold place. I left mine a little to close to a heater and it fused together so I had to recut it.
Fun fact, this type of thin sugar candy is was used as breakaway glass for movies. However, most modern productions have moved away from this technique.

Thanks for reading. I have a couple more friends projects to plug. In the last post we talked about live online shows, but maybe you want content that you can stream at any time. Let’s talk about web series and sketches. Missing movies? Check out Poster Perfect. Want more comedy, why not check out Whales and Beasts or my bud Matt Levy’s sketches? Want some crazy stories? The Kellenberg Chronicles is a new video series about a crazy catholic school. If you want to see me personally in sketches, my sketch group is doing online content now and my friend Pat launched a new sketch reading series Quarantine Mustache you can also (sometimes) catch me on.
Other than that, I’m working on a couple of longer crafts that you don’t want to miss. So make sure you are subscribed and share Craft Cult with your friends.